Wednesday, September 10, 2014

Keerai paniyaram

Keerai paniyaram / spinach paniyaram. Paniyaram (appey / puff panakes) are very native South Indian dishes. We can make n number of varieties using the same batter. Sometimes I prepare the paniyaram batter itself from scratch (which is a successful method always). But using leftover dosa batter is a handy method too. Try this with any kind of greens we get and I am sure you are all going to love this.
Keerai paniyaram with kara chutney.


Ingredients:
thick dosa batter - 1 cup
besan flour - 1 tbsp
baking soda - 1/2 tsp
ghee /butter/  sesame oil - as per need
To temper:
spinach - handful
mustard seed - 1/2 tsp
urad dhal - 1 tsp
sesame oil - 1 tsp
onion - 1/4 (small)
green chilly - 2
asafoetida (hing) - a pinch

Method:
For spinach: In a wok, heat oil and add  mustard seeds, urid dal. As the mustard starts splutter, add finely chopped onion, green chilly and saute till it gets soft. Then add finely chopped spinach and cook covered for 5 minutes. Add salt to taste.

Add besan flour to dosa batter. Besan flour helps in flipping the paniyaram easily. The dosa batter should be thick.
10 minutes before starting to prepare the paniyaram, add the baking soda and mix well.
In the mean time prepare the spinach fry. Pour this spinach to the dosa batter and mix well.

Now heat a paniyaram pan and brush some oil in all the holes. Then add 1 tsp sesame oil / butter in each hole. Reduce the flame to minimum and pour the batter to halfway in each hole. Click to see the picture. Cook covered or in open. (I prefer putting a lid to ensure uniform cooking). We can notice some red color in the edges and then flip using a skewer or fork. No need to cover after flipping. Take out once done.

Serving suggestion:
Serve as breakfast or snack with coconut chutney. or kara chutney.

Note:
Do everything in low heat. It may take a little while but that is the only way to get whole fluffy paniyaram.
Non stick pans work the best. But I have used a pan similar to traditional thick paniyaram pan.
For the first batch it may require more oil to fry, but it will take very lesser in the following.

Sunday, September 7, 2014

Dindigul chicken biriyani in cooker

Recently I learned this delicious Dindigul briyani recipe from my friend Emelda. This is one of the most popular non vegetarian foods in Tamilnadu. Only a very few people can bring that authentic taste, as it needs lot of experience . Even the popular restaurants need more care to bring this authentic taste, while a few like her can do it phenomenally. While talking about this recipe , she surprised me by saying that this Dindigul briyani is made in a pressure cooker (traditionally it is done by dum process) and gave me the instructions for that too. One would be amazed at the quality of separate rice grains we get by this process. The secret is in the timing. So follow the instructions carefully and I am sure this is the easiest way to make a delicious briyani.  I am narrating her version of Dindigul briyani and I am sure this is going to be everyone's favorite also.

Immediately transfer to a serving tray gently.

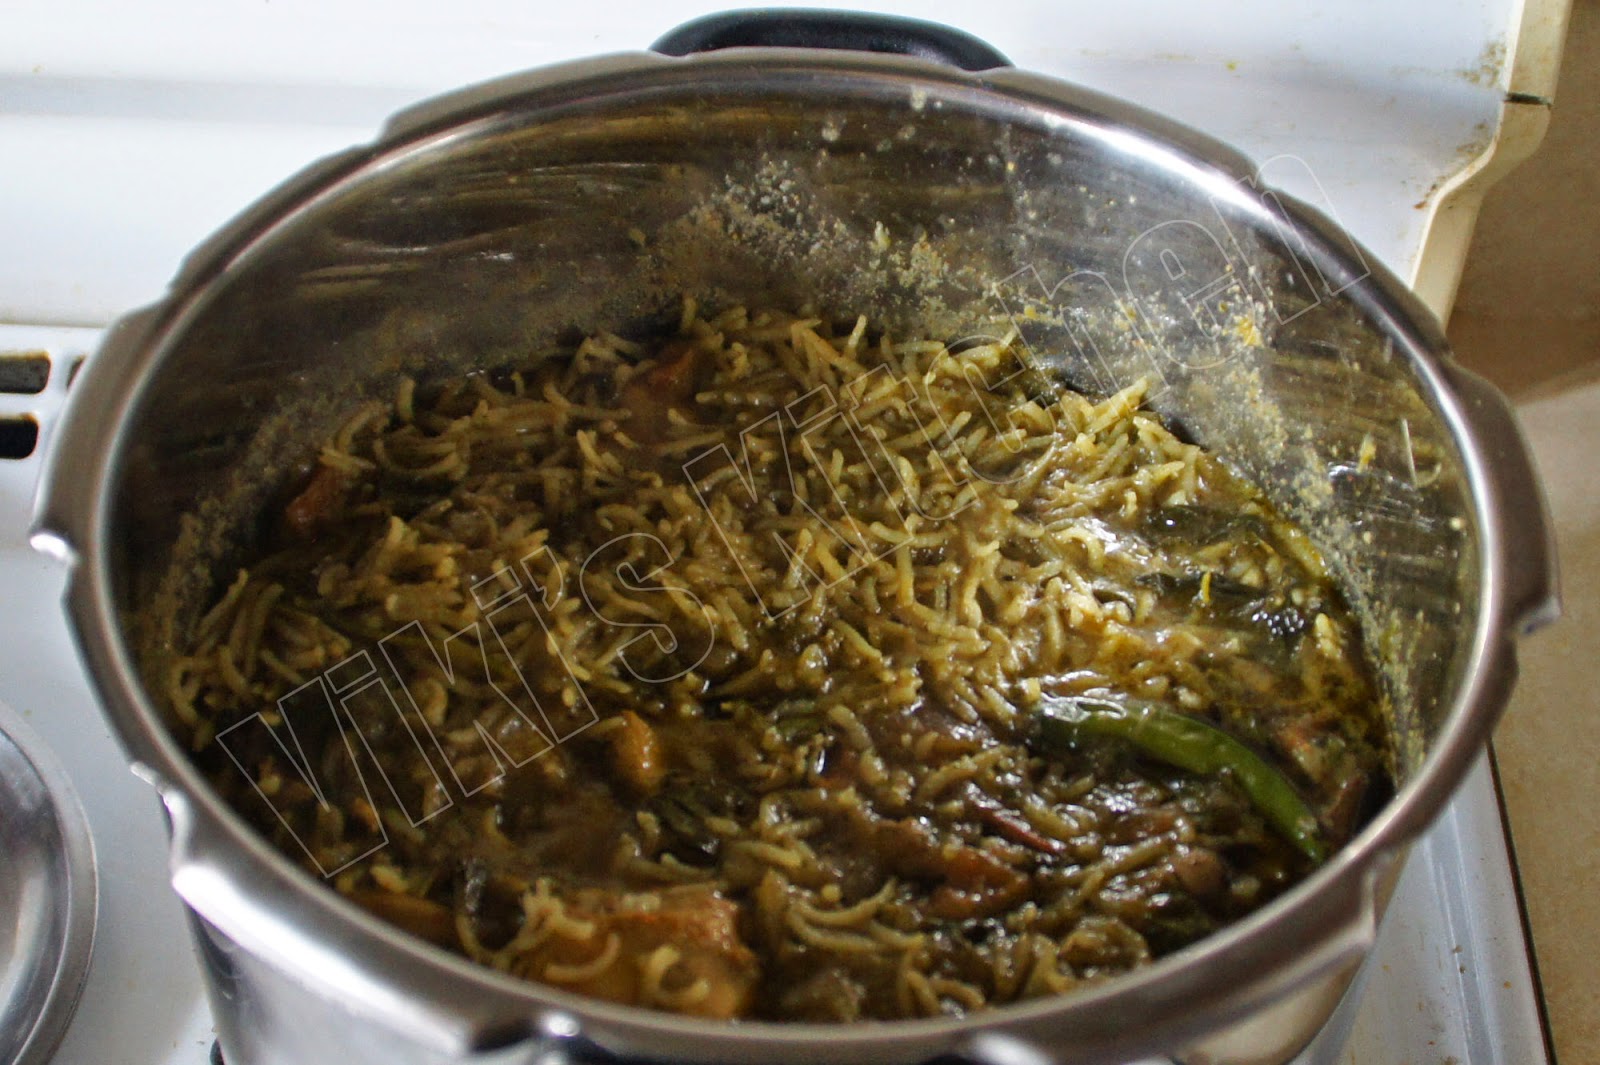
Briyani after pressure cooking.

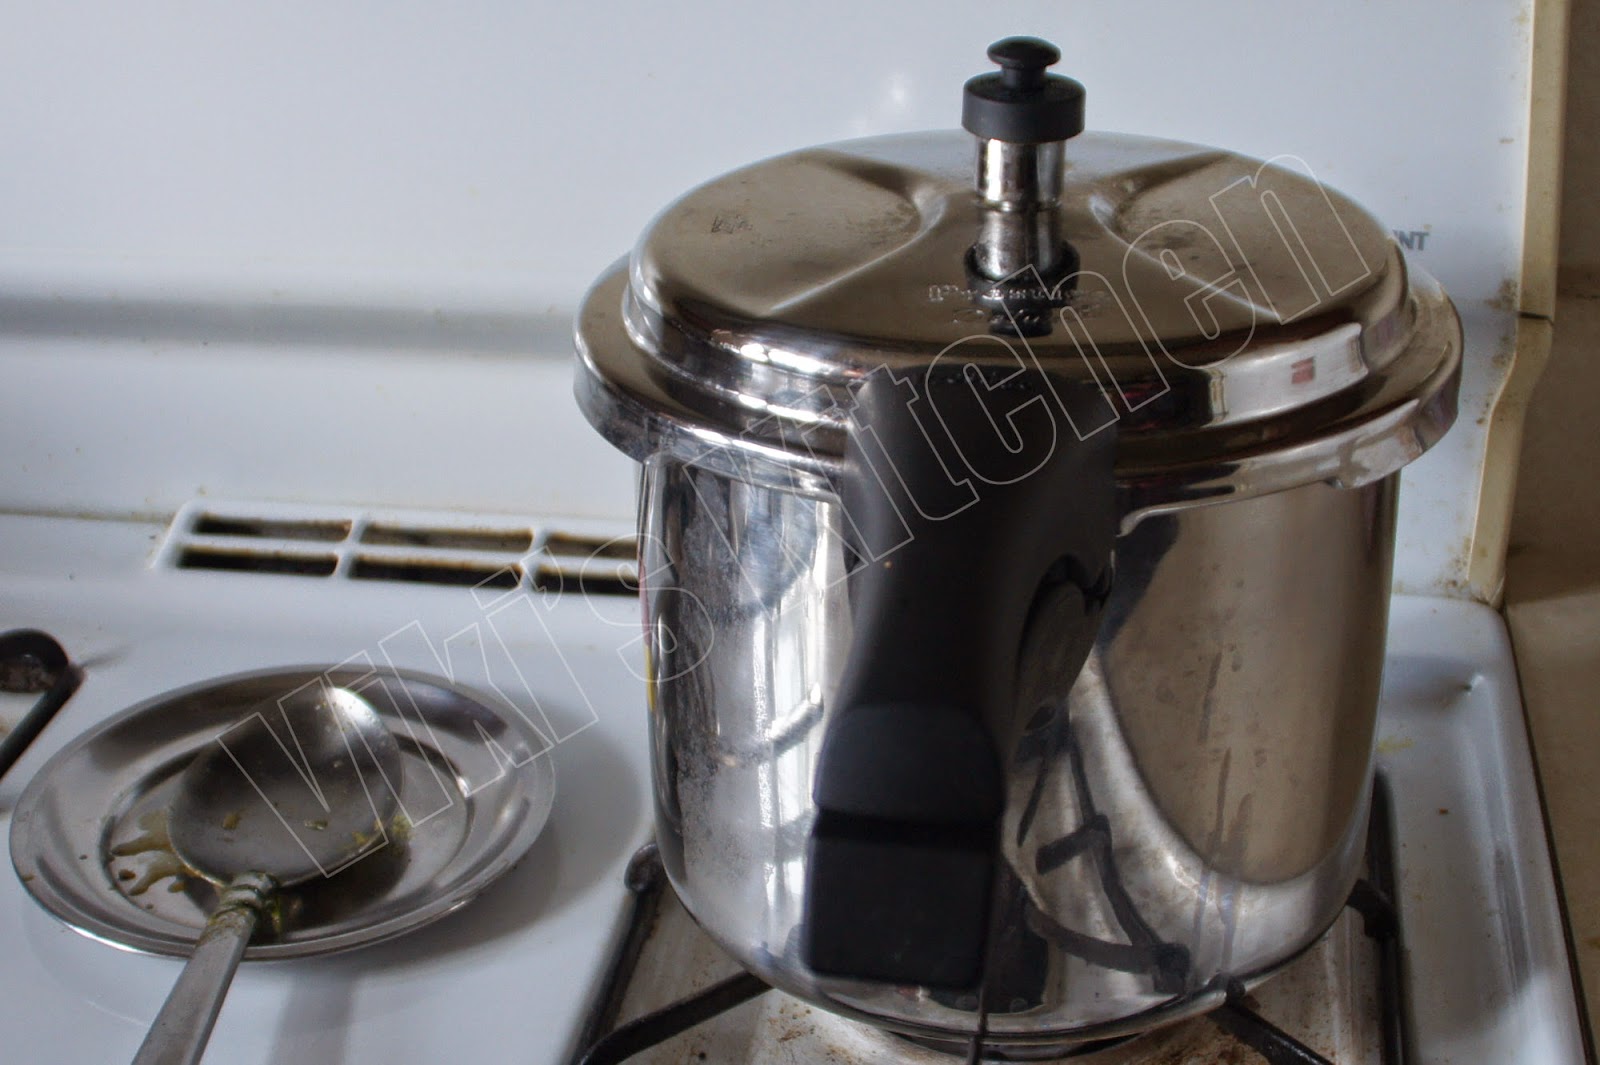
Pressure cook it in low heat for 6-8 minutes without any whistle and switch off.

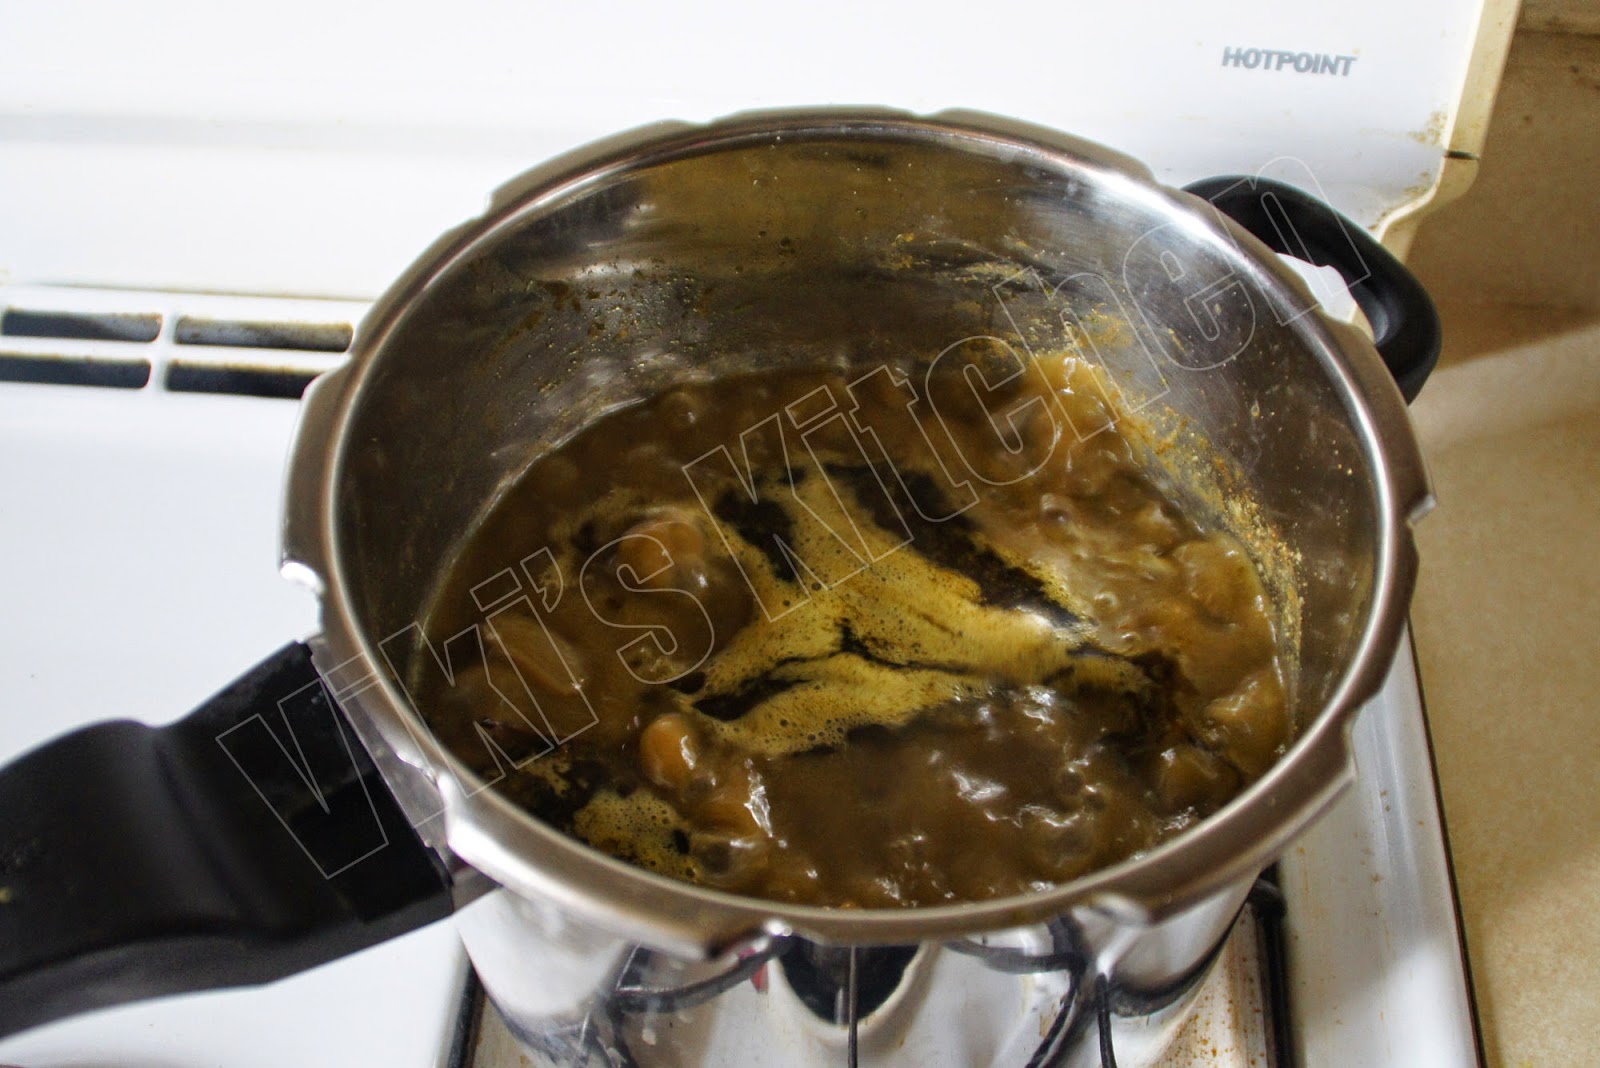
Cook the rice before closing the cooker,  till we see almost all water is absorbed and only an inch stands above rice.

After adding the required water to cooked chicken masala, bring it to rolling boil. After that only we add soaked rice.

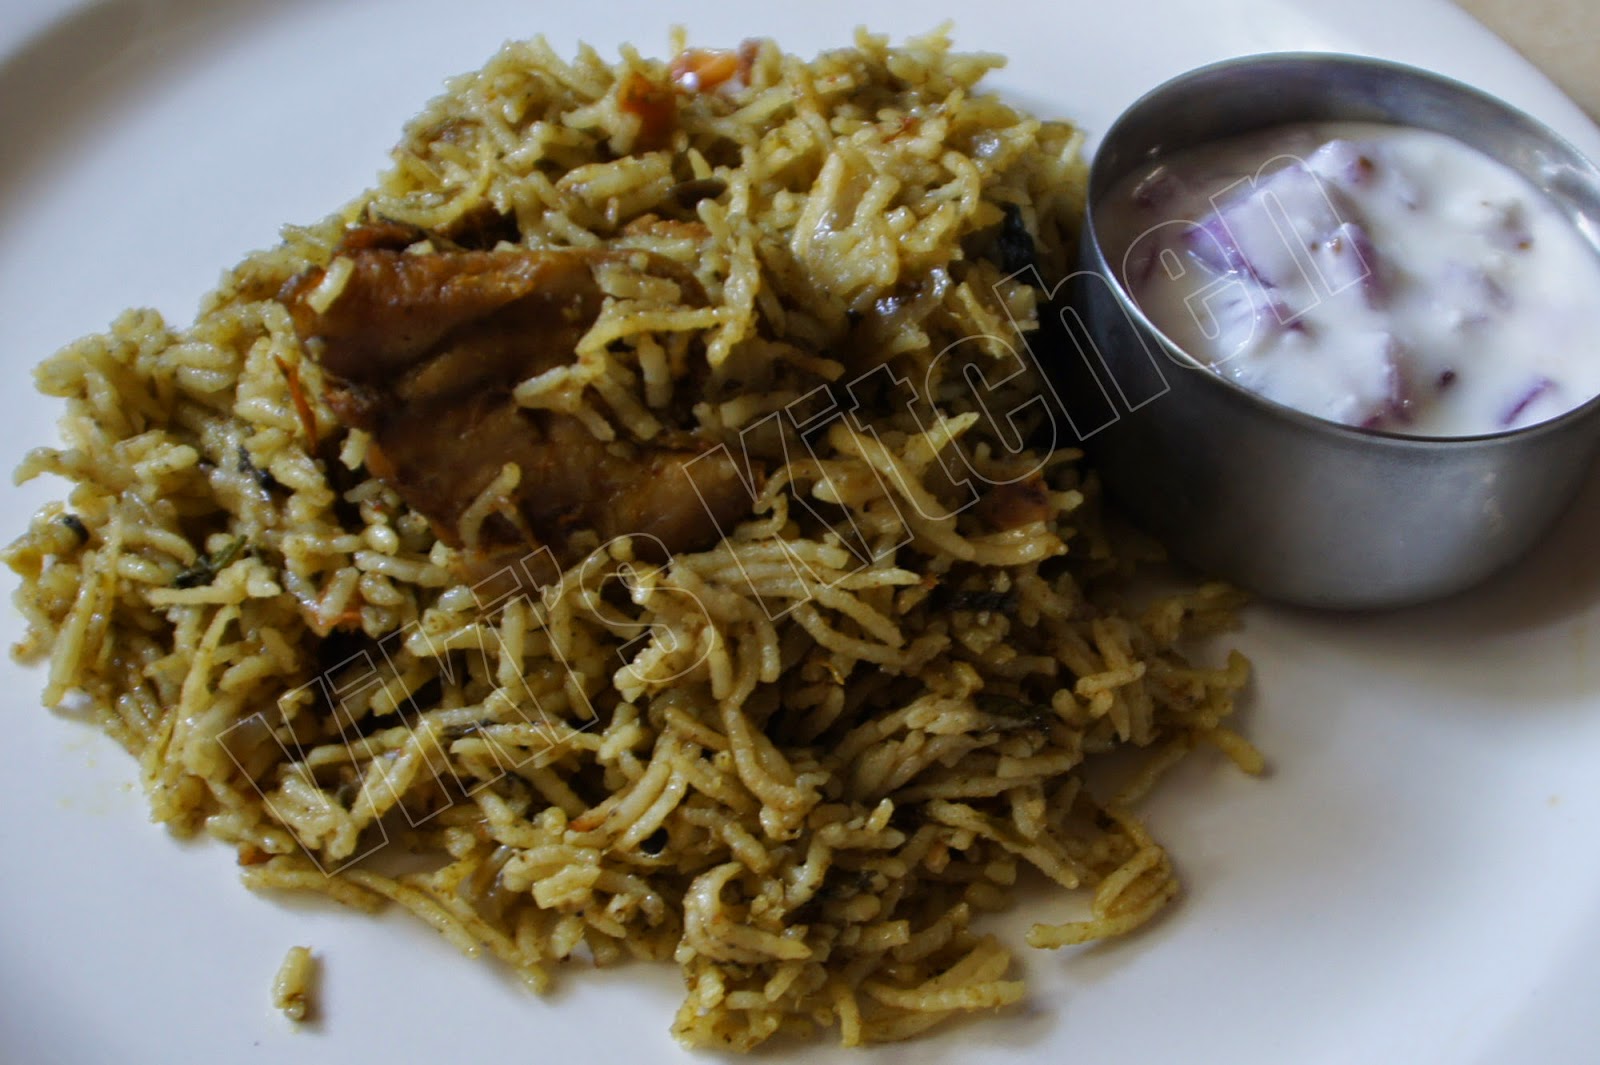
Serve this delicious Dindigul chicken briyani with onion raita.

Ingredients:
Long Basmathi rice - 3 1/2 cups
water - 5 cups
( 3.5 cups x 2 - 2 = 5 cups)
Chicken - 3/4 kg (almost 2 lb)
(with bone / leg piece is good.)
salt - To taste
Green chilly - 3
Red onion - 1 (big)
Tomato - 4
Lemon - 1/2
ghee - 1/2 cup
turmeric - 1/2 tsp
red chilly powder - 1 tsp
garam masala powder - 2 tsp
thick curd - 1/2  cup (optional but tastes good)

Paste 1:
cilantro - 10 plants (leaves only)
mint leaf - 10 sticks (leaves only)
green chilly - 4

Paste 2:
Ginger - 2 inch
garlic - 10 pearls

For tempering:
cinnamon - 3 inch long
star aniseed - 1
Sea weed (kalpaasi) - 2 curls
Nutmeg (jathikkai) - a tiny bit
mace - 1/4 of  a flower
cardamom - 5
cloves - 6

Preparation:
Clean the chicken and cut it in to big pieces. Rinse and keep aside.
Add  a tsp of salt ,  curd, red chilly powder, turmeric powder, garam masala powder and leave it for an hour.
(overnight marination inside fridge yields very tasty juicy chicken pieces in biryani).

Chop the onion in lengthwise.
Chop Tomato, green chilly, few cilantro, mint into small pieces.
Grind ginger and garlic together to a fine paste.
Separately grind cilantro, mint, green chilli to a very fine paste.

While we start tempering,  rinse and clean the rice. Soak it in water for 10 minutes , drain water and let it remain for 1/2 an hour (while we saute and cook the meat). Don't soak for more time. The rice may break by over-soaking.

Method:
Heat ghee in a pressure cooker.
(Now Soak the rice in room temp water for only 10  minutes).
Toss in the items given for tempering.
Immediately add the chopped onion and fry till it becomes golden brown.
Add the ginger garlic paste and stir well till the raw smell vanishes (less than a minute, don't let it get  red).
Now add the finely chopped tomato and cilantro paste (paste 1). Saute till the tomato gets mashed and oil starts showing off. 
Now put the chicken pieces and pressure cook it for 3 whistles.
After the pressure is released, open the cooker.
Add water and bring to a boil.
Check salt and taste. Add more salt if needed.
Add the soaked rice and continue cooking without closing the lid.
Continue cooking in medium flame until the rice absorbs water and almost 1 inch of water stands above rice.
Now sprinkle juice of 1/2 lemon and close the pressure cooker.
Put the pressure valve and reduce flame to minimum.
Cook in this low flame for 6 - 8 minutes ( don't allow for a whistle).
Switch off.
After the pressure is released , open the cooker.
Now the biriyani may seem to have some extra some water, but it will be absorbed, as soon as we keep it open.
Gently shake the pressure cooker / insert a spatula in the sides and transfer the biriyani to a serving tray (don't use spatula too much, while the biriyani is hot).
Garnish with finely chopped cilantro and mint leaves.
Dindigul chicken biriyani is ready!

Serving suggestions:
Serve as main course meal with onion raitha.

Friday, August 15, 2014

Tomato carrot soup

The best section in any grocery store in my view is the produce (fruit and Veg) department. I try to beautify my shopping cart with colorful veggies as if it is an advertisement for veggies:). That too, if a seasonal vegetable is in sale, it would definitely come with us:) Then coming home, I would wonder how to make use of them efficiently :) Making soups is another nice way to include all those goodies and here is my version of tomato carrot soup. Hope you all enjoy this in this cool weather !
Tomato carrot soup

(for making 6 servings)
Ingredients:
Tomato -  1/2 kg
Carrot - 2
green peas  or sweet corn - handful
turmeric powder - 1 tsp
cilantro , mint leaf - handful.
Butter - 1 tbsp
All purpose flour / corn starch - 2 tbsp
cinnamon - 1 inch
bay leaf - 1
shallot - 3
garlic - 1 whole
whole black pepper - 2 tbsp
cumin - 1 tbsp

Method:
1.Wash and keep the tomato as whole. Peel and chop carrot to small pieces.
Grind garlic, black pepper and cumin to a coarse mixture.
In a pressure cooker add whole tomato, carrot, peas / corn, turmeric powder , chopped cilantro, mint leaf, prepared garlic masala.
Pour 10 cups of water, close the pressure cooker. After 1 whistle reduce flame to medium and cook for 5 minutes. (In ordinary stockpot : cook covered till the vegetables are cooked tender).
After releasing the pressure, add salt. Take out the tomatoes and remove the skin and puree.
2. Heat 1 or 2  tbsp butter in a pan.
Put bay leaf, cinnamon and after 5 seconds. Then fry chopped shallot till it gets golden brown. Then add the all purpose flour or corn starch and fry for a few seconds till raw smell goes.
3. Pour this to the cooked vegetable stock and bring to a boil.
Garnish with chopped cilantro.

Tomato carrot soup is ready!

Serving suggestion:
Serve with garlic bread.

Thursday, August 14, 2014

Chennai Kaara chutney

While every city in Tamilnadu is telling tales on their own special cuisines, Chennai has it all under  one roof.  Have you ever wondered what makes those Chennai restaurant idlies more delicious? Other than the usual sambar and coconut chutney we see everywhere, they would serve you a spicy red chutney, called kaara chutney. I think it might have originated from Andhra, as they make the spiciest foods in India. If you buy a parcel of idly (carry home version) , from those small idly shops, they would tie this spicy red chutney in a small pouch along with all the other side dishes. If tomatoes are in their peak season, we can see this chutney in all shops. This is one of my most favorite chutney and here goes the recipe for that spicy kaara chutney.

Ingredients:
Red onion - 1 medium size
Tomato - 4 (1/4 kg)
urid dhal (black gram) - 2 tbsp
Dried Red chilli - 6 to 8
tamarind - gooseberry size
oil - 1 tbsp
for tempering:
mustard seeds - 1 tsp
urid dal - 1 tsp
curry leaves - 1 sprig
sesame oil - 2 tsp
Salt - tsp
hing - a big pinch

Method:

Heat 1 tbsp oil in a pan.
Fry the 2 tbsp urid dhal to red color. In the same oil fry the red chillies and keep them aside.
In the same pan add chopped onion and fry to golden brown.
Add chopped tomato and cook covered with few tbsp water till done.
While the tomato is cooking add tamarind and cook it also.
Let everything cool and grind together the onion, tomato, urid dal, tamarind, salt, dry chilly.
For tempering, heat 2 tsp oil in a separate pan.
Crackle the mustard, then add urid dal. Let it get red. Then goes the curry leaves, hing.
Pour this hot over the prepared chutney and mix well.
Chennai kaara chutney is ready!

Serving suggestions:

Serve as side dish with Idly , dosa , along with sambar and coconut chutney for a special treat.
It would be enough to serve with 25 idly.
Makes a big batch and stays good refrigerated for a week.


Tuesday, August 5, 2014

Ragi paniyaram

Paniyaram or appam is usually prepared with rice flour. On that day I wanted  to incorporate some very ripe bananas sitting and also to stick to some miller recipes.  So I made it with ragi flour. Ragi is a gluten-free grain. It would be easier if we add some wheat flour to it , to keep the paniyarams in shape. I made this on a weekend as a tea time snack, as my hubby dear likes sweeter goodies better:)  After enjoying enough paniyarams on Saturday evening, I refrigerated the leftover batter and devoured it the next day also. I think from next time, I will be making this batter ahead for weekend.
Here is my version of ragi paniyaram and it will definitely make everyone happy:)


paniyaram without baking soda


paniyaram with baking soda

Ingredients:
Ragi - 1 1/2 cup
whole wheat flour - 1/2 cup
cardamom powder - 1/2 tsp
ripe banana - 2
milk / coconut milk - 1/2 cup
jaggery - 1 cup (crushed)
Baking soda  - 1 tsp (optional)
oil - few tbsp

Method:
Dry roast the ragi flour and wheat flour together for 5 minutes in low heat, so that it smells nice (not red).
Let it cool . Mash the bananas and add to flour. Then add cardamom powder.
Melt jaggery in little water and remove any sediments at bottom.
Add this jaggery solution also to the mixing bowl. If needed, add coconut milk or milk little by little and mix well.
Heat a paniyaram pan.
Add 1/2 tsp coconut oil in each dent (for the first time we may need 1/2 tsp oil. After that few drops will be enough).
Reduce flame to minimum and scoop the paniyaram mixture till 3/4 th in each.
Place a lid and cook covered. Check every minute and it will be ready in almost 3 minutes in the first side. Flip (using a spoon and skewer) and cook the other side uncovered for another minute.
Take out and enjoy!

Note:
This mixture can be prepared earlier and can be refrigerated for further use.
Adding baking soda (few minutes before cooking) makes the paniyaram very spongy. It is optional only.
Makes 25 paniyaram.
Using coconut oil or butter or ghee for making the paniyaram will definitely elevate it to next level:)

Friday, July 25, 2014

Drumstick ridgegourd koottu

Vegetables like ridge gourd (peerkan kaai) , drumstick (murungaikai) are very native to South Indian ....especially the Tamilnadu cuisine. Whenever I cook drumstick, I find it difficult for anyone to eat ....that too men and kids consider it old fashioned to eat it in front of others :) While growing up, drumstick had played an important role in our daily menu, as we had a large tree in the backyard. So instead of buying some vegetable for sambar, it would always be murungakkai sambar. My mom used to cook the drumstick and scoop out the edible portion inside drumstick and add it in many dishes. Few weeks back I saw fresh succulent drumsticks here at the rate of $ 6 / lb . I bought 2 drumsticks for $ 2 (!) and wanted to make something delicious. I added it with ridge gourd and the result was very delicious. I made it for a Saturday lunch along with ridge gourd peel chutney and served this koottu as 'curry over rice'. It was a very light and delicious meal. Hope you all try my version of this koottu in this peek drumstick , ridgegourd season and enjoy.


Mashed drumstick ridge gourd koottu

Ingredients:
Drumstick - 2 (long)
ridge gourd - 1 (1 lb)
green gram dhal (moong dal / paasi paruppu) - 1/4 cup
turmeric - a pinch
hing - a pinch
onion - 1
green chilly - 1
curry leaves - few
oil - 1 tbsp
mustard seed - 1/2 tsp
urid dal - 1/2 tsp
salt - to taste

Masala to grind:
coconut - 2 tbsp
dry roasted fennel - 1 tsp
green chilly - 2
cumin - 1/2 tsp

Method:
Cut the drumstick into two or three long pieces. 
Pressure cook dal along with drumstick, turmeric and hing.  Scoop out the edible inside portion of drumstick.
Squeeze and extract juice from outer layer too. Discard the fiber.
Peel the ridgegourd (save the peels for chutney...see the recipe for peerkan kaai thol thogaiyal).
Chop it into small pieces.
Chop onion, green chilly, curry leaves and keep aside.
Grind the masala to a coarse paste.
Heat oil in a wok. Let mustard crackle and urid dal gets mild red.
Then add chopped onion, chilly, curry leaves and stir till onion gets soft.
Then add the ridge gourd and cook covered with a handful of water.
It may take 5 minutes to get cooked.
After that, add the cooked dal, mashed drumstick, salt and masala paste.
Cook covered in medium heat for 2  to 3 more minutes or till the raw smell goes.
Switch off.  Garnish with chopped cilantro.
Ridge gourd drumstick curry is ready!

Serving suggestion:
Serve as curry over hot rice along with pappad and a hot chutney.
Also makes a side dish for any rice or chapati.

Note:
If needed add 1 tomato while making the koottu.

Friday, July 18, 2014

Potato masala panini

Panini can be explained as a crispy grilled sandwich. If this delicious sandwich gets the fillings in Indian flavor, then it will definitely satisfy our tastebuds :) This is another recipe I got from my neighbor aunty. She calls this as Mumbai style grilled sandwich. Hubby and me absolutely love this very much. While making potato subzi for chapati, I reserve a  little for this panini or masal dosai and by this way we can save some time. Also this is a nice way to use leftover vegetable curries and also a good idea to make kids eat their vegetables:)
Also check out my capsicum panini.


Ingredients:
sandwich bread - 6 slices
potato masala - 4 tbsp (see below for recipe)
onion - 1/4 cup
butter - 1 tsp (each)
Indian green chutney - 1/4 cup
tomato sauce - 1 tsp each sandwich

Method:
Heat the panini maker to maximum heat with the lid closed. After we see the ready button glowing, open the grill. (Read and follow the instructions carefully if it is the first time).
In the mean time place the required bread slices (3 slices) on a plate and spread 1 tbsp green chutney and few slices of onion, 1 tsp tomato sauce over the breads.
Take few more bread slices and  spread the potato masala over them. Close the green chutney covered slices with these aloo covered bread slices.

Rub a piece of butter on panini press (bottom plate) in a small area and  place the prepared sandwich.(one set at a time).
Place the lid gently (no locking) and the by the weight of the top plate the sandwich will get thin and crunchy  in one minute.
If needed apply some more butter on top of sandwich and press again gently.
Take out using a spatula, slice and serve while it is hot.
Potato masala panini is ready!

Serving suggestion:
Makes a main course meal in breakfast or dinner.
Serve with Indian chai tea or orange juice as breakfast.
-------------------------------------------------------------------------------------------------------
I )Spicy potato masala curry:  
This is one of the best fillings I make for potato paratha, spicy masal dosai, etc. We can use the below curry as side dish for chapati too . This curry should be thick and should be spreadable. Keep this handy to amaze your loving family.

Potato masala:
Boiled potato - 3
red onion - 1/2
ginger garlic paste - 1 tsp
turmeric powder - 1/4 tsp
red chilli powder - 1 tsp
cilantro - few leaves.
salt - to taste
garam masala / curry masala powder - 3/4 tsp

Method:
 Peel the boiled potatoes and mash almost finely.
Heat oil  in a wok, add fennel (sombu). As it gets red, add finely chopped onion. After the onion gets soft, add ginger garlic paste and saute till raw smell goes. Add the turmeric powder, chili powder, curry masala powder and mix for 10 seconds. Then add the mashed potatoes, salt, cilantro and cook covered with handful of water for 5 minutes.
After switching off sprinkle lemon juice and keep aside.
--------------------------------------------------------------------------------------------------------
II) Easy potato masala for filling:
Pressure cook the potatoes. Peel and mash them as finely as possible. Add salt, garam masala powder, turmeric powder, red chilly powder and chopped cilantro. Mix well and keep refrigerated.
This is the easy version to make potato fillings in any Indian recipe.

Aval Pazham

 If there is one easiest breakfast recipe in Indian, then it should be this one. LOL. Because all other recipes in India requires lot of ing...