Thursday, January 22, 2009

Adai Dosai

Adai dosai is a common breakfast / dinner item made in South Indian houses. we make it in many ways using many kind of lentils. The following recipe is an authentic one followed by people of Tirunelveli. My mom used to make it for saturday mornings. (Sundays were devoted to Poori). I don't even know when she would have got up or when she would have soaked them all..(Yes , it is the secret of mothers ). But those memories are really wonderful and the best part is , this was her favorite breakfast cum dinner.
I used to give her some appreciation by making my imperfect adais , after enjoying her crispy ones:) Later on those breakfast menus became dinner specials , paving way to oats and cereals.
Recently I enjoyed adai made by my friend Priya Anand and got inspired a lot again:)
She prepared it like a kerala adai and it was soo.... lovely. Will post that version also soon.
Hope this recipe brings many loving memories to you too guys:)

Adai dosai  served with coconut chutney.
Update (11- 25 - 2013)
Nowadays I make adai using my electric griddle (350 deg F or little lesser). This helps me make more adais in short time...also it will never char these lentil dosais. But we can make it just like dosa in dosa pan too. Both tastes good.


To grind:

Idly rice / any rice - 1cup
Raw rice (Basmati) - 1 cup
Thoor dhal - 1/4 cup
Channa dhal - 1/2 cup
Moong Dal - 1/2 cup
urid dhal  - 2 tbsp
Ginger - 1 inch
Dry red chilli - 5
Asafoetida - a pinch
Turmeric powder - a pinch
Cumin - 1 tsp
Salt - 2 tsp

To temper:
Oil - 1 tbsp
Mustard - 1tsp
urid dhal - 1 tbsp
onion - 2 cup
Green chili - 2
cilantro - a handful
curry leaf - 1 sprig

Method:

Wash and soak the rice , thoor dhal, channa dhal, urid dhal for 6 hours.
I soaked it by 12 Noon and made it for dinner.
(If you plan to make adai for a special breakfast, then soak all the items told and keep it inside fridge overnight.
Otherwise soak the rice overnight and soak the dhals for just 2 hours in the norning.
Because while making adai , the dhals should not ferment. Moreover do not use fermented left over batter, as it is believed to be hazardous)
After 6 hours grind soaked items along with Red chilli, ginger, asafoetida, turmeric, cumin and salt like coarse dosa batter .
Tempering the batter :
Heat a pan with oil and add mustard, as it crackles, add urid dhal.
When urid dal starts to get red in color, then add the chopped onion , cilantro, curry leaves and fry till the onion becomes transparent.
Then add this tempering to adai dosa batter.
Heat a dosa pan and coat it with a little sesame oil.
(Thick traditional dosa tawas make crispy adais than the non stick tawas)
Then pour a ladle of batter and make thick dosas.
Make a hole in the center of the adai and add 1 tsp sesame oil or ghee around the adai and in the center hole.
Flip it. Wait to get adai cooked on both sides (almost 1 - 2 minute each side at medium heat).
Like wise make as many as required.
Adai dosai is ready!

Serving suggestions:
Serve adai hot with coconut chutney or aviyal or onion chutney.
Do not prepare it in batches before serving. Because cold adai does not taste great.
So start making adai , as soon as anyone sits in front of the dinner plate.

Note:  
The taste will be enhanced if we add a handful of drumstick leaves to the batter before making adai.

Wednesday, January 21, 2009

Sesame Ladoo

Sesame ladoo / Ell urundai is a kind of primordial Indian sweet . It is believed that , the people who extract oil (nallennai in tamil) from sesame seeds could have invented this amazing sweet. Actually they mix palm jaggery with the left over crushed sesame seeds after getting the oil .
We cannot get palm jaggery easily in USA , so here is a modern recipe for our store bought sesame seeds with ordinary jaggery:)


Ingredients:

Black Sesame seeds - 1 cup
Jaggery - 1/2 cup (grated)
cardamom - 2 pods (optional)

Method:
Sprinkle little water over black sesame seeds and dry roast it.
Sprinkling water avoids jumping of sesame seeds. Let it cool .
Then coarsly grind (just 2 pulse) the sesame seeds and cardamom in a mixer.
Heat the crushed jaggery with a spoon of water and make a thick liquid out of it.
Take care not to char the jaggery.
Then mix the crushed sesame seeds with jaggery and make lemon size balls.
Sesame ladoo is ready.

Good for a healthy dessert for underweight kids!

Tuesday, January 20, 2009

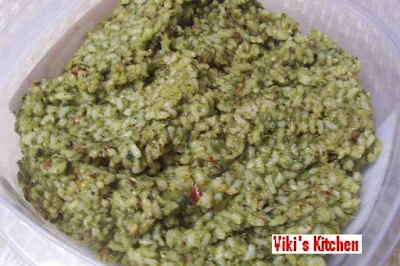
Cilantro rice

Kothamalli sadam / coriander rice / cilantro rice is a quick fix lunch box recipe. All that we need is just 20 minutes for the entire preparation .


Ingredients:

cilantro leaf - 2 handful
Rice - 1 cup
coriander seeds - 1 tsp
cumin seeds - 1 tsp
Dry red chilli - 3
Tamarind - 2 inch
Tomato - 1
garlic - 1 pearl
oil - 2 tbsp
mustard seeds - 1 tsp
urid dhal - 1 tbsp

Method:
Pick the leaves from the cilantro bunch.Clean and wash the cilantro leaves.
Heat oil in a kadai. Add the urid dhal, coriander seeds and mustard seeds.
After the mustard gets cracked, add the dry red chilli and fry for a while.
Then take the chilli alone out , keep it aside.
Now add the cilantro leaves and chopped tomato to the hot oil and fry them till the tomato becomes mushy.
Then add the cumin seeds, tamarind , salt, garlic and mix them all. Then switch off the stove.
After it gets cooled , grind it in to a fine paste in a mixer/ blender.
Check for salt.
Cook the rice with twice the measure of water and a little salt.
After the rice gets cooled , add the cilantro masala and mix well.
Cilantro rice is ready.

Serving suggestions:
Serve hot with egg omelet or raitha . I prepared cauliflower fry as a side dish.

I would like to thank Varsha of will-O'-the-wisp for passing me this cute award.

Thank you Varsha.
I am glad to pass this award to sriharivatsan , Premy's cakes,
Chitra , Swapna and Shama .
Enjoy .

Friday, January 16, 2009

Pongal Aviyal.

Aviyal is a kind of side dish prepared in TamilNadu and kerala during auspicious times . Aviyal means vegetables cooked in water . It contains many vegetables and root vegetables without much oil.There are many varieties of aviyal .
One of such kind is the TamilNadu aviyal or kalyana (wedding) aviyal or Pongal aviyal. TamilNadu Aviyal is flavored with turmeric , mango , tamarind and tomato instead of curd, While kerala aviyal has more coconut and curd. But I will tell both are yummy in their own way . Since it is a Pongal season , I felt it more appropriate to present you guys this TamilNadu's special aviyal. There is an old saying that people should add all the vegetables (atleast one piece) on Pongal day, so that they will not get allergic to any vegetable throughout the year.
This is a 'must to serve' side dish in almost all functions of TamilNadu.
What is more pleasant than a wedding feast, in which all can sit together to have this aviyal with Sambar rice served in a banana leaf?

Recipe source:  My mom used to do this aviyal every year during pongal. I got this yummy recipe from my Jeyasri chithi.  Jeyashri chithi prepares lot of dishes like this. In her words ' add lot of native veggies for avial' . I follow this and it tastes very delicious. I love her recipes very much and practice them for my special days.  


vegetables:
Unripe banana (choose Indian banana) - 1
Baby brinjal / small eggplant - 3
Drumstick - 1
Red onion - 1
White pumkin - 100 gms
Tomato - 1
Yam (suran / senai kilangu) - 100 gms
Raw mango - 1/2
potato - 1
cluster beans - 100 gms
string beans - 100 gms

(Cauliflower , cabbage , broccoli , celery and beetroot do not go along with the recipe. Just use only native Indian vegetables.)

Masala:
fresh shredded coconut - 1 cup
green chilli - 4
shallot onion - 4 / 1 small red onion.
cumin seeds- 1 tsp
black pepper- 1 tsp
(Grind all of the above coarsely).

Other ingredients:
Channa dal - a handful
Tamarind extract - 1 tsp.
turmeric - 1/4 tsp
shredded coconut - 1 tbsp
coconut oil (or)any cooking oil - 1 tbsp
curry leaves - 1 brig
mustard seed - 1tsp
salt - to taste
water- 2 cups

Method:

Cut the vegetables in to big pieces .
Cook all the vegetables in water and turmeric powder. Add water just to immerse the vegetables. Add soaked channa dal.
After they become tender add salt and tamarind extract.
Then goes the coarsely ground masala and mix well. Bring it to boil.
check for salt.Now switch off the flame.
Heat a separate pan with coconut oil and splutter the mustard seeds. Add the remaining shredded coconut, curry leaves and run the 'thalippu' over the aviyal.
TamilNadu Pongal aviyal is ready.

Serving suggestions:

Makes 800 ml of aviyal (nearly 4 cups).
It can be served with sambar rice , rasam rice , roti , adai or chapathi .

Thursday, January 15, 2009

Cranberry beans koottu

I am introduced to cranberry beans after coming to NJ only. While I was browsing through a chinese food market, I bumped on this lovely veggie that resembles much of an Indian butter beans. Before that I wanna share some memories on butter beans.
Butter beans is a famous , expensive but rare vegetable found in Tirunelveli / Tuticorin markets. Even in Madras I have not spotted this beans any where. We make a koottu (curry) out of it along with sambar rice. My Mom used to prepare it with Paruppu kulambu and I love those tongue tickling moments.
I applied the same formula with cranberry beans and the result was amazing. So in your next visit to any Asian food market look for this beans and enjoy this curry :)


cranberry beans / butter beans curry
Ingredients:
Cranberry beans/ butter beans - 1 lb
Shallot onion - 4
Shredded coconut - 2 tbsp
cumin seeds - 1 tsp
oil - 1 tsp
fennel seeds (sombu)- 1 tsp
Curry leaves - 1 brig
coriander powder - 2 tsp
red chilli powder - 1 tsp
turmeric powder - a pinch
tomato - 1 (chopped)
salt - to taste

Procedure:

Shell the cranberry beans , wash and clean the beans inside.
Bring to boil enough water and cook the beans to tender.
In a Indian mixer/ any blender grind the shallot, coconut and cumin seeds together to a coarse paste.
Heat 1 tsp oil in a pan. Add the fennel seeds and let it become red. Then goes the curry leaves.
Immediately add the cooked beans along with the remaining water.
Now add coriander powder, red chilli powder, turmeric powder and salt.
Slide in chopped tomatoes. Close the lid and cook for 5 minutes.
Then introduce the ground masala and keep stirring occasionally, till the koottu / curry becomes a gravy.
Butter beans/ cranberry beans koottu is ready.

Serving suggestions:

Makes nearly 600 ml of curry.
Serves 4 people .
Serve hot with chapathi, roti , vegetable pulav,or as side dish with sambar & rice.

Cranberry beans koottu goes to Legume affair hosted by Srivalli and Susan.
Also it will be seen in the Sunshine mom's FIC_ Yellow event.

Wednesday, January 14, 2009

Vegetable Biryani (Oven method)

Happy Pongal everybody . After a week , I come out with our very known dish 'vegetable Biryani'.Actually after posting the non veg biryani, one of my vegetarian friend ordered me for a delicious veg. biryani.... So I am dedicating it to her:)
Vegetable biryani always gives a great alternative to sambar and daal rice during the fasting season.
Some people prepare it in a rice cooker or a kadai. But if it comes for a pot luck or dinner , I prefer to prepare the vegetable Biryani in conventional oven.
Nothing more to say , but try this and tell me how it turned out.


Vegetables: Cauli flower - 5 big florets (pieces), green beans - 10 , carrot -1 , green peas - a handful , butter beans / cranberry beans - 1 cup
Ingredients:
Basmathi rice / Jeeraga samba raw rice - 3 cups
Turmeric powder - 1/4 tsp
Red onion - 2 (medium size)
Tomato - 2
cilantro- 1 handful.
mint leaf -1 handful.
Ginger paste - 2 tsp
Garlic paste - 1 tsp
Fennel - 1 tsp
bay leaves - 2
star aniseed - 1,
cinnamom stick - 2 inch
cardamom - 2
cloves - 4
curd -1 cup,
ghee - 2 tbsp
olive oil - 3 tbsp
chilli powder - 2 tsp ,
green chillis - 5 (uncut).
Lemon - 1
cashew nuts -10
raisins- 10.
salt.
saffron color- 2 drops
rose essence-2 drops
milk - 2 tbsp

Marination:
wash and clean the vegetables. peel the skin of carrot and cut into long thin slices.
Cut the green beans in to long pieces. Pluck 5 -6 florets from the cauliflower.
Defreeze the green peas. Boil and cook the cranberry beans/ butter beans separately.
Put all the vegetables in a mixing bowl .
Add 2 tsp chili powder, 1 tsp garam masal powder, 1 tsp ginger paste, 1/2 tsp garlic paste, 1 cup curd,2 tsp salt and juice from 1/2 a lemon.
Marinate the vegetables for 2 hours or overnight in refrigerator.

Biryani gravy preparation:

Heat 3 tbsp olive oil in a broad bottom vessel.
Add fennel ,star aniseed , cinnamon stick,cardamom ,cloves, bay leaf .
Then goes the chopped onion .
Fry it till golden brown and take half of it aside.
Now add the chopped tomato and cook till the oil oozes out of it.
Then add the remaining ginger garlic paste and stir well till the raw smell goes.
Fry it till the oil start oozing out. Now add the marinated vegetables and stir well.
No need to cook the vegetables (except butter beans seeds), as they will get cooked in the oven.

To cook rice:
wash the rice and soak it for 1/2 an hour.
Bring to boil some 10 cups of water.
Add the juice of half a lemon and 2 tsp salt.
Then add the soaked rice and 1/2 cook it (50% done).
Immediately drain water using a colander (sieve) and keep it aside.

For garnishing:

Roast the cashews and raisins in 1 tbsp ghee. keep aside.
Chop cilantro and mint leaves.

Arrange the layers:

Take an aluminium foil baking tray. Clean it and spread half of the rice.
Then spread the prepared vegetable gravy over it .
Cover that with another layer of rice.
spread the chopped mint leaf, cilantro, uncut green chillies, fried onions, cashews and raisins.
Mix 2 drops of rose essence , saffron food color (or real saffron) with 2 tbsp milk.
sprinkle this mixture over the top layer of rice.
sprinkle 1 tbsp ghee over that.

In oven:

Now cover the tray with an aluminium foil.
Preheat the oven to 350 deg C and cook the biryani for 1 hour (or) more, till the rice is cooked completely. My biryani got ready in one hour.
Vegetable biryani is ready.

Serving suggestions:

Serve vegetable biryani hot with onion raitha .
Serves 6 people.

Vegetable Biryani goes to Sunshine mom's FIC_ Yellow event.

Monday, January 5, 2009

Shrimp curry (South Indian coastal region kulambu)

If any non vegetarian fan (like me) is asked to rate their favorite dish , then shrimp will definitely get a top score. To my surprise hubby never likes crab or shrimp (so I get a lion's share always :) . Love my man for his taste:)
Back to the shrimp curry, there are many ways to prepare the shrimp. Mostly we cook it exactly like a chicken curry or fry it like chicken 65. But the shrimp tastes great in whatever manner being cooked. (It tastes good if not cooked for a long time). Some American restaurants serve a half cooked cocktail shrimp and I love that taste too. I had it raw along with small gooseberry as a salad in Thailand and that was very lovely.
The recipe I narrate here traces its origin to the southern coastal region of Tamil Nadu. I got this charming recipe from a fish selling person (who regularly supplies fish to my father's house) and I love it because of its simplicity.
Here goes the recipe.


Ingredients:

Shrimp - 30 numbers
shredded coconut - 2 tbsp
cumin - 1/2 tsp
turmeric- a small bit
whole black Pepper - 2 tsp
coriander powder - 2 tbsp (not the seeds)
ginger - 1 inch
green chilli - 2 (split to half)
Chopped onion - 1 cup (1 number)
chopped tomato - 1 cup (2 number)
salt- to taste
oil - 1 tsp.
curry leaf - 2 brig

Method:
1.Wash srimp. Remove the veins and shell.Keep aside.
2.Bring to boil 1 cup of water in a vessel
Then add chopped onion and tomato .
3.Grind shredded coconut , cumin ,turmeric, black pepper, coriander powder
and ginger together.Add this mixture to the boiling onion-tomato .
4.Add the cleaned shrimp and cook covered in a low heat for 15 minutes.
5.Heat 1 tsp oil in a pan.
Fry fennel seeds (sombu) to red color then add the curry leaves and green chilli .
Now pour this tempering to the cooked shrimp kulambu. Check for salt.
The consistency should be watery like sambar.

Coastal region shrimp kulambu is ready!

Serving suggestion:
Makes nearly 3 cups of shrimp kulambu.
Serve hot with plain steamed rice.

Saturday, January 3, 2009

Turkey Biryani

Turkey biryani has always been a fascinating dish for me since childhood. Most of the restaurants in Madras serve Turkey biryani only once in a week , because the turkey is a rare bird in India. This biryani has a vibrant flavor and taste.
Hubby being so delicate to taste new dishes, I waited  till I got a chance to prepare it for a dinner. I did this for a thanks giving day and Christmas function. Getting smaller portion of Turkey is a challenge here .  I was looking for a small portion of cut turkey. Finally succeeded in getting turkey wings from 'shop Rite' (Many other shops sell turkey as a whole bird ). It came out very tasty and we all enjoyed it very well. Here goes the recipe.
Hotel style Turkey biryani made with jeeraga samba rice.

Ingredients:

Basmathi rice / Jeeraga samba raw rice - 3 cups
Turkey wings - 2 lbs
Turmeric powder - 1/4 tsp
Red onion - 2 (medium size)
Tomato - 2
cilantro- 1 handful.
mint leaf -1 handful.
Ginger paste - 2 tsp
Garlic paste - 1 tsp
Fennel - 1 tsp
bay leaves - 2
star aniseed - 1,
cinnamom stick - 2 inch
cardamom - 2
cloves - 4
curd -1 cup,
ghee - 2 tbsp
olive oil - 3 tbsp
chilli powder - 2 tsp ,
green chillis - 5 (uncut).
Lemon - 1
cashew nuts -10
raisins- 10.
salt.
saffron color- 2 drops
rose essence-2 drops
milk - 2 tbsp

Note:
The meat in the biryani always tastes plain . So if we want to make them more juicy and tasty we should marinate the chicken/ turkey or any meat the day before preparing the biryani (but not earlier than that).
Then place the marinated meat tightly packed inside the refrigerator (not freezer).

Marination:
wash and clean the turkey pieces.
Cut it in to big portions. Apply 1/4 tsp turmeric over it.
Marinate the turkey with 2 tsp chili powder, 1 tsp garam masal powder, 1 tsp ginger paste, 1/2 tsp garlic paste, 1 cup curd,
2 tsp salt and juice from 1/2 a lemon.
Keep it inside a Ziploc cover and place it inside a closed container . Keep it refrigerated .

Biryani gravy preparation:
Heat 3 tbsp olive oil in a broad bottom vessel.
Add fennel ,star aniseed , cinnamon stick,cardamom ,cloves, bay leaf .
Then goes the chopped onion .
Fry it till golden brown and take half of it aside.
Now add the chopped tomato and cook till the oil oozes out of it.
Then add the remaining ginger garlic paste and stir well till the raw smell goes.
Now add the marinated turkey pieces and stir well. Fry it for some time.
Then pressure cook it for 4 whistles (or) keep in simmer for 5 minutes after 1 whistle.
Let all the pressure gets released and open the cooker. Check for salt. it should taste everything perfect.
Donot panic if you get some water added from steam. It will be sucked by the half cooked rice while slow cooking the biryani.

To cook rice:

wash the rice and soak it for 1/2 an hour.
Bring to boil some 10 cups of water.
Add the juice of half a lemon and 2 tsp salt.
Then add the soaked rice and 1/2 cook it (50% done).
Immediately drain water using a colander (sieve) and keep it aside.

For garnishing:

Roast the cashews and raisins in 1 tbsp ghee. keep aside.
Chop cilantro and mint leaves.

Arrange the layers:

Take an aluminium foil baking tray. Clean it and spread half of the rice.
Then spread the prepared turkey gravy over it .
Cover that with another layer of rice.
spread the chopped mint leaf, cilantro, uncut green chillies, fried onions, cashews and raisins.
Mix 2 drops of rose esssence , saffron food color (or real saffron) with 2 tbsp milk.
sprinkle this mixture over the top layer of rice.
sprinkle 1 tbsp ghee over that.

Dum or slow cooking:

Now cover the tray with an aluminium foil.
Preheat the oven to 350 deg C and cook the biryani for 1 hour (or) more, till the rice is cooked completely. My biryani got ready in 90 minutes.

Serving suggestions:

Serve turkey biryani hot with onion raitha and chicken gravy.
Serves 5 people.

Friday, January 2, 2009

Cranberry Sauce

Last month we bought a pack of cranberries, but just could not take that sour taste. So googled to find a dish with it and came across this famous 'cranberry sauce'.
We can substitute this home made sauce for jam as it resembles much like one.
These tiny red fruits are packed with a lot of nutrients and antioxidants. The fresh fruit is generally available from September to December.
But we can use frozen cranberries also to make this sauce.
Scientific researches are revealing the uses of cranberries and how it prevents aging .


Ingredients:
sugar - 1 cup (200 gms)
water - 1 cup
cranberries - 4 cups (12 oz pack)
black berries - 10
orange peel (grated) - 1 tsp
cinnamon- a dash
Raisins - a handful

Method:
Wash and clean the cranberries.
In a saucepan bring to a boil water and sugar, stirring to dissolve sugar.
Now add cranberries and boil again.
Then reduce flame and wait till the cranberries burst.
Now add all the other ingredients. Remove from heat. Cool completely at room temperature and then chill in refrigerator.
Cranberry sauce is ready.

Serving suggestions:

Can be served with bread like jam or as dessert or with any spicy food.

Note:

The Cranberry sauce will thicken as it cools. So no need to add any thickening agent.
It will have a mild unnoticeable bitter taste as soon as prepared, but will become sweet after some time.

Tuesday, December 30, 2008

Frosted Sugar cookies


I prepared this frosted sugar cookies for the Christmas feast.
I chose to make butter cream icing in advance and refrigerated it for easy handling.
It is like an easy breeze to make and great for kids.

Ingredients:
granulated sugar - 1 cup
unsalted butter - 1 cup
milk -3 tablespoon
vanilla essence -1teaspoon
egg-1
all purpose flour-3 cup
baking powder-1 1/2 teaspoon
salt 1/2 teaspoon
sugar a little to sprinkle.

Method:
Beat the egg , milk, and vanilla essence .
In a large bowl, combine sugar, butter with the beaten egg mixture.Blend well.
Add flour, baking powder and salt to the mixture and make it into a dough.
Cover with plastic wrap and refrigerate it for 1 hour for easier handling.
Preheat oven to 400 F .
Make small balls and flaten them on silverfoil or ungreased cookie sheet over the oven tray.
( place each cookie 1 inch apart)
sprinkle sugar over the cookies before baking.
Bake at 400 F for 5-9 minutes or until edges are light golden brown.
Immediately remove from cookie sheets and decorate as desired.
Makes 6 dozen cookies.


Frosting:

Unsalted butter - 1/2 bar (5 tbsp)
confectionery sugar - 2 cups
milk - 1 tbsp
cookie sprinkles - 1/2 cup
vanilla essence - 1 tsp
Cool the cookies completely before frosting.
Mix softened butter with confectionery sugar, milk and vanilla essence.
This can be of a thick consistency like a chapathi dough.
Spread the white icing uniformly all over the cookies by using a knife or icing tool.
Then decorate the cookies with sprinkles .

Frosted sugar cookies is ready!
Store them in air tight box and it will last for a month.

Frosted sugar cookies goes to FIC : White event in Yummy food.

Malar of Kitchen Tantra has tagged me for this baking event. Thanks for tagging me for this noble cause dear.

The following is quoted from the Breadline Africa Bake-Off site:
On 15 October, we launched The Breadline Africa Worldwide Blogger Bake Off. The Blogger Bake Off is an online campaign that challenges blogger to get involved by baking bread, and then acting by donating to end poverty. And then, challenge their readers and five other blogger to do the same.With the money raised, we will be supporting grass roots community projects aimed at ending poverty and hunger in Africa. We’ll be placing container kitchens, vegetable gardens and more in poor communities, sending emergency food relief where needed
and helping these poor communities to help themselves.

The rules for blogger are outlined below:

If you are tagged, copy and paste the rules into your post.
Bake bread, do something you would’t normally do, and blog about it. Upload your picture and recipe.
Give dough, donate to Breadline Africa and help us end poverty.
Tag five blogger, and ping us so we know you’ve done so.

The person who raises the most funds will get to name a Breadline Africa community kitchen and win $500 Amazon Vouchers.
There are also three minor prizes of $250 Amazon vouchers for people who receive the most votes in the following categories: Most Unusual Recipe; Most Nutritious Recipe and Most Traditional Recipe.
Breadline Africa is a registered charity in South Africa that is seeking to put an end to poverty in South Africa and further afield in Africa. Their aim is to break the cycle of poverty and help communities to achieve long term self-sustainability. Breadline Africa was founded in 1993 by social workers and communities in South Africa with minded colleagues in Europe, (who were well placed to source out donations). They are geared to help fund small ground level projects in Africa which are most likely to succeed with financial help.

On Blog Action Day Breadline Africa launched their Worldwide Blogger Bake-Off campaign. The aim is to raise $1 million in funds for a project to convert shipping containers into locations for food production and distribution in Africa. It is hoped that these sustainable community kitchens will not only provide food such as bread and soup to those in need, but also opportunities for skills development within poor communities.This bake-off gives us baking blogger the power to make a difference in this world. What do we do? Bake bread. Give Dough. Feed Africa. Vals says, "You can sign up for the campaign, make a donation, upload your bread recipes and document your culinary adventures in the media center to spread the word. You don't have to donate money but simply just mention the campaign and create awareness."

I am tagging 5 of my friends for this event.
Premy
Saraswathy
Usha Nandhini
Akal's saapadu
Shama
Best wishes my friends!

Monday, December 29, 2008

Wheat Halwa


While talking about wheat halwa , many will not be aware of its varieties.
There are two kinds of wheat halwa.
One made in a glossy form called Tirunelveli halwa and the other an opaque one.
The glossy Tirunelveli Halwa requires samba wheat (a red color wheat), more soaking time and a lot of ghee.
I did not plan in advance to make an halwa , so I could not make a Tirunelveli halwa. Instead I prepared the ordinary wheat halwa that can be seen in any other part of India.

Ingredients:

Ordinary Whole wheat (wheat grains) - 1 lb
Sugar - 4 cups
lemon - 1/2
Cardamom - 4 nos
Ghee + oil - 1 cup
Red food-color - 1 pinch
Cashew - 1/2 cup chopped (garnishing)

Method:

Wash and soak the wheat for 12 hours. (overnight)
Next morning grind it in a blender by adding 1 cup of water. Spread a muslin cloth over a sieve and Strain repeatedly to get milk.
Grind again with some water and strain again till we end up with the husk.
Let it stand undisturbed for 6 hours. Thick milk gets settled at the bottom.
Take the clear lean milk above . Use both milks and discard the sediment.
Add lime juice, sugar, red color (not necessary) and mix well with the wheat milk.
Pour it in to a thick bottomed pan and heat till the liquid starts to solidify.
Then reduce flame and keep stirring continuously.
Add the ghee+ oil when the halwa starts thickening. Add the cardamom powder. Mix well.
Cook till you can roll the halwa into a ball with your fingers.
Add chopped cashews along with the hot halwa and switch off flame.
Spread on a greased plate and allow to cool .Then cut it into desired shape.

Wheat halwa is ready !

Wheat halwa goes to celebrate the Christmas feast event with Purva.

I would like to thank my friend Varsha for passing me this cute award.

Thank you Varsha!
I pass this award to my friends below.

Premy's cakes

Akal's saapadu

Usha Nandhini

Saraswathy


Congrats!

Friday, December 26, 2008

Christmas 2008

Merry Christmas Friends!
On 24 th evening we celebrated the Christmas mass in the 'Our Lady of Peace Church'of NJ .
The church was decorated with a lot of Christmas trees .The 'Nativity scene ' describing the birth of Jesus was enchanting. Oh! there are no words to describe a Christmas eve...The poinsettia plants(a plant with red color bracts/leaves at tip) around every corner, stars and lights, the children waiting for santa's gifts (we too) , people clad in red coats (conspicuous color of the Christmas), the marvelous songs of the choir , ... wonderful experience for me :)
I prepared some sweets like fruit cake , wheat halwa and sugar cookies for the festival. We celebrated Christmas in a very simple but cheerful manner along with some friends. I am very glad that the Turkey biryani turned out good and the chicken fry did not consume much energy and oil. (I baked and broiled it...saved a lot of time.). Here are some snaps. Recipes coming soon....
Happy holidays!

Tuesday, December 16, 2008

Christmas Plum Cake

Wish You all a 'Merry Christmas' and a prosperous NEW YEAR!
In India , during the Christmas we used to buy and distribute these rich plum cakes as gifts to our friends. This cake even without any frosting enjoys the center of attraction for everyone there. I have been longing to taste this fruit cake after coming here. But couldn't get that flavor.while googling I came across Cham's Fruit cake and Prema's Plum cake recipes. So I thought of trying it for this season. As a trial , I baked one and got it a big hit.
Click to see my youtube channel fruit cake video


To my surprise , the end result was very similar to the Plum cakes sold in Tuticorin and Tirunelveli bakeries.

Chams and Premas recipes were much useful .Other than my variation, it is completely their recipe and I am just recording it for my future use.

I.For caramelizing
sugar-1/4 cup
water - 1tbsp + 1/2 cup
Add sugar and 1 tbsp water keep in stove at low to medium heat. When the sugar starts to turn brown , stir slowly .The sugar will start to change color from light brown to dark. In between , keep in microwave the water for 1 min and warm it. When the sugar starts to turn brown , pour slowly the warm water. Be cautious , as it may splutter .
Plum cake recipe:

My first fruit cake:) 2008 Christmas.
Ingredients
All purpose flour (maida)- 1 1/4 cup
sugar- 3/4 cup
butter- 1 stick (8 tbsp butter = 1/2 cup oil)
(I used 1/2 cup olive oil)
dried fruits-(dates, raisins, dried cherries,plums,pears, prunes and apricots)- 1 cup
dried nuts-(almonds, cashews and walnuts) - 1/2 cup
egg -3
baking powder-1 tsp
baking soda-1/4 tsp
salt-1/2 tsp
vanilla extract -1 tsp
candied lemon and orange peels- 1tbsp
(I crushed peels of an orange)
All spice powder(cinnamon, nutmeg,clove and dry ginger)- 1 tsp
(I used 1/4 tsp of each powder)
Rum or Brandy- 1/2 cup (or) Rum extract - 1 1/2 tsp
(or) grape juice- 1/4 cup + orange juice- 1/4 cup
(or) orange juice - 3/4 cup

Preparation:
Chop the dried fruits and soak them in Rum /Brandy or grape and orange juice for a few hours.
I soaked it in 3/4 cup orange juice for 3 days. (Not inside fridge, just in room temperature.stir it twice a day).
On the third day, add 3 tbsp of alcohol essence to the soaked fruits.
Do not waste the juice. we can use it while baking.

Method:

Step 1.Preheat the oven at 350 degree, grease a small loaf pan and place a parchment paper at the bottom.
Step 2:In a blender ,add 2 cloves, nutmeg powder ,1/2 inch cinnamon ,dry ginger powder , orange peel and crush them.
Then add olive oil , eggs, caramelized sugar,sugar, vanilla essence,salt and beat again.
Add all purpose flour, baking soda , baking powder together and run the blender again to get fluffy batter.
Pour it in a broad mixing bowl.
Step 3:Add the dry fruits only (if you ve little juice left keep it away or add in the cake mixture)and fold again.
step 4:Take 1 tbsp of AP flour and mix it with the broken nuts.
step 5:Pour in grease pan . Now spread the flour coated nuts (do not stir after adding the nuts)over the cake batter .
step 6:Cook in middle of the rack for 40 to 50 minutes in 350 deg C. If not cooked increase 10 min each time. The cake will be done in 45 minutes. The cake is ready when a toothpick inserted into it comes out clean.
My cake got ready in 55 min (gas operated oven).
Cool completely before storing it.

Note:
I made some variations while trying the first time. They are :
1. Added my home made alcohol flavor to substitute the Rum extract.
2. Replaced the butter completely by 1/2 cup of extra virgin olive oil

I.How to make the alcohol essence?
This plum cake recipe recommended the usage of rum extract and I thought of leaving that ingredient as we don't have the habit of consuming any alcohol.
Last week while preparing the batter for Aappam, I got an idea to find a substitute for rum. (Well prepared aappam batter smells like some liquor on the next morning).Eureka!!! I found something interesting.
So I searched for an alcohol substitute and got the following recipe from alcohol substitutes and many other sites. This makes nearly a cup of alcohol flavored essence. This is not an alcohol. But has some flavor similar to it. You can buy rum extract also.
Friends ! please educate me, if am going wrong.
Ingredients:
Apple - 1 (big)
maple syrup - 1 tbsp
yeast - 1 tsp
sugar - 4 tsp
water - 1 cup.
Method:
Wash and remove the seeds of the apple. Crush it in a blender along with skin.
Add all the other ingredients and stir vigorously.
Then pour it into an air tight container and keep it in a warm place for 48 hours.
Do not open in between.(other wise , it will become vinegar).
Now carefully open the container (it will be under high pressure), by slowly releasing the cap.
Add 3 tbsp of this apple essense to the soaked the dry fruits while making the cake.
Refrigerate it and finish it within 15 days.

Update:
Nowadays I am simply using the orange juice with few spoons of apple juice and its giving a similar cake without alcohol or rum extract.

Monday, December 15, 2008

Here comes the Christmas !

Christmas is the happiest time of the year for me from my childhood. When I was a kid we lived in a town called Palayamkottai , where Christians live in bunches and we can easily see Anglo Indians too. So its of no wonder that they dedicate the whole December month for Christmas and New Year eve.Though I had very lesser opportunity to celebrate the birth of Jesus, I love the festival like anything. (I was born a Hindu and living as a Christian, admire all religions). They used to dcorate the whole city with 'electric stars' and colorful serial bulbs. Every day Santas from various denominations make a visit to our houses along with the carol service. This will be the peak moment for everyone to get gifts and offer the carol service people some offering for the Church.
I always have a great feeling that it is a time of joy and for positive thinking towards the world. So I love to decorate our house with lights, wreath , Christmas tree and Nativity scene.
We set up the tree on the Thanks giving weekend. Then within a week finish all the decorations for the tree. Now the tree would be ready to shine by December 1st.
Then during the advent season (Nov 30 to Christmas), there will be special mass on Sundays to emphasize the true meaning of Christmas.
Advent, the beginning of the liturgical year in the Catholic Church, is a time of preparation for the coming of Christ at Christmas. It was historically known as "little Lent," because, like Lent, it is a time of repentance, with prayer, fasting, and Confession.
Advent begins four Sundays before Christmas, and therefore varies in length between 22 days and 28 days. (In 2008, it is 25 days long.) The following is a list of the dates of the Sundays and major feast days that fall in Advent 2008.
* First Sunday of Advent (Sunday, November 30, 2008)
* Feast of Saint Nicholas (Saturday, December 6, 2008)(Our Santa clause)
* Second Sunday of Advent (Sunday, December 7, 2008)
* Immaculate Conception (Monday, December 8, 2008) ,Holy Day of Obligation.
* Our Lady of Guadalupe (Friday, December 12, 2008)
* Feast of Saint Lucy (Saturday, December 13, 2008)
* Third Sunday of Advent (Gaudete Sunday) (Sunday, December 14, 2008)
* Fourth Sunday of Advent (Sunday, December 21, 2008)
* Christmas Eve (Wednesday, December 24, 2008)
* Christmas (Thursday, December 25, 2008), Holy Day of Obligation.
On the night before Christmas (or 3 days before) we set up a 'nativity scene ' depicting the birth of Jesus. On 24th evening, before attending the Christmas mass we visit our friends and distribute snacks and sweets.
Then by 8 PM (in India at 12 midnight) after dinner, we attend the special mass for Christmas . The mass ends by receiving holy communion and kissing the 'Infant Jesus'
The next day ,that is the Christmas day will be the Biriyani making day for me while my prince charming stretching himself before the TV:)
This is how we celebrate Christmas.
This is the wreath I made for our door decoration.

This is the tree on the first week. The top ornament denotes Jesus Christ , while other ornaments denote the members of the holy family. This tree is otherwise called a Jesse tree or a family tree. I will post the entire setup along with 'nativity scene' soon.

My regular readers may know that i make a trial run before every special dish. Likewise , while searching for a fruit cake I got Chams, Christmas fruit cake and it turned out to be a great success.
Thanks Cham. (I used 1/2 cup olive oil instead of butter. This is the only one variation and my cake got baked in 55 minutes at 350 deg...a gas operated oven). This is a very very good recipe and I have never got such a nice cake before.So I have planned to do this a lot.

Let's celebrate the Christmas feast event at Purva's place also.

Merry Christmas!

Friday, December 12, 2008

Broiled Eggplant chutney

Broiled / Grilled / barbecued eggplant chutney is an interesting dish to make. My mom used to prepare this simple delicacy often.Those were the days when we didn't count our calories or gone after fiber calculations. But our traditional cooking involves only a very little oil and supplied us what we really needed.
Every night while doing my homework I used to ask my mom "Mom , anything interesting tonight?" If she says she got some fish to cut or a big brinjal to broil, then I will grab a stool and start watching her. I love the way my mom pricked the giant size Eggplant and her broiling technique.
Ok , Coming back to our chutney,
We may need a big purple or white eggplant to do this. Otherwise 3-4 small size brinjals are enough. I served this as side dish with steamed rice, (ketti paruppu) fried dhal and paruppu rasam.


Ingredients:

Big size eggplant - 1 (1/4 kg)
red chillies - 3
Tamarind - a strawberry size
salt - to taste.
olive oil (or any oil)- few drops

Equipments needed:

Hand mortar - (optional..we can use a blender also)
metal skewer
gas stove (electrical stoves don't do that good).

Method:
wash the eggplant. Remove its crown , dab with a clean kitchen cloth and remove the moisture. Poke a few holes into it. Then coat it fully with a few drops of olive oil or sesame oil. Insert the skewer in to the eggplant through the crown area. Switch ON the stove and broil it by holding the skewer.
I used a vadai kambi (a sharp metal rod used to flip vadai).
Broil the eggplant , till its skin becomes dark .
Now you can see the eggplant cooked tenderly. (If in doubt, press it gently with a spoon and the eggplant with fall apart).If not cooked properly, then broil it again.
But I am sure within 5 minutes , it will be cooked softly.
Then Cool it and remove the skin. Put it in a blender or hand mortar. Using a hand mortar will definitely enhance the flavor, but I used a blender.
Add red chillies, salt and tamarind to it.
Grind it to a coarse paste. No need to temper(thalippu) it. But if you like , you can crackle a few mustard seed with curry leaves and run it over the chutney.
But I like the traditional chutney which does not call for any tempering.
Eggplant chutney is ready.

Serving suggestions:

It can be best served with dosai, idly , roti or steamed rice.

Thursday, December 11, 2008

Palani Panchamirtham

I think Panchamirtam is the oldest form of Indian jam or fruit mix sweet made in Hindu temples for pooja. This is also sold as prasadam or 'holy food' . The Hindu Lord Murugan's Palani temple is in Palani of Tamilnadu , India. The prastham offered here is Panchamirtham. The Panchamirtham, collected after abhishekam (Abishekam means a holy ritual of showering  the main deity) , is not only a delicious and nourishing food but also has astonishing properties . It remains good for months even without fridge.The main ingredient is the baby banana (viruppachi banana).
I am a great fan of this Panchamirtham , so i decided to make it at home. Though i could not get the original taste , i am satisfied with its closeness .
I got the recipe from the web site of Palani temple. . But tweaked it with what we get here.
I am giving below the original recipe and my modified version.
The original recipe:
Panchamirtam consists of kandasari sugar from Kangeyam area, dates, kismis, sugar candy (kalkandu), cardamom and ghee in proper proportions: plantains (viruppachi banana) 100 numbers; kandasani sugar 10 kgs.; dates 1 kg.; Sugar candy 500 giris.; kismis 500 giris.; ghee 250 giris.; cardamom 25 giris. The plantain is crushed fully. Sugar is then mixed with it. Seedless dates, sugar candy and kismis are added in the third stage. The last items to go into the preparation are cardamom and ghee.

Home made Panchamirtham.


Ingredients:
Baby banana - 6(very ripe)
Pomegranate - 1/2 cup
Raisins - 20
Cardamom (powdered)- 1/2 tsp
Dry dates(chopped)- 3 tbsp
Apple(peeled & shredded)- 1
Jaggery (crushed) - 1 cup
Honey - 1/4 cup
Ghee - 2 tbsp

Method:

Take a clean , dry mixing bowl.
Mash the bananas with hand and mix the pomegranate, raisins, dates, shredded apple, Jaggery , honey and ghee together.
Mash them well.
Store in air tight container in the refrigerator.

Serving suggestions:
Serve cold as dessert.

Congrats and thanks Hema!


This post is dedicated to congratulate Hema of Adlak's kitchen on her 100 th post and for celebrating it in an unique way.
Congrats on your 100th post Hema, wish you many more. What a beautiful and thoughtful post.Thank you so much for thinking of me !

Wednesday, December 10, 2008

Pakora / Fritters

I think a pakoda does not need any intro for a typical Indian. But for those who do not know about it... A pakoda is a deep fried fritter made out of besan flour and onion:)
Back in India they sell this crispy pakoras even in small sweet stalls. They make so many varieties of pakoda like cashew pakoda, mint pakoda,Keerai(greens)pakoda,bitter gourd pakoda, onion pakoda and an ordinary pakoda. During winter or rainy seasons ,they place the hot stove in the front portion and fry it as per our order. I am sure nobody can resist buying these tempting hot fritters on their way back home after a busy day:)
Nowadays I make this as a side dish whenever I run out of vegetables.
I am narrating the basic procedure for an 'ordinary pakoda'. You can make innumerable varieties out of it.
Lets beat this chill weather by this hot pakoda:)


Ingredients:
Besan flour - 1 cup
Rice flour - 1/4 cup
Red onion - 1 (big)
green chilli - 3
ginger - 2 inch
salt - to taste
curry leaves- 1 brig
cilantro - 1/4 bunch
mint leaf - a handful
red chilli powder - 1 tsp
curry (garam) masala powder - 1 tsp
oil - to deep fry (250 ml)

Method:
Chop the onion into thin slices.
Finely chop the green chilli, ginger, cilantro and mint leaves.
Mix the chopped veggies with the besan flour and rice flour.Add chilli powder, salt and garam masala powder.
Try to knead the flour without adding water.
Heat 2 tbsp oil and add it to the mixture. (optional). This makes the pakoda more crispy. Instead of oil we can add a few drops of water also.
The dough consistency should not be like chapathi dough. It should be like a mixture of moistened flour with veggies.
Heat oil in a kadai. Drop small pieces of mixture in to the hot oil and fry to get crispy fritters.
Take them out and place over paper towels to remove excess oil.
Crispy pakoda is ready!

Serving suggestions:
Serve hot as an evening snack or as side dish with any variety-rice.
Goes fine with curd rice or sambar rice.

Monday, December 8, 2008

Bitter gourd fry

Bitter gourd is a veggie that people hate to eat. It has been believed that it helps to reduce blood glucose level. Mostly it is cooked with tamarind or tomato and even some people end up in adding sugar to subtle its bitterness.
But here is a recipe which I learned from my mom to cook it in a more tasty way.
Stick to the recipe and you will see the bitterness vanishing.
Enjoy!


Ingredients:

Bitter gourd - 4 (1/4 kg)
oil - 3 to 4  tbsp
mustard  or fennel seeds- 1/2 tsp
Red onion - 1
chilli powder - 1 tbsp
garam masala powder - 1 tsp
salt - to taste.

Method:

Carefully examine the bitter gourd while buying.
They should be dark green in color with the spikes closely packed. Discard the matured seeds.
Heat oil in a kadai.
Add 1/2 tsp mustard seeds and after they splutter add the chopped bitter gourd.Cook it with constant stirring and uncovered.
After 10 minutes add the chopped onion.
Fry really crisp.
Finally add salt , garam masala powder and chilli powder.
sprinkle a handful of water and cook it covered.
Adding a little water helps to coat the masala thoroughly.
open the lid, Saute for 2 minutes and put off stove.
crispy bitter gourd fry is ready.
Adding more oil makes it bitter-less curry:)

Serving suggestions:

This is a good combination with 'paruppu satham' (Toor dhal and rice)
It takes 25 minutes to cook 1/2 kg.

Thursday, December 4, 2008

Nilgiri chicken kuruma

The Nilgiri or Blue Mountains often referred to as the Nilgiri Hills, are a range of mountains in the western ghats.It is famous for its hill resorts like Ooty ,TamilNadu, India.
A good way to enjoy the Flora (plant life) of Ooty is to go for trekking.
Over 2700 species of flowering plants, 160 species of fern and fern allies, countless types of flowerless plants, mosses, fungi, algae, land lichens are found in the Nilgiris.
It was originally occupied by the tribes called Todas.They worship nature .They have their own language, rich arts and crafts .Their food habits are very simple and use a lot of greens in cooking instead of our 'curry powders'. (Reference: Wikipedia)
They are known for their Nilgiri tea and 'Nilgiri chicken kuruma'.In the olden days even before the masala sachets made their way to the village petty shops ,these people would have found a unique way to make their healthy chicken recipe. Later on , even star hotels master it and earned a lot from this delicious curry.Though this kuruma seems more green than our chilli powder version, the taste remains more classic than any other one.Here is the recipe for their famous 'Nilgiri chicken kuruma'.
(Pardon me for this picture.Actually my camera did not do any justice and showed the green color as a hue of brown.)


Ingredients:
chicken - 1/2 kg (with bones)
Onion - 1 (50 gm)
gingelly oil - 2 tbsp
tomato - 1
curd - 1/2 cup
potato - 3
turmeric powder - 1/4 tsp
Fennel seeds/ perunjeeragam - 1/2 tsp
salt - to taste.
chopped mint and cilantro - 2 handful (for garnishing)
Paste 1:
(To soak and grind)
shredded coconut - 3 tbsp
cashew - 6 (optional)
poppy seeds - 1 tbsp
coriander seeds - 2 tbsp
cumin seeds - 1/2 tsp
green cardamom - 3
cloves - 4
fennel seeds - 1 tsp
cinnamon - 1/4 inch
Paste 2:
green chilli - 10
cilantro - a handful
mint leaf - a handful
paste 3:
ginger - 2 inch
garlic - 4 pods

Method:

Wash and clean the chicken pieces. Apply turmeric powder and wash again.Marinate it with curd, salt and paste 2.
Soak the items given under paste 1 for 1 hour and grind them to a creamy paste.
Heat oil in a kadai. Fry the fennel seeds to red color.
Add the chopped onions and fry till it becomes golden brown.
Now goes the chopped tomatoes. After the tomato gets cooked , add the ginger garlic paste (paste 3). After the raw smell changes add the chicken pieces and stir for some time. Now add the paste 1 with 2 cups of water.
Peel and cut the potato in to big pieces and add it to the boiling chicken.
Close the vessel with a lid and stir occasionally.
cook it for nearly 1/2 an hour or till the chicken becomes tender.
This kuruma can be like a thick gravy.
After putting off the flame add finely chopped mint leaves and cilantro.
Nilgiri chicken kuruma is ready.

Serving suggestions:

Serve hot with steamed rice, Idly, dosa , poori,chapathi or paratha.
I served this with Malaysian parotta , bought from Indian stores.
Serves 5 people.

Wednesday, December 3, 2008

Methi sweet ball / Venthaya kalli


Venthaya kalli / Methi sweet ball is a healthy breakfast served in southern parts of India during summer. Methi is highly beneficial in reducing blood sugar level and fat tissues. So methi leaves or methi seeds should be consumed atleast once in a week.
As far as I know only grandmas do these kallis perfectly without lumps:) So I made some innovations to simplify it and here goes the recipe.

Ingredients:

Rice flour - 1/2 cup
fenugreek seeds/ methi seeds - 3 tbsp
water - 2 cups
Jaggery - 100 gms
gingelly oil - 2 tsp

Method:

Soak the fenugreek seeds overnight inside refrigerator or for just 2 hours.
In the morning grind it to a fine paste and mix rice flour to it along with water.
Same time dissolve the jaggery in one cup of boiling water and filter any sand / dirt. Heat the purified jaggery solution in a nonstick kadai and slowly introduce the rice + methi paste . stir continuously to get a thick consistency. Then add gingelly oil.
Remove heat if the mixture starts leaving the edges.
Methi kalli is ready.

Serving suggestions:

Serve hot with a spoon of gingelly oil over it.
Enough to serve 2 people.

Thursday, November 27, 2008

Mysore bah

This is the first time I have ever tried making Mysore bah at home.
When I was in Madras , there was no chance for me to prepare my favorite sweets because of its easy availability and fresh taste. But thanks to abroad life style all of us have become 'super chefs':)
I am sure all my regular readers and friends will know my schedule. So as usual here is a snack / dessert for the long weekend.
My request is do not get panic to see the measurements of oil and ghee here.
The bitter truth about Mysore bah is it contains lot and lot of oil:( I found out this while preparing this dish only. Now after making this sweet at home I am reconsidering my preference on sweets:)
Calorific value: 47 gms gives nearly 195 calories. (Reference The daily plate)
Reference:
Method from Vah chef and Ingredients from my mom's recipe note book.
Inspired by the pictures and presentations of Vibaas Besan burfi.
I am a great fan of the vah chef at vahrehvah.com. Kindly go through his videos before making this mysore bah. His procedures are wonderful and so easy to follow.

Ingredients:
Besan flour / Bengal gram flour - 1 1/4 cup (250 gms)
sugar - 2 cups
oil - 1 cup
ghee- 1/4 cup
cardamom - 3 pods (optional)

other items:
Big Non sick tawa - 1
vessel to heat oil - 1
Laddle for hot oil - 1
Long handle non stick spoon - 1
vessel for flour - 1
sieve
a plate / a cake mould.

Method:

Measure the besan flour and keep it in a broad vessel.
Heat oil and ghee together to smoky. Take a laddle of hot oil and pour to the flour.
Mix gently and remove the lumps by using a sieve. This is very important to keep the basan flour in a loose state without any lumps.
Now heat the water and sugar to boil. The consistency should be very thick enough to make soft balls if dropped in cool water.
Add the sieved besan flour little by little and stir continuously till it gets separate from the vessel.
Same time heat the oil to smoky hot and add to the hot mixture little by little.
Add hot oil in three or four intervals. You may see the flour forms a froth / bubble all over and starts to change color .
This is the perfect condition to switch off flamme.
Pour it to a plate and let it cool.
Cut in to small squares or diamond shapes.
Mysore bah is ready.

Serving suggestions:
Makes 30 pieces of size 2"x2"x2" diamond shapes. (Number may vary by height of plate and pieces size).
Serve as dessert.

Wednesday, November 26, 2008

THANK YOU !!


Happy Thanks giving day everybody. Thank you my friends for all your support and encouragement. Lets spread the smile and happiness through our blogs.
Have a great weekend!

Friday, November 21, 2008

Poori festival

I am sure all of you guys know how to make poori. But I am posting it to show some of the side dishes. May be a feast to our eyes too:)
Last weekend we had a small get-together in our house and I made poori with channa and Hotel style 'Poori kilangu'. Poori-kilangu is a famous dish in South India. Almost every restaurant will gladly present this kilangu with poori. Poori-kilanu is a non spicy potato masala curry made without much masala powders .This is the masala they keep inside paper-roast dosa to make masal dosa.

Poori:


Ingredients:
Wheat flour / Al purpose flour - 2 cups
salt - 1/2 tsp
baking soda - 1/2 tsp
water - enough to knead
oil - 300 ml (1 1/2 cup)

Method:

Mix flour, salt and baking soda in a wide vessel. Add water little by little to make a chapathi / bread dough. coat with oil and keep aside.
Do not make the dough a long time before making poori, otherwise they will absorb a lot of oil.
Divide the dough into small lemon size balls.
Then using a rolling pin , flatten each and every ball in to thin discs of diameter of your palm . keep them on plastic sheets.
Immediately heat oil and fry the flattened pooris one by one both sides.
Keep the fried pooris on paper towels to extract the left over oil.
Then serve hot with channa or potato masala.
Makes 25 number of palm size pooris.

Poori-kilangu:


This is the yummiest potato masala served with poori in South India.
Ingredients:
Potato - 4 (300 gms)
onion - 1
green chilli - 4
ginger- 2 tsp (chopped)
curry leaves - a brig
mustard seeds - 1/2 tsp
channa dhal (Bengal gram) - 2 tbsp
turmeric powder - 1/4 tsp
oil- 2 tsp
Besan flour - 2tsp
salt - to taste

Method:
Wash and Pressure cook the potatoes . Peel the skin and cut in to big chunks.
Mash the potato as fine as possible. (some people keep it as small cubes).
Chop the onion, green chillies , curry leaves and ginger.
Heat oil in a vessel. Add channa dal and then mustard seeds.
After the mustard seeds splutter add the chopped onion, green chilli curry leaves and ginger. Saute them a while till onion gets cooked add turmeric, salt, mashed potatoes.
Check for salt. Let it get thicken.
Mix 2 tsp besan flour with 1/4 cup water and add that to the boiling potatoes.
After a minute put off stove.
Poori-kilangu masala is ready. This is the basic version prepared in Madras hotels. Some people prefer adding tomato, green peas also.
Makes 2 cups of thick gravy like potato masala.

Channa masala:


Ingredients:

Chick peas / whole channa dal - 1 cup
tomato - 1
Red onion - 2 (medium size)
green chillies - 4
coriander leaves - a handful.
mint leaves - few
curry leaves - few
curd - 1/2 cup
cumin seeds - 1/2 tsp
red chilli powder - 1 tbsp
turmeric powder - a pich
MTR channa masala powder - 1 tsp (optional)
salt - to taste
olive oil - 1 tbsp
cardamom - 2
cloves - 2
Fennel seeds - 1/2 tsp
bay leaf - 1
Method:
Soak channa dal overnight and cook it to tender in a pressure cooker for 5 whistles.
After getting the first whistle ,I reduce the flame to the minimum and heat the cooker for another 10 minutes to cook this dal. You can follow this idea if you want to reduce the noise pollution:)
Grind ginger and garlic together.
Grind curd ,cardamom, cloves, cumin seeds and 1 onion together. keep aside.
Heat oil in a pan. fry some fennel seeds and bay leaf.
Add the chopped onion, green chillies ,curry leaves, cilantro and mint leaves. After the onion turns golden brown , add ginger garlic paste and saute well.
Now add cooked channa dhal with the remaining water.
Add chilli powder, turmeric powder , channa masal powder and stir well.
close the lid and cook for 5 minutes.
Add the ground curd masala and let it boil till the raw smell vanishes.
Now add salt , curd and mix well.
Using a laddle mash a few channa dhals to get a thick gravy.
Boil it for one minute and Switch off immediately .

Serving suggestions:

Goes well with parathas ,poori , roti and naan .
Makes 2 cups of channa masala.

Wednesday, November 19, 2008

Thukkada


I am sure this is the simplest of all the snacks ,no need to to spend a lot of time or looking for rare ingredients. Still the flavor and crispy Thukkada will attract every one in the house.
It just took 20 minutes to make the entire dish .

Ingredients:

All purpose flour - 1 cup
rice flour - 1 tbsp
baking soda - 1/4 tsp
garam masala - 1 tsp
curry leaves - 1 brig (torn into pieces)
salt - 3/4 tsp (check)
chilli powder - 1 tsp
water - a little
corn oil - to deep fry (250 ml )

Method:

Mix all the above except oil and water.
Then add water little by little to make a firm chapathi dough.
Divide the dough into equal lemon size balls.
Make thin chapathis one by one and cut diamond shapes out of them.
Heat oil in a pan .
Immediately deep fry them in oil to golden color and strain them out.
Then roll out another chapathi, cut diamonds and repeat the process .
Let them cool and store in air tight box for longevity.
Serve as snacks with tea in the evenings.

Sunday, November 16, 2008

Showers of awards !!

More and more awards !!!
I think this is awards mela here in our 'blog kingdom' and Some of my friends have passed me a few more awards. I am so happy and excited about these new awards.

Gita and Yasmeen have passed me the Great Buddy Award and kreative blogger award .
Thank you soo much friends, I am so honored :)
Malar Gandhi and Purva have passed me the Hard working blogger award and Kreative blogger award.
I am so happy to receive these award. Thank you friends :)

I gladly pass those awards to the following friends.
Usha from http://veginspirations.blogspot.com/
Deesha from http://vegetableplatter.blogspot.com/
Vij from http://spicesnaroma.blogspot.com/
Anu from http://mixtomatch.blogspot.com/

Jayashree has passed me the Kreative Blogger Award. Thanks a lot dear :)
I am glad to pass this award to
Vibaas from http://vibaas-world.blogspot.com/
Shama from http://easy2cookrecipes.blogspot.com/
Mahimaa from http://spicesetc.blogspot.com/
Sujatha from http://spicykhazana.blogspot.com/

Ramya and Purva have honoured me with a 360 Deg. foodie award. Thanks a lot friends:)

I am passing this award to
Malar Gandhi from http://www.kitchentantra.com/
Gita from http://gitaskitchen.blogspot.com/
Yasmeen from http://yasmeen-healthnut.blogspot.com/ yasmeen
Shama from http://easy2cookrecipes.blogspot.com/
Mahimaa from http://spicesetc.blogspot.com/
Sujatha from http://spicykhazana.blogspot.com/

Congrats friends!
I owe you all big time. All of you deserve these awards even some of you may already have received these awards. I am displaying the Great Buddy Award , 360 deg blogger award , Hard working blogger award and Kreative Blogger Award in the left side column .
Enjoy!

Friday, November 14, 2008

Venthaya kulambu (Methi spicy gravy)

Fenugreek (Methi) seeds and leaves helps in reducing the fatty tissue in our body.
Help in digestion by improving the liver function and to increase blood formation.
It has also shown results in controlling diabetes mellitus.
Soak one teaspoonful of fenugreek seeds in water overnight and this water should be consumed in empty stomach in the morning for controlling Blood Sugar.
So it is good to add it in our daily cooking in some form.
From the link :

Medicinal value of fenugreek

I love this venthaya kulambu for its lovely flavor and simplicity. Many families will have their own recipe for this venthaya kulambu and I am sure every one's version will be yummier than the other.
And here is the Tirunelveli (my native place) version.

Ingredients:
Mustard seeds - 1 tsp
Tamarind - 1/4 lemon size
Turmeric powder - 1/4 tspn
small white or green Brinjal- 3 nos
cury leaves - 1 brig
onion - 1 small
Tomato - 1 small
Hing - a pinch (optional)
Salt - to taste
Oil - 1 tbsp

venthaya kulambu masala:

Fenugreek seeds- 1tbsp
cumin - 1/4 tsp
Thoor dal (Red gram) - 2 tbsp
Dry chilli - 4
shredded Coconut - 1 tbsp

Method:
Heat oil in a pan.
Add Fenugreek seeds, Thoor dal, cumin,Dry chillies and fry till it turns golden brown. Then add shredded coconut.
Fry to get golden color.Cool the mixture and grind this to a powder.
Soak Tamarind in hot water and extract juice. Keep aside.
Heat oil in a pan.
Splutter the Mustard seeds and add chopped onion and fry till it becomes brown.
Then add curry leaves and chopped tomato.
Fry the tomato till it becomes tender.
Then goes the tamarind extract ,turmeric powder, Salt and brinjal.
Cook every thing till the brinjal gets cooked.
Then add the ground venthaya kulambu masala and let it boil for 3 minutes.
Venthaya kulambu is ready.

Serving suggestions:
Goes fine with rice and chapathi.
If served with rice , paruppu usili can be a good combo.