Sunday, June 3, 2012

Whole chicken fry (Indian style)

In India some popular non veg restaurants attract the customers by displaying this mouthwatering red colored crispy whole fried chicken or whole tandoori chicken by lunch and dinner time. I am always attracted by colorful foods and love to try at home than eating out. Instead of the deep frying technique they use in hotels, I make this by shallow frying.   Recently I made this whole chicken fry remembering my mom. Many years back, I learned this recipe from my mom and it is always handy for me. Mom was always praised for her newer cooking styles and hospitality. Happy cooking makes delicious meals and pleasant memories and it is true with us always. Passing on this for all the chicken lovers out there:)

Marination:
Whole chicken -  1.5 kg (3 lb)
lemon - 1
salt - 2 tbsp
red chilly powder - 2 tsp
black pepper powder - 1 tsp
cumin powder - 1 tsp
garam masal powder /curry powder - 1 tsp
ginger garlic paste - 2 tbsp
turmeric - 1 tsp
red food color - 2 pinch (optional but looks good)


Clean the chicken after removing the skin.  The wings can have some skin on.
Wash well. Prick all over using a fork.
Apply salt and lemon juice and keep aside.
In the mean time mix all the other ingredients for marination and rub over the chicken and insert some marination inside too.
Keep this marinated chicken for 1 hour or inside a zip lock pouch and keep refrigerated overnight. (I fried after 1 hour, didn't do overnight marination this time).

Frying the chicken:


Heat a heavy bottom wok with 1/2 cup oil. (Frying in ghee or butter is the best. Coconut oil also makes the chicken tastes good). Or use any frying oil.
First put the breast side down and fry in medium flame for 10 minutes.
Flip carefully and put a tight lid. Cook covered in low heat for 15 minutes.
Again flip and cook covered for 10 minutes.
Now take out  the lid and fry in medium heat both sides, till it is completely fried and becomes red.

Whole chicken fry is ready!

Note:
More care should be taken while flipping the chicken, if the wok is not heavy.
Keep the wok in the back burner and hold tightly while flipping.
Always fry the chicken in low to medium heat.
Cook covered and ensure if it is completely fried before serving.
Time taken : 40 minutes in low - medium heat.


Whole fried chicken served.


Serving Suggestion:
Serve hot with briyani or kushka or parotta and raitha.
Squeeze 1/2 a lemon over the fried chicken before serving.

Friday, June 1, 2012

Lemon juice

Here is a simple lime / lemon juice for the summer. My amma used to make this drink whenever there was a guest, as we there is a big lemon tree in my appa's house. At first we had a large lime variety called 'Malta lime' and then we planted this country lemon tree there. That was our everyday cooldrink in childhood during summer and I love the way how amma used to make it in large vessel for many. Happy memories and cool cool drinks linger in our minds forever !


Ripe Lemon fruits are bright yellow and oblong in shape. These lemons were as big as an apple:)

Ingredients:
Lemon or lime - 1 (big)
water - 6 cup
sugar - 3 tsp per cup of water or more
rose essence - 1 drop
ice cubes - 3 per glass

Method:
Dissolve sugar in water and squeeze the lemon to it.
Add the rose essence and filter the juice to remove any seeds.
Keep refrigerated till use or serve immediately.
Pour in glass tumblers and serve with ice cubes.

Lemon juice is ready!

Note:
1. Some people prefer adding salt instead of sugar (1/4 tsp per glass).
2. This plain lemon juice can be enhanced by adding plain soda (carbonated water).
3. Adding a tsp of nannari sarbet (Indian sarsaparilla sherbet)syrup to this will taste great.
4. This plain lime juice tastes good with white sugar only.
5. If refrigerated, serve within a day to ensure fresh smell.

Friday, May 25, 2012

Potato fry

Potato is a must for us at least once in a week:) Here is my amma's (mom) favorite potato fry, which she would make along with sambar or lemon rice often. She would always use coconut oil in most of the cooking like tempering, that would take this usual potato fry to the next level. I too love the coconut oil flavor in this fry. Try this and enjoy!


Ingredients:
Potato - 4 (200 gm)
red onion - 1
coconut oil - 2 tbsp
fennel - 1 tsp
red chilly powder - 1 tsp
garam masala powder - 1/2 tsp
salt - to taste

Method:
Peel and cut the potato and onion into small cubes.
Heat oil in a thick bottom wok and add fennel.
After it starts becoming mild red, add the onion and saute till it wilts.
Then add the potato and fry for 2 minutes.
Reduce the heat, add salt and cook covered.
After it is cooked and starts turning little crispy , add the chilly powder and masala powder. Again stir till raw smell vanishes.
Switch off.
Potato fry is ready!

Serving suggestion:
Serve hot with sambar rice, curd rice, lemon rice or chapathi.
Makes a good side dish for lemon rice for picnics.

Tuesday, May 22, 2012

Alfredo sauce

Fettuccine pasta with alredo sauce is our favorite whenever we visit any restaurant. One day I wanted to make some pasta at home and bought a bottle of the alfredo sauce but it tasted different than what we tasted. Then I learned that the restaurants make it fresh always and it is very easy too. There are many ways to prepare this milky white satin like alfredo sauce. I wanted to try one with cream cheese, as I heard from many about that. Then I got the basic recipe from cooks.com and modified it according to need. This is the basic alfredo sauce without alcohol and broth. This sauce tastes similar to the restaurants and now I am confident that I can make a decent alfredo sauce whenever we need.
Any cream cheese can be used. I used a low fat version.

Fettuccine pasta in alfredo sauce.

Ingredients:
(for 2 people)
unsalted Butter - 2 tbsp
cream cheese - 4 tbsp
all purpose flour - 2 tbsp
salt - to taste
pepper - 1 tsp
garlic powder - 1/2 tsp
Italian seasoning - 1/4 tsp
mozzarella cheese - 3 tbsp
whole milk - 1/2 cup or more

Method:
Heat a wok and add butter. Keep the flame in low. Add the flour and cook for a minute without changing the color. Add milk and bring to a boil. Then put all other ingredients and mix well. Cook till cheese melts and sauce looks like smooth.

Serving suggestion:
Cook pasta according to directions in the package.
Add the alfredo sauce to the drained cooked pasta and mix well.
Top it with some more shredded cheese and serve.

Monday, May 21, 2012

Chicken biriyani in cooker

Briyani in cooker is not traditional, but surely a good method when we have to prepare in a small quantity or for a lunch box. My mom would prepare dum briyani only for festivals as it was a time taking process back then. As a 12 year old, I started involving in cooking with mom when I fell in love with the vast ingredients she would use for briyani:) She would like me to keep the kitchen and store room neat, stocked up and organized...may be that was the first lesson before chopping veggies:) After learning her vegetable briyani in cooker, I started preparing chicken briyani in pressure cooker cooker too, which was more easier (till I learned the wedding briyani). On seeing this she too started making cooker briyani quite often. Slowly it became a family favorite meal like a kichadi. My younger brother is a huge fan of my briyanis and would wake up on a Sunday earlier (by noon), only if I say I am making briyani or some non-veg dish:) Just like any sister, his smile makes me more enthusiastic and I tried to comfort him with his favorites always. So a few weekdays too, I would get up very early and prepare this for his lunch box to cheer him up. Recently he browsed through all my recipes and couldn't find his favorite cooker briyani recipe while suggesting his friends and asked for a recipe. Dedicating this simple, easy and quick briyani to venkatesh ,his colleagues and all:)

Chicken briyani with onion tomato pachadi (raita).

Ingredients:
Chicken - 1/2 kg

Other Ingredients:
Basmathi rice / Jeeraga samba raw rice - 1/2 kg (3 cup)
salt - to taste
Turmeric powder - 1/2 tsp
chilly powder - 1 tsp
Red onion - 1 (big)
green chillis - 6 (slit).
Lemon - 1/4
water - (rice x 2) - 2 = (3x2) - 2 = 4
(this is for cooker. For dum process it is 'minus 1')
curd - 1/2 cup
garam masala / briyani masala powder - 2 tsp

To temper: (whole spices)
bay leaves - 2
cashew nuts -10
raisins- 10.
ghee -  5 tbsp

Masala 1:
Tomato - 2

Masala 2:
cilantro- 20 tender plants
mint leaf -1 cup leaves
green chilly - 10
cashew - 5

Masala 3:
Ginger - 2 inch
Garlic - 1 full

Preparation:
Buy chicken red meat(thighs, wings, drumsticks with skin and bone). Breast piece won't give the proper taste.
wash and clean the chicken and cut into big pieces.
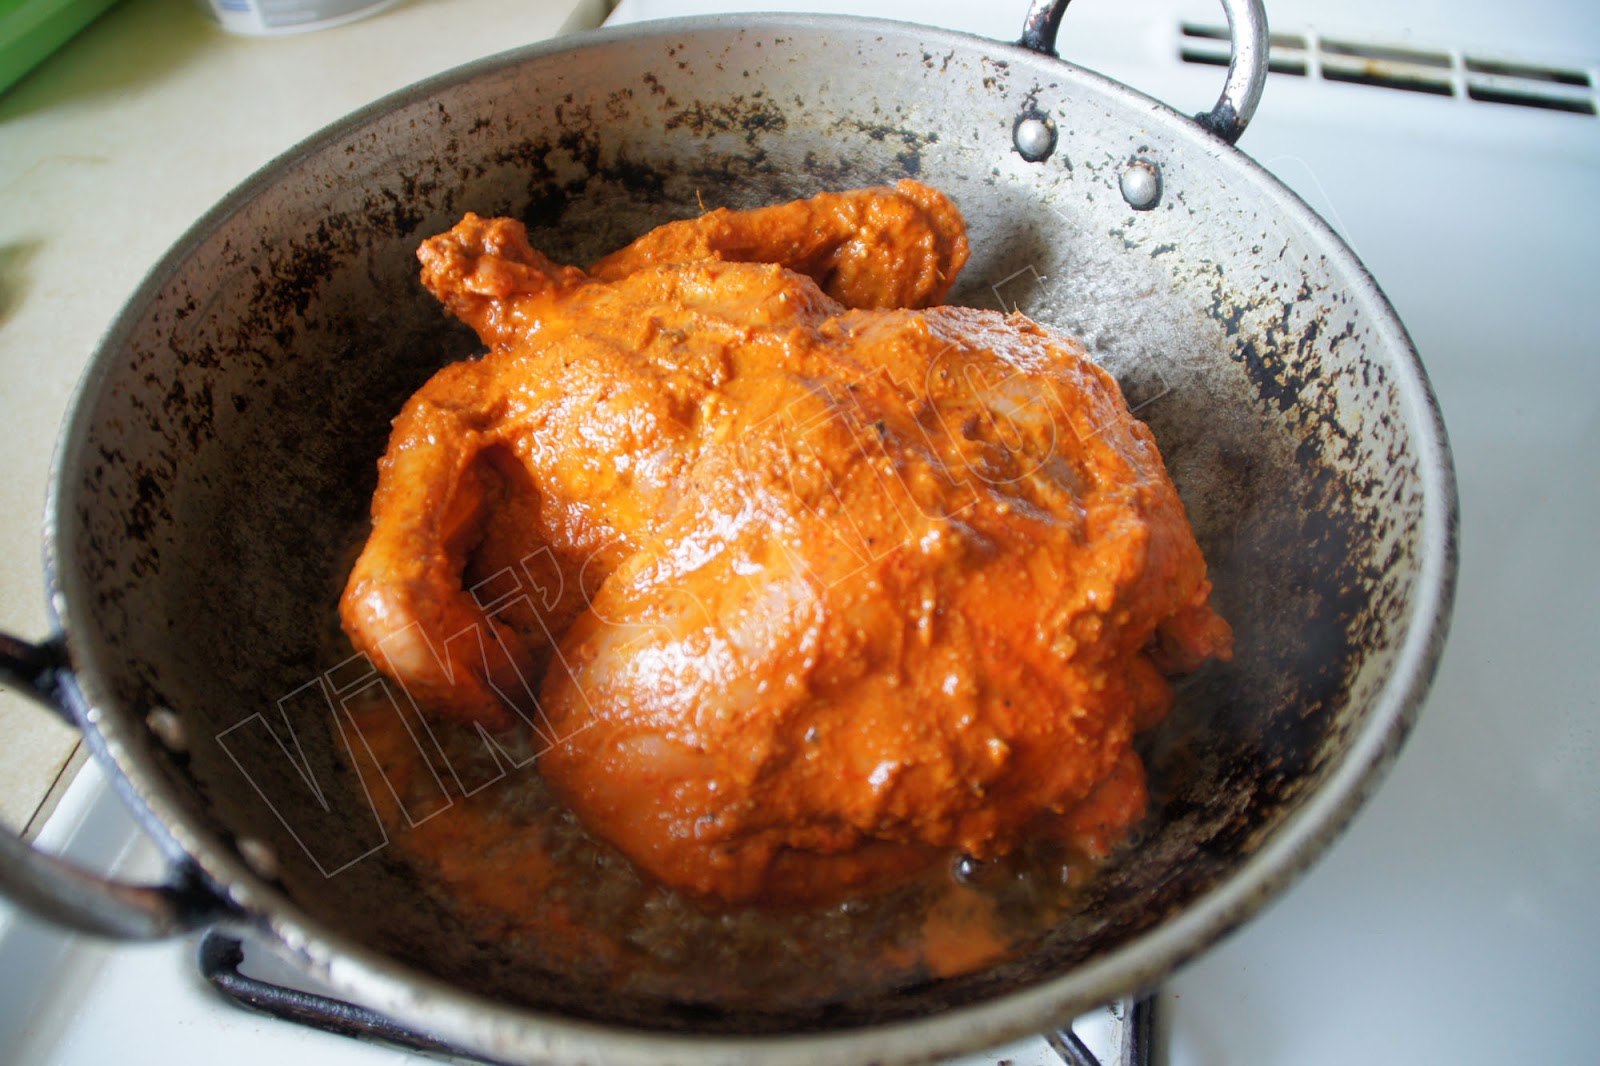
Add curd, turmeric powder, salt, chilly powder and marinate for 1 - 3 hours.

Wash the rice and soak it for 1/2 an hour.

Grind all the pastes separately.

Chop onion, chilly into long thin slices and keep aside.

Method:
Heat ghee  in a broad vessel or cooker.
Add the bay leaves and items given under tempering.
Then goes the chopped onion .
Fry it till golden brown and add the ginger garlic paste and stir well till the raw smell goes.
Now add the tomato paste and cook till the oil oozes out of it.
Then add the cilantro , mint paste and cook till the oil start oozing out. Now put the marinated chicken and add salt, powdered garam masala. Cook covered in low heat till oil separates. Check the taste now. It should be little more salty.
Now add the soaked rice and uncut green chillies to the cooker vessel along with the prepared masala. Squeeze some lime juice over. Fry for a minute.
Before this start boiling the require water separately and pour water to rice, mix well. Let it come to a boil.(Boiling the water before adding helps in evenly cooking the rice , otherwise sometimes we get some uncooked rice while making briyani).
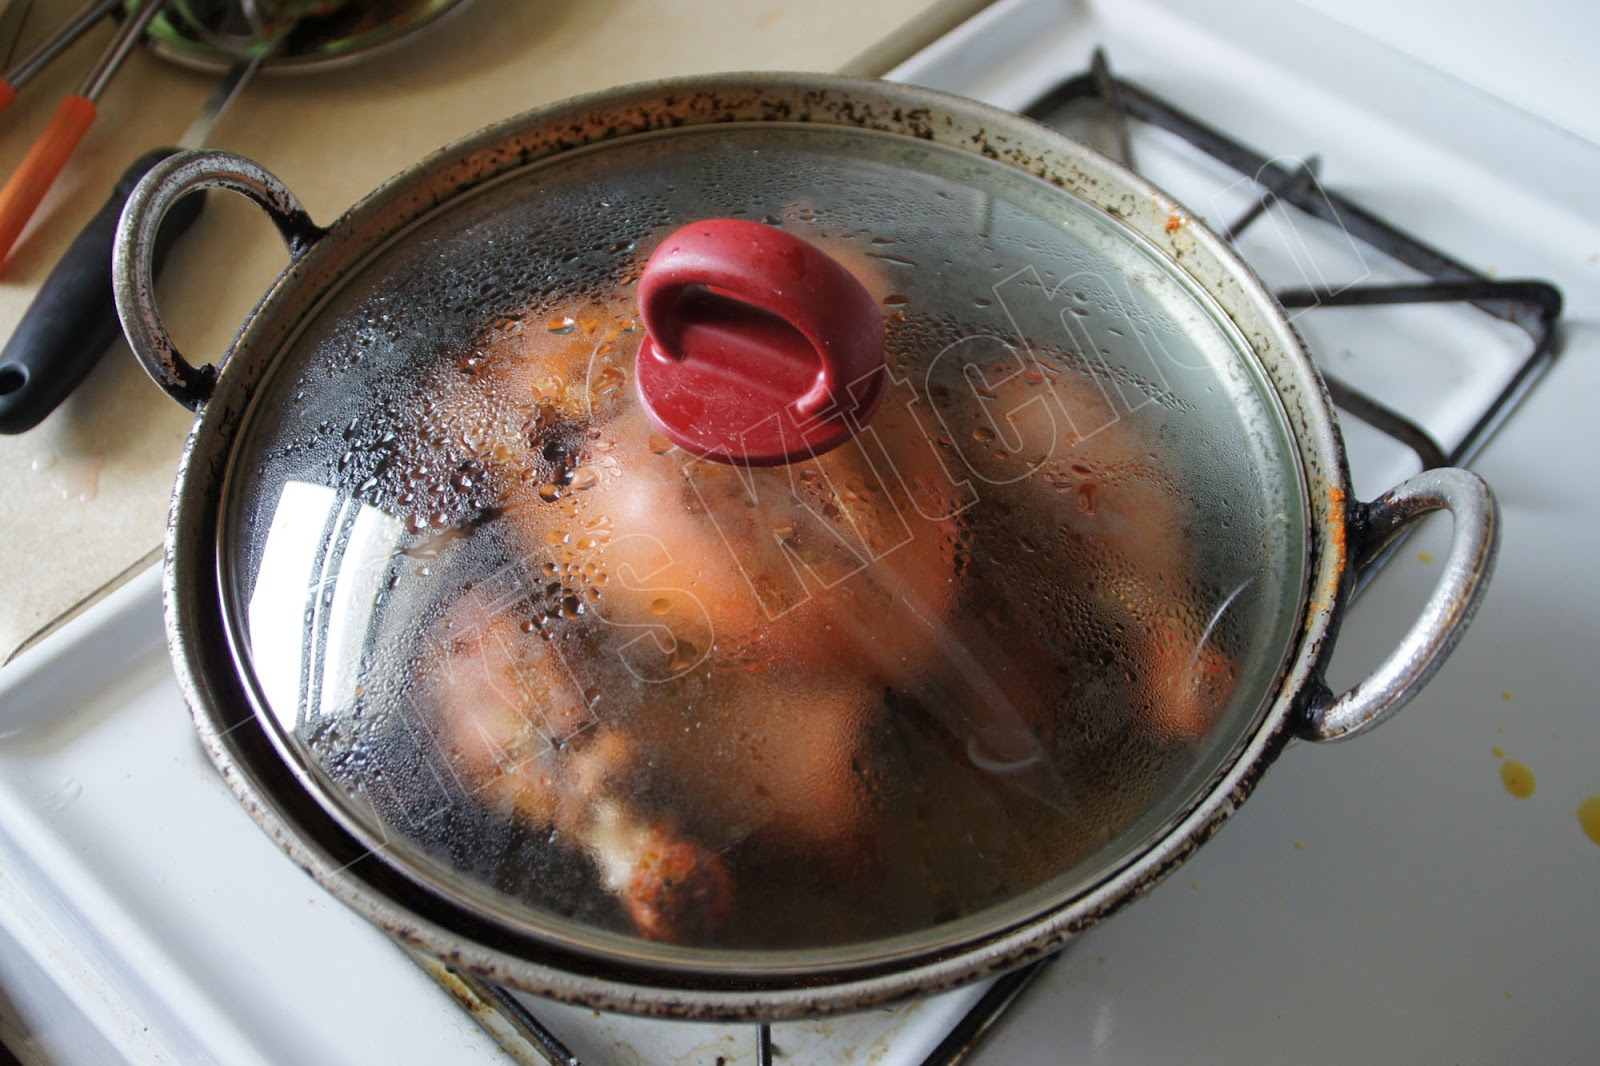
Close with the cooker lid and put a pressure valve.

(I use a cooker vessel inside the cooker and pour some water around the base cooker, just like idly cooking. Mine is a 10 liter cooker, but we can prepare it directly in cooker if we have a small pressure cooker).

Wait till a whistle comes. Reduce the flame to medium and cook for exactly 5 minutes. Switch off and open lid once the pressure is gone completely (5 minutes).
Add a little ghee over the biriyani and wait for 5 minutes. Don't stir for first 5 minutes (makes it mushy).

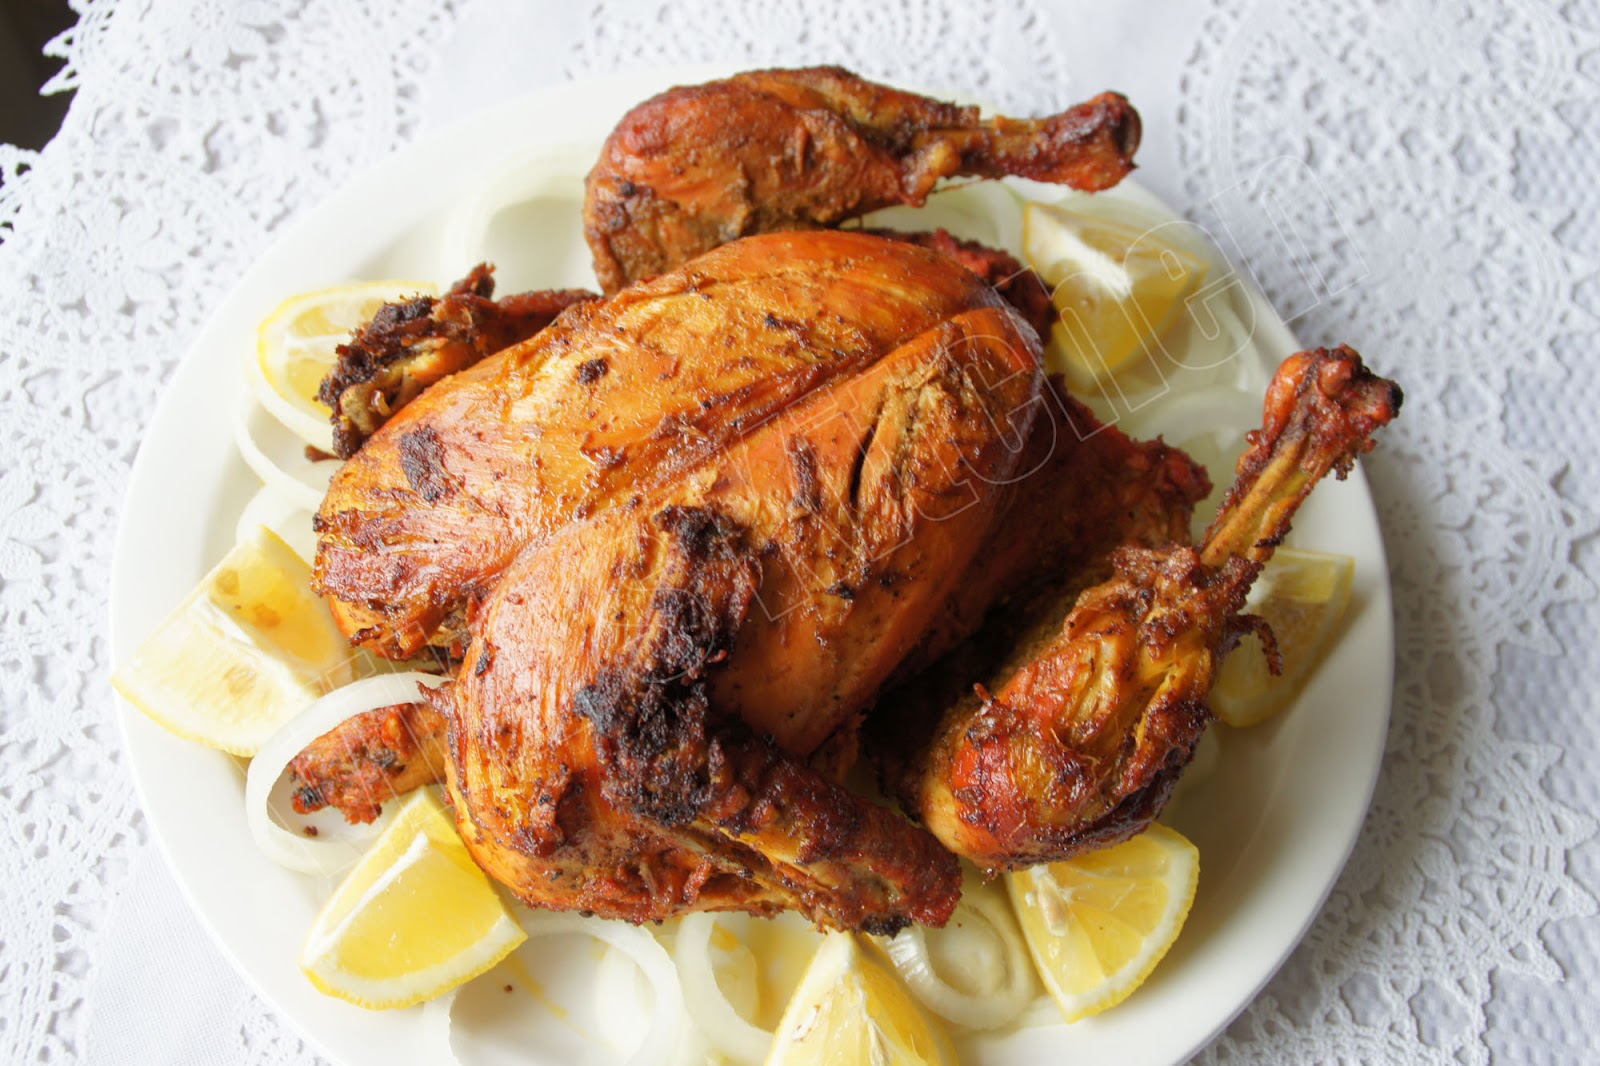
Chicken biriyani in cooker is ready!

Serving suggestions:
Take out the briyani carefully without mashing the whole rice and serve hot.
Serve hot chicken biryani with onion raitha and a gravy / fry.
Serves 4 people or more people.

Thursday, May 17, 2012

Ripe mango sambar

Other names: Mambazha sambar / sweet mango dhal .

 Last week hubby bought a batch of mangoes, but they were all kind of very sour. While I was wondering what to do with this whole batch of sour mangoes, surprisingly they all turned out very sweet on one day. Now I have a big lot of well ripe mangoes and we have to consume them quickly:) Then this recipe came into my mind to play with my favorite mango and here is that sambar:) I think it is a good recipe for the mango season. Unripe mango sambar is a common one in Tamilnadu but using  ' mango fruit' is quite unusual. I think it is a regional recipe of Tirunelveli. It would be like a sambar with little 'jaggery touch' but more flavorful. Try this and enjoy!


Ingredients:

To pressure cook:
Toor dhal/red gram lentil - 3/4 cup
water- 2 cups
turmeric powder - 1/2 tsp
asafoetida - 1 pinch
sesame oil- 1 drop
Wash and clean the lentil. Pressure cook the dhal with the above said ingredients for a whistle. Then reduce flame and cook for 10 minutes. Let it cool. Open the lid and add some fresh cumin seeds. Mash well using a spatula. Keep aside.
(we can cook the dhal in stove top also. But we may need to soak it first for 30 minutes or more and cook for 30 minutes).

Other ingredients:
Ripe mango - 1 (big)
Shallot (sambar vengayam) - 5
(choose small variety. Remove the skin, wash and clean. Don't chop).
Tamarind - amla (gooseberry / nellikkai) size ball
cooking oil / ghee - 2 tbsp
(Try to use ghee, as it gives more taste to the sambar).
curry leaves- 1 sprig
cilantro/ coriander leaves (chopped)- 1 tbsp
mustard seeds-1/2 tsp
fenugreek -1/2 tsp
dry red chilly - 3
salt - to taste
Sambar powder - 2 tsp

Method:
Soak the tamarind in 2 cups of hot water and extract the juice by squeezing.
Add the chopped ripe mango , salt and bring it to a boil. Let it boil till the raw smell vanishes. Don't let it overcook, as the mango mashes quickly.
Add the mashed dhal, sambar powder and bring it to a boil.
In the same time heat oil or ghee in a separate wok. Add the mustard seeds, fenugreek seeds and let the mustard splutter. Immediately add the shallots, curry leaf, chopped dry red chilly and saute well. Continue frying till the shallot starts getting a golden color (not red).
Pour this hot mixture over the dhal. Bring it to only one boil, add the chopped cilantro and switch off.
Mambazha sambar is ready!

Serving suggestions:
Serve hot over plain cooked rice.
The best side dish would be a spicy arbi fry.
Make some extra sambar, reserve for dinner and serve along with paper roast dosas.

Thursday, May 10, 2012

Potato cabbage curry

I always look for many ways to make my cabbage curry more interesting. One day I coined this 'new' curry by adding some potatoes to it. Surprisingly it turned out very successful, almost similar to the 'poori kilangu masala. Try this and make everyone love cabbage:)


Ingredients:
Potato - 3
cabbage - 150 gm
onion - 1
green chilli - 6
ginger- 2 tsp (chopped)
curry leaves - a sprig
mustard seeds - 1/2 tsp
channa dhal (Bengal gram) - 2 tbsp
turmeric powder - 1/2 tsp
oil- 1 tbsp
Besan flour - 2 tsp
salt - to taste
cumin - 1/2 tsp

Method:
Wash and cook the potatoes . Peel the skin and mash in to big chunks. Keep aside.
Chop the onion, green chillies , curry leaves and ginger.
Heat oil in a wok. Add channa dal and then mustard seeds.
After the mustard seeds splutter add the chopped onion, green chilli, curry leaves and ginger. Saute them a till onion wilts. Add the finely chopped cabbage and stir well. Sprinkle a handful of water and cook covered.
Now add turmeric, cooked potatoes and salt.
Mix 2 tsp besan flour, cumin with 1/4 cup water and add that to the boiling potatoes.
Bring to a boil and switch off.
If desired, garnish with freshly chopped cilantro.

Potato cabbage curry is ready.

Serving suggestion:
Serve with roti or chapati or like masal dosai.

Monday, May 7, 2012

Jamaican Jerk chicken

Some months ago, hubby dear brought me a sample of jerk chicken seasoning, which his friend Mr. Raynor gave him. First I used a tsp of it to marinate just a piece of thigh while making tandoori and found the taste incredible. Then I searched the net on 'how to make homemade jerk seasoning mix' and arrived at this site. Thanks to the author, I could prepare a jerk seasoning from scratch, and prepared a whole batch of jerk seasoned chicken thighs. I made a dipping sauce also with the leftover marinade and everyone liked it.
Then he again presented us a whole bottle of jerk seasoning, which we enjoyed to the core. Even before the baked chicken made its way to the dining table, we started munching it, saying WOW...HOT....ssss...superb:) That is one yummy chicken recipe, every spice lover should try!Thanks Mr. Raynor, you have introduced us a new delicious chicken!

Jamaican Jerk chicken , my attempt to do from scratch:)

Homemade jerk chicken seasoning along with the sample seasoning I got.
The jerk seasoning Mr.Raynor presented us.

The fiery HOT Jamaican jerk chicken is ready!

Main ingredient:
Chicken - 2 lb.

Jerk Seasoning mix:
Ingredients:
Vinegar - 4 tbsp
green chillies - 8
Jalapeno - 2
Bell pepper - 1/2
red onion - 1
ginger powder - 1 tbsp
garlic powder - 1 tbsp
dry thyme - 1 tbsp
olive oil - 1 tbsp
salt - 1 tsp
Black pepper powder - 2 tsp
All spice powder - 2 tsp
brown sugar / molasses - 2 tsp

others:
lemon -1

Method:
Saute the sliced onion and chillies in 2 tbsp olive oil or butter.
Saute till it turns slightly brown.
Grind with all the above ingredients. Mix the lemon juice.
The seasoning mix is ready.

Clean the chicken and make some slits to facilitate marination.
Mix with the prepared jerk seasoning mix.

Place in an airtight container and keep refrigerated overnight.
The taste of the jerk chicken lies in the duration of marination also.

Preheat oven to 350 deg F. Arrange the marinated chicken pieces and reserve the remaining marinade liquid. Bake one side for 25 minutes. Flip over, coat some butter and bake again for 20 minutes or till it is done.

Jamaican Jerk chicken is ready!

Serving sauce:
Pour the leftover marinade in a wok and heat for 10 minutes. Add soy sauce, tomato sauce and hot sauce to taste. Bring to a boil and switch off.
This sauce can be used as dipping sauce or kept refrigerated to be used as a marinade for next batch.

Using the ready-made seasoning mix:
Marinate overnight 1 lb chicken with 2 tbsp or little more of the seasoning mix and bake / grill as above.

Thursday, May 3, 2012

Sweet paniyaram

Sweet paniyaram / Inippu kuzhi paniyaram is always welcome in our home like any other sweet.  I started making it often after seeing my MIL preparing it some years ago. I always encourage her over phone to make it for festivals, as this is her signature dish .
Ingredients:
Raw rice (pacharisi) - 1 cup
idly rice (puzhungal arisi) - 2 tbsp
black gram lentil (ulunthu paruppu) - 2 tbsp
water - 1/4 cup
coconut - 2 tbsp
salt - 1/4 tsp

baking soda - 1/2 tsp

jaggery (brown sugar) - 1/2 cup or little more.
water - 1/2 cup (for jaggery)
cardamom powder - 1/8 tsp

ghee / oil -  as per need

We may need :
kuzhi paniyara kal (puff pancake pan)
fork / skewer

Method:
Soak the rice and dhal together for 4 hours. Grind to a fine paste with 1/4 cup water, 1/4 tsp salt, coconut. It should be like idly batter.  Let it stand for 4-5 hours. No need to ferment like idly, but this duration gives soft paniyaram.

Mix jaggery with 1/2 cup water and bring it to a boil. Switch off, let it dissolve. Filter and remove any impurities. Let it cool.  Add it to the prepared batter with cardamom and mix  well.
(This batter can be kept refrigerated now for further use).

Just before preparing the paniyaram, add the baking soda, mix well and let it rest for 5 minutes.

Heat a paniyarakkal (paniyaram pan / puff pancake pan). Add oil/ ghee till 1/2 of the depth of each hole (first time only, then 1 tsp in each hole will do). Let it get hot.

Then pour paniyaram mix in each hole till 3/4. Put a lid and cook covered. It takes about a minute.
Reduce heat to the minimum and wait till its cooked on one side.
Click to see 'how to make paniyaram' in my unniappam post.
Then with the help of a wooden skewer (vadai kambi) or fork, gently flip the paniyaram.
Let them cook the other side too.

Then take them out and drain the excess oil using a kitchen towel.

Sweet Paniyaram is ready!


Serving suggestion:
Serve as snack..
Makes 21 paniyaram
(7 hole paniyaram pan X 3 times)

Note:
This sweet paniyaram can be  prepared  by deep frying instead of using a pan also.
Ghee or butter should be used instead of oil to get the most delicious sweet paniyaram.

Monday, April 30, 2012

Icing.

Usually I buy a pack of icing for most of my cakes. But from this moment I have decided to make my own. So for this Easter I made cream cheese frosting and butter cream icing. I wanted a low calorie cream cheese frosting for my cupcakes and an 'icing tool friendly' butter cream icing. While doing this only I realized how easy and healthy it is to make icings at home. The following recipes may not be for a professional but works out the best for me.
 Easter cake with basket-weave icing and fondant flowers.
Butter cream icing:
In mass production they would add vegetable shortening to buttercream icing, to get smooth flowing cream for cake professionals. But I didn't add shortening, as I wanted to share it with some adorable kids too. The finish was very good and it tasted extremely good, except for the fact that this buttercream icing will dry-out in few days. So it is better to finish the cake within 3 days after icing. Other than that I didn't face any challenges in doing the basket-weave icing. It was as flowy as the store-bought. Also we can keep the excess icing in air-tight container for a month in fridge. Before icing keep in room temperature till it is smooth ,add a tbsp milk if it is dry.
Primary crumb coating before real icing.
After this crumb coating allow it to dry for 1 hour. Then do a more polished outer cover icing. After that start with the favorite design. I made a basket weave pattern.
Click to see tutorial. Basketweave tip # 48 is used here.
For rope icing, Star tip 18 is used.  Click to see tutorial.
Cutting the cake on Easter eve, after attending the mass.
Ingredients:
Butter - 1/2 cup (1 stick)
confectioner's sugar - 4 cup
(for rose and decorations use 3 cups of powders sugar)
milk - 1 tbsp
vanilla extract - 1/2 tsp
salt - a pinch
food color - if needed

Bring butter to room temperature by leaving it in counter top. First beat the butter to fluffy. (I did manually using a fork, but a mixer is good for this). SIFT the sugar and add to butter. Again mix well with other ingredients to fluffy. Butter cream icing is ready!
Cream cheese frosting:
For the cupcakes I prepared cream cheese frosting. I wanted it to be on the tart side. so halved the prescribed sugar level and still it tasted yummy. 1:1 sugar with zero calorie sweetener is also possible, I hope. We can refrigerate this icing for nearly 2 weeks, keep out for 1 hour to get the texture and pipe-out before serving.
Prepared this icing few days earlier and kept refrigerated.
Carrot cupcake with cream cheese frosting.
Ingredients:
Cream cheese - 8 oz (1 pack)
unsalted butter - 8 tbsp (1 stick)
confectioner's sugar - 4 cup
vanilla extract - 1 tsp

Bring cheese and butter to room temperature by leaving them in counter top not any means (this is important). Mash together the cheese and butter. Sift the sugar and add it along with vanilla essence. Mix well. Enough to frost 2 to 3 dozen cupcakes (1 tbsp icing per cake). Makes one tub (US) frosting.
Fondant flowers:

I bought Wilton's readymade rolled fondant. Then got some videos in Youtube to learn fondant rose and calla lily.
The white daisy flowers are my own creation:)
Next time I should try some homemade fondant.
Click to see for video on rose flower making by icing / frosting.

Saturday, April 28, 2012

Carrot apple cake

Carrot cake is the most favorite for my hubby. This Easter also I wanted to bake some for all of us. I was a little intimidated to apply my recipe for making fluffy cupcakes. So I combined two recipes 1 and 2 to get the below one. This will yield one 6 inch round cake and 12 cupcakes or 24 cupcakes. Thanks to the authors, this is the most successful fluffy carrot cake I have ever baked.


First batch is ready!

Cupcakes and round cake I baked.

Fluffy carrot cupcake.

Ingredients:
Carrot - 2
Apple (small) - 1
All purpose flour - 2 cup
egg - 4
sugar - 2 cup
oil / butter - 1 1/4 cup
shredded coconut (dry) - 2 tbsp
vanilla extract - 2 tsp
orange peel - 1 tbsp
cinnamon powder - 1 tsp
baking soda - 2 tsp
baking powder - 2 tsp
salt - 1/2 tsp
walnut - 1/2 cup
raisin - 2 tbsp

Method:
Shred the carrot. Core, peel and shred the apple.
Preheat oven to 350 deg (175 deg C) for at least 30 minutes before we start baking.
Grease and flour the cake tin. Keep aside.
Beat the eggs in a mixer or using a fork till fluffy. Then add vanilla essence, sugar, oil and beat till its fluffy.
Sift together the flour, baking soda, baking powder, salt TWICE.
Put it in a mixing bowl and add the liquids from mixer.
Mix well
Add the shredded carrot, coconut, orange peel, cinnamon, coarsely chopped walnut and mix slightly.
Now the batter is ready!

Fill the cupcake cups to halfway and bake for 20 to 22 minutes.
6 inch round cake may need 40 - 50 minutes.
6 inch round carrot cake before icing.

Carrot cupcake with cream cheese frosting.

Note:
Take out and cool completely before frosting / icing.
Makes one 6 inch cake and 12 cupcakes.

Serving suggestion:
Tastes great with or without icing.
Approximate energy from 1 cupcake without frosting is 150 K cal.
1 tbsp cream cheese frosting will be 70 K cal.

Monday, April 23, 2012

Potato masala

On the other day my neighborhood aunty from Gujarat brought me this aloo masala wrapped in dosa, just like Madras masal dosa.  The potato subzi was very spicy and delicious. While talking I learned a few recipes from her and I too prepared this like her's. Though it is a very simple recipe, I find this curry a good alternative and makes me love chapati:)

potato masala with chapati.

Ingredients:
Potato - 4 (300 gms)
onion - 1
tomato - 2
lemon - 1/4
green chilli - 4
ginger - 2 inch
cilantro - a handful
mustard seeds - 1 tsp
red chilly powder - 1/2 tsp
turmeric powder - 1/2 tsp
garam masala powder - 1 tsp
oil- 2 tbsp
salt - to taste

Method:
Wash and Pressure cook the potatoes . Peel the skin and mash coarsely into small pieces.
Chop the onion, green chillies, cilantro and ginger finely.
Heat oil in a vessel and add mustard seeds, 2 tbsp channa dhal.
After the mustard seeds starts splutter, add the chopped onion, green chilli, cilantro and ginger. Saute them a while till onion gets slightly cooked.
Add the chopped tomato and cook covered with salt, garam masala, turmeric, chilly powder.
After the tomato is well cooked and oil shows up, put the potato.
Check for salt. Add 1/2 cup water and cook covered.
Switch off.
Before serving add lemon juice and chopped cilantro.

Spicy aloo masala is ready!

Serving suggestion:
Fold inside  paper roast dosa like masal dosa and serve hot with sambar, chutney.
Also makes a good side dish with chapathi or poori.

Wednesday, April 18, 2012

Its awards time!

Divya Pramil of 'You too can cook Indian food' has shared this beautiful Sunflower with me. She runs a delicious blog and I like her interest on blogging, pets and pious nature.
Expecting many more recipes from you dear....keep rocking!


Thanks Divya!.

Also, Alagu Chitra Ganesh of 'A desperate housewife's diary' has passed me this 'Inspirational award'. I like the way she presents her yummy recipes along with her enthusiastic approach. Expecting more recipes from you Chitra. Keep rocking dear!


Thanks Chitra!

                                                                      -*-*-*-*-
The rules for the awards are

1.Create a post with the following details;
2.(Thank the person who nominated you for this Sunshine Award and link them back.
Then tell something about you.
3.Spread the joy by nominating your fellow bloggers and friends, its a way of appreciation.
4. Finally convey the bloggers about the nomination.

                                                                          -*-*-*-*-

As per the rules here are something about me.
1. I am a cheerful housewife and can stay here in the house without feeling boredom. People often wonder how I manage being a housewife. The answer is simple. I always keep myself entertained with something like cooking, arts, reading, exercise or gardening. Above all I believe in God and HIS love.

2. Hubby and me start our weekends with a nice English movie, popcorn and coke:)

3. I do my best to celebrate the festivals with much planning and enthusiasm, just like our moms :)
                                                                      
                                                                           -*-*-*-*-

I would like to share the above awards with the following friends: (I wanted to pass these beautiful awards to all my friends, but couldn't type all your names...don't mistake me),

Seetha of Seetha's kitchen.
Maha of Honey cooking Experiment
Girija of En samayal pakkam

Enjoy!

Friday, April 13, 2012

Happy Tamil New year,

Wishing all a very happy and prosperous Tamil New Year.

(click to see image source.Thanks.)

Love,
Viki

Monday, April 9, 2012

Easter cookies

For this Easter I made some cookies and cakes in 'spring theme' to share with some wonderful kids, neighbors and friends. I chose bunny, doggy, tulip and butterfly shapes from the wilton's cookie cutter set that hubby presented me recently.
Flower bouquet cookies.

While googling I learned that glazed icing work the best with sugar cookies for stacking (not sticky). Thanks to the sugar cookie recipe and cookie icing recipe authors, I got a bunch of successfully made soft sugar cookies. I was amazed at the glossy finish after icing these cookies. These icings dry within 3 hours (or overnight in humid weather) and can be conveniently stacked up. Our friends too appreciated the outcome along with my hubby:) This recipe is surely a keeper for me and I will be doing it again and again:)

I love these flower cookies very much, so I made them in more number:)


Easter bunny is the main attraction for kids:)
Cookies for  a garden party.

Kids love these cute bunny cookies:)

Doggies for my hubby dear along with a cute bunny:)

I simply rolled these cookies on my roti maker. Prepared them after supper on Thursday.

Cookie before baking.

Ingredients: (5 dozen)
sugar - 2 cups
All purpose flour (maida)- 5 cups
unsalted butter - 1 1/2 cup
vanilla essence - 1 tsp
egg - 4
baking powder- 2 tsp
salt - 1 tsp

Method:
Bring butter to room temperature by keeping it out of fridge.
Mix the butter and sugar using a fork.
Beat together egg and vanilla essence.
Sift together AP flour, salt, baking powder.
In a large bowl combine sugar, butter with the beaten egg mixture. Blend well.
Add flour, baking powder and salt to the mixture and make it into a dough.
Manual kneading is the best here.
Cover with plastic wrap and refrigerate it for at least 1 hour for easier handling.
We can prepare the dough and refrigerate overnight for better cookies.
The dough can sit in fridge for a week.
Preheat oven to 350 - 375 deg F (175 deg C) for at least 30 minutes .
Make small balls and roll them into 1/2 to 1/4 inch sheet and cut into desired shapes.
(I did on a chapati rolling base with lot of flouring).
 Place each cookie 1 inch apart on the baking sheet.
Bake at 350 F for 6 - 7 minutes or until edges are light golden brown.
Immediately remove from cookie sheets and let cool completely.
Decorate as desired.

Note:
While baking one batch, keep the dough in fridge. Stiff dough is the best for rolling.
Cool them on wire rack overnight or at least for 4 hours before storing in air tight containers.
It can be refrigerated before icing.
Makes 5 dozen cookies.

Sugar cookie icing recipe

Tools for icing.

Ingredients:
confectioners sugar - 1 cup
milk - 2 tsp
light corn syrup -  2 tsp
almond extract (or) vanilla - 1 tsp
water - 1 tbsp
food color - pink, lilac, blue, yellow, green

Method:
Sift the sugar and remove the lumps. Mix everything except color.
Divide into required portion and add a drop of color to each bowl.

Note:
Prepare this just before icing. If hardened, add a tsp of milk and mix well.
If we want more shine, add tbsp of more corn syrup.
Stir before each coating to get the shine.
Use a (new and separate) paint brush for icing.
Dipping the cookies in icing also works fine.
Never refrigerate the cookies after this type of icing, as it will not be this much shiny again.
Enough to decorate 30 cookies.

Sunday, April 8, 2012

Easter Greetings !

Wishing all my readers, friends and family a Joyful Easter, beautiful spring season and happiness always.

Homemade Easter cake with basket-weave icing and fondant flowers. Recipe ...coming soon...

Click for icing recipe.
Click for cake recipe

May all our prayers be answered,
Kindness and understanding flourish,
Love, Faith and Hope increase
and everyone feels the Lord's presence
on Easter and always
Wishing all a Peaceful and Blessed Easter.
Happy Easter !


Love,
Viki

Chennai Kara Kulambu (vendakkai kara kulambu)

Okra / vendakkai  in tamarind curry. Ingredients: Okra - 150 gm (20 numbers) Onion - 1 Tomato - 1 curry leaves - 1 sprig Garlic - 1 Tamarind...