Wednesday, November 28, 2012

Thiruvathirai kaLi

Thiruvathirai is an auspicious day for Hindus (South India), which comes on Margazhi month (winter). A sweet porridge by the name 'Tiruvathirai kali' along with a spicy mixed vegetable curry called 'thalagam' are made on that day. I got this recipe from 'Mangayar malar' magazine. Mangayar malar has been my most favorite magazine since my teens. It is a magazine especially for women like me, who need some 'light reading' before sleep:)  I love it very much for keeping up the authentic touch, traditional values, a mind calming style and authentic recipes....thanks to the online editions, still I am able to read the books:)  Almost all the recipes I got from that will be on my 'success list':) As expected, this kali too tastes excellent and hubby dear like it very much. There are many versions for this dish but I am narrating the recipe I got and love.

Ingredients: 
raw Rice - 1 cup
moong dal (green gram lentil) - 2 tbsp
Jaggery (Indian brown sugar) - 1 cup
cardamom powder - 1/8 tsp
ghee (clarified butter) - 2 tbsp
cahsew nut - few.

Method: 
Dry roast the rice and dhal together till it turns very mild red (not brown) and aromatic. Add water and rinse thrice. Drain all the water and let it dry for some time (30 minutes) in a plate.(we can do the rinsing first and then the roasting too). Powder the rice and dal in a mixie (blender). Keep aside.
Add 2 cups of water to jaggery and heat till it dissolves. Filter and remove any sediments. Bring it to a boil, add the powdered rice+dal. Reduce flame and cook covered. Wait till all the water is absorbed and the rice gets cooked. Fry the cashews in ghee and pour over the cooked kali. Finally add cardamom powder, mix well and switch off.
Thiruvathirai kali is ready!

Serving suggestions: 
Serve as breakfast or dessert.

Saturday, November 24, 2012

Sheet cake decoration, tips (carrot cake for Thanksgiving)

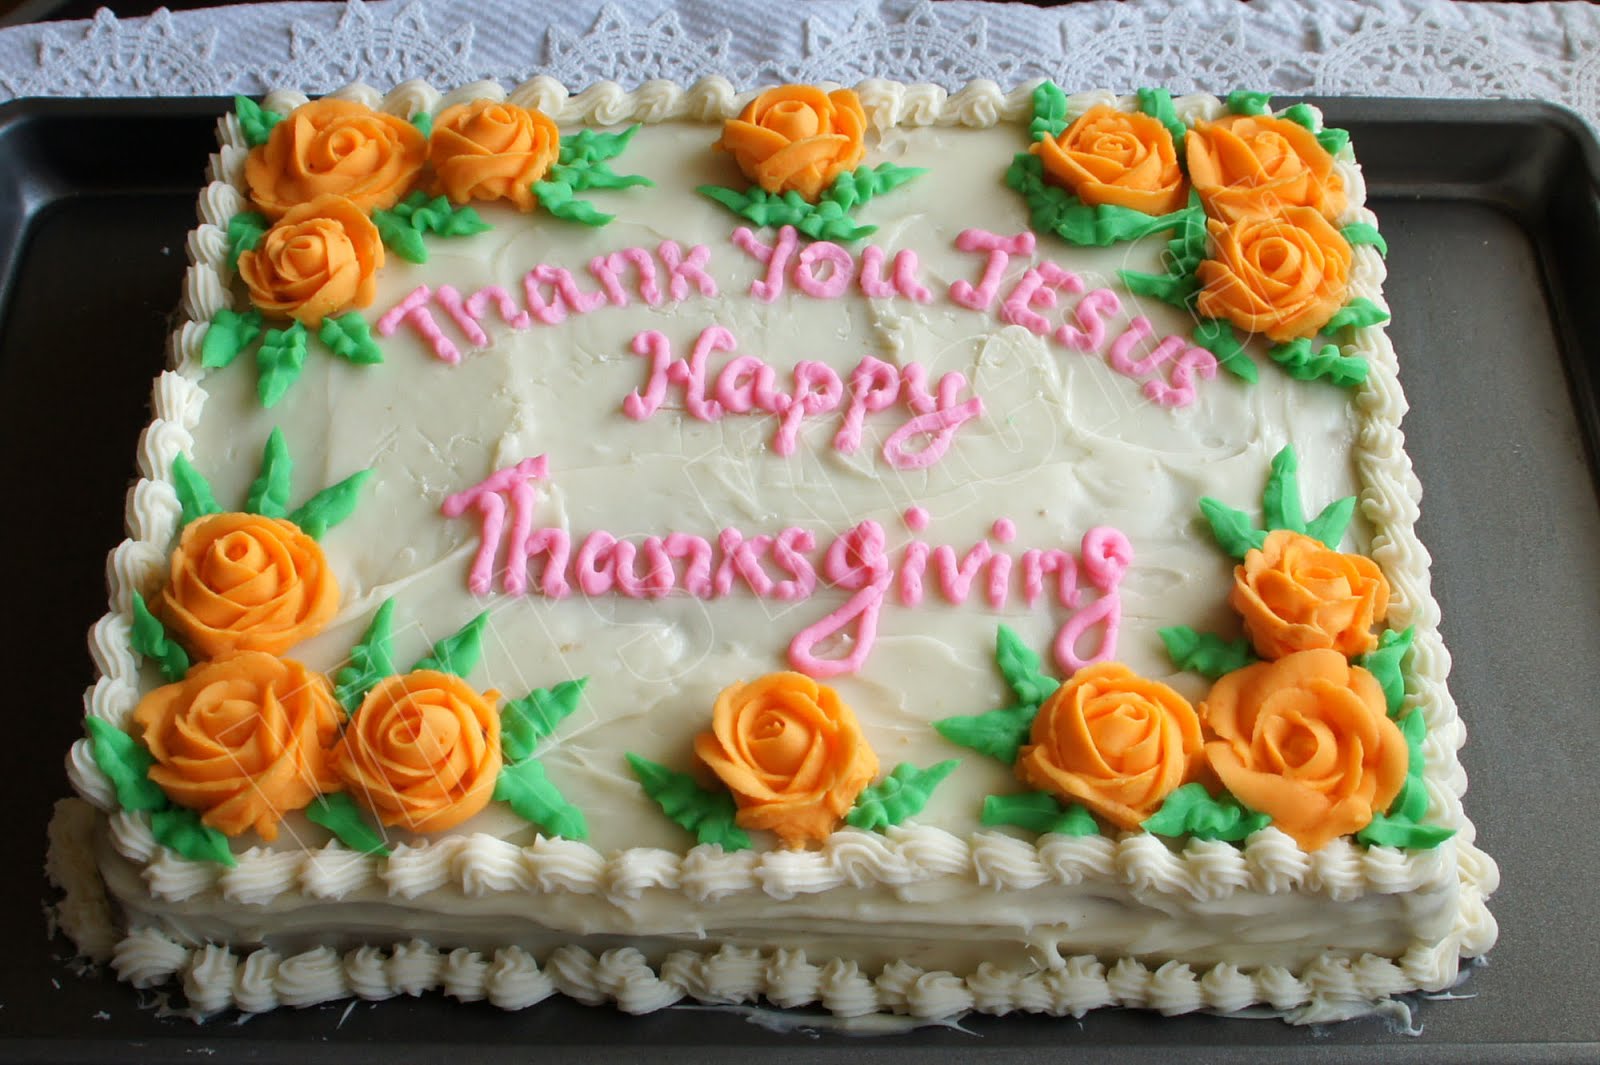
Here is the 1/4 sheet cake I prepared for the Thanksgiving dinner hosted by our friends Mr&Mrs. Raynor. That's a very pleasant and happy thanksgiving celebration for us to be with their family on that day. We enjoyed many delicious dishes like whole turkey, bean rice, jerk chicken, homemade jerk sauce, Jamaican curried chicken, potato salad, Mac n cheese and Regi's prayer.  I made poori (fried whole wheat bread), South Indian chicken curry with coconut and cashew masala and carrot cake. We had a happy dinner together and enjoyed shopping till midnight:) Here I am giving out the recipes for the moist carrot cake, cream cheese icing, butter cream icing for this sheet cake. (Sugar proportions are varied for this particular cake for decorative purpose....this works for me). Also I have given some basic tips on making a large size sheet cake, soaking,  transporting the cake etc.

All praise goes to GOD.

Orange rose icing.
Flour, sugar, my recipe notebook, toasted walnut, orange peel.....ready for baking.
Ingredients:
Carrot - 4
Apple (small) - 1
All purpose flour - 2 cup
large egg - 4
sugar - 2 cup
butter - 1 1/4 cup
shredded coconut (dry / fresh) - 3 tbsp
vanilla extract - 2 tsp
orange peel - 1 tbsp
orange juice - 3 tbsp
cinnamon powder - 1 tsp
baking soda - 2 tsp
baking powder - 2 tsp
salt - 1/2 tsp
walnut - 1 cup (toasted)
raisin - 1/4 cup

Method:
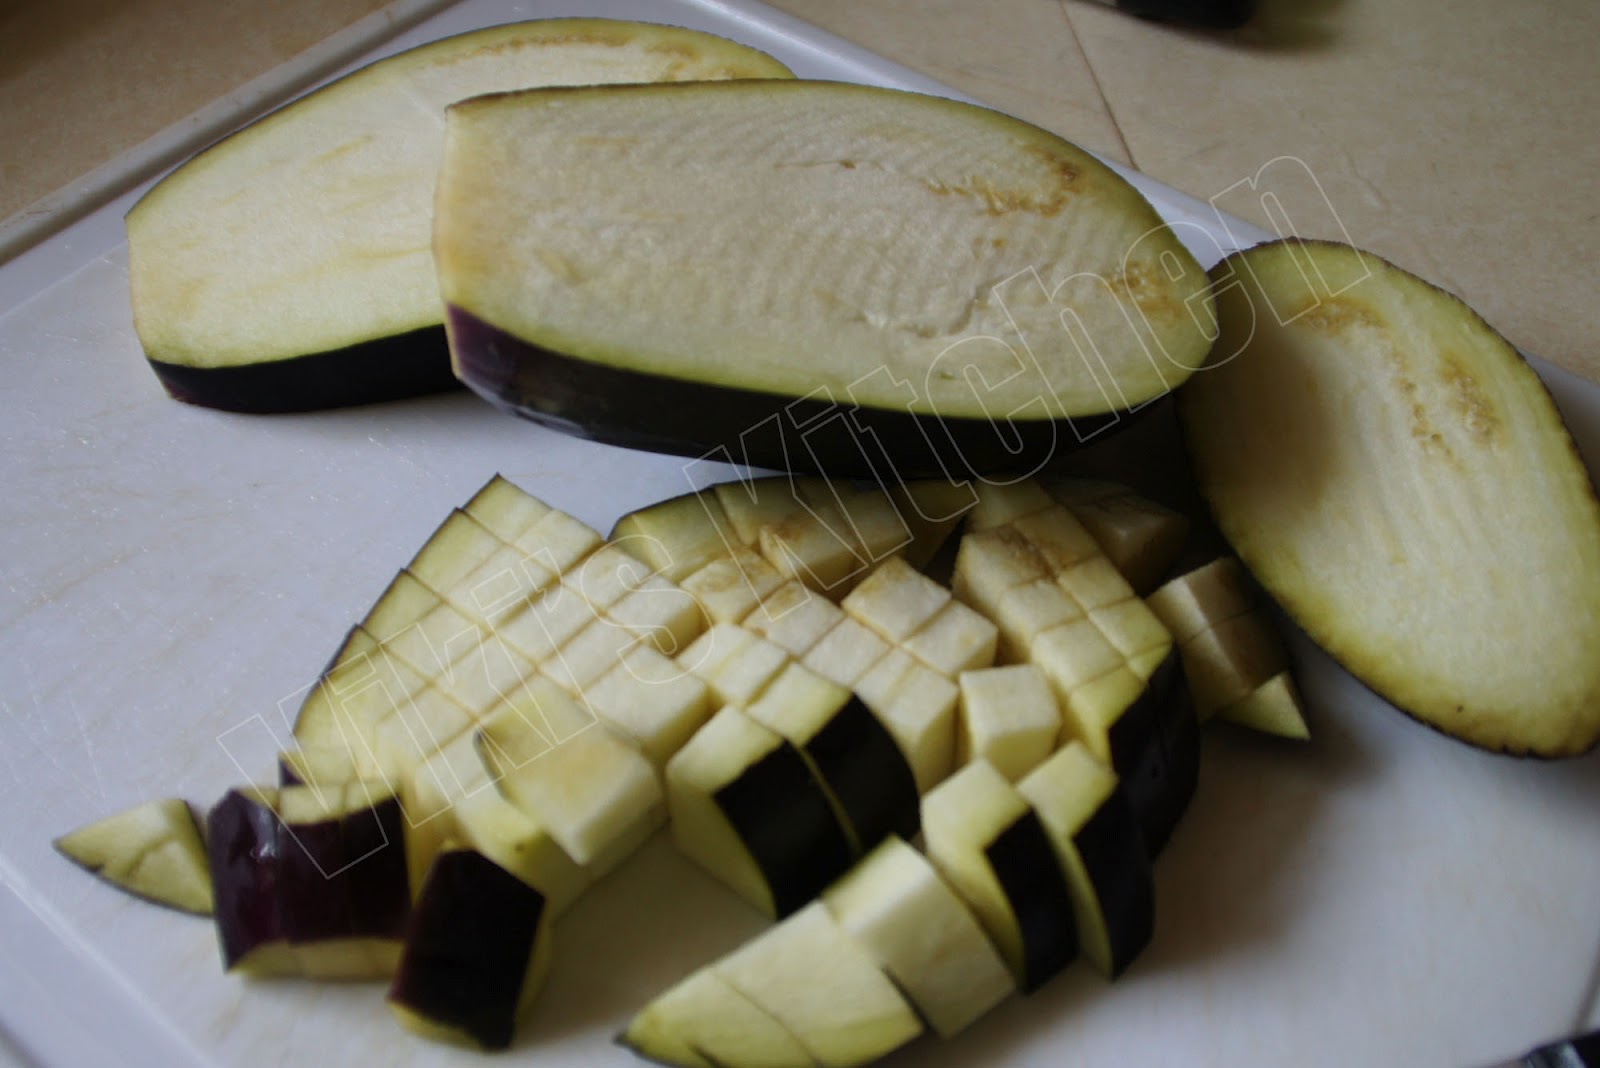
Shred the carrot. Core, peel and shred the apple. (Pineapple can also be used instead of apple, but sometimes that makes the cake soggy. So I use apple for controlled moisture) . Preheat oven to 350 deg (175 deg C) for at least 30 minutes before we start baking. Grease and flour the cake tin. Keep aside. Beat the eggs in a mixer or using a fork till fluffy. Then add vanilla essence,orange juice, sugar, butter and beat till its fluffy. Sift together the flour, baking soda, baking powder, salt TWICE. Put it in a mixing bowl and add the liquids from mixer. Mix well. Add the shredded carrot,apple, coconut, orange peel, cinnamon, coarsely chopped walnut, raisin and mix slightly. The batter should be approximately of 7 cups. Now the batter is ready! 
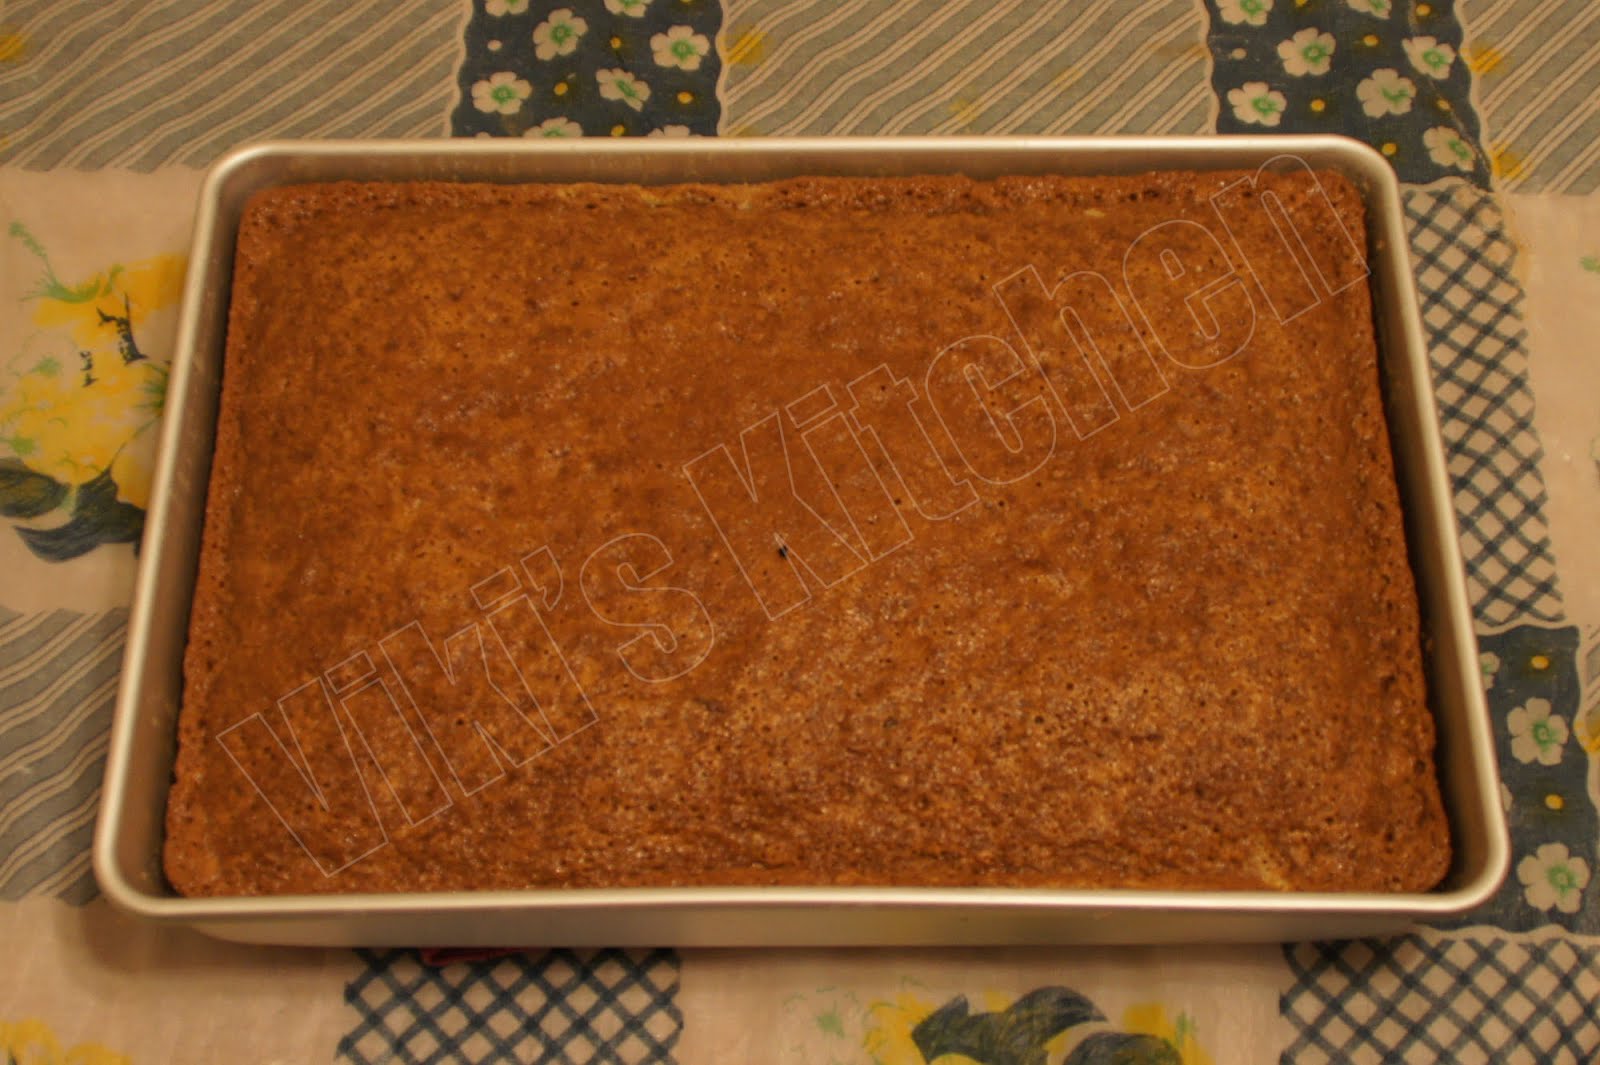
Pour into greased cake tin. Bake at 350 deg F for 40 minutes or till an inserted skewer comes clean.

Cream cheese frosting:
Ingredients:
Cream cheese - 8 oz (1 pack)
unsalted butter - 8 tbsp (1 stick)
confectioner's sugar - 4 cup
vanilla extract - 1 tsp

Bring cheese and butter to room temperature by leaving them in counter top(not any means ...this is important). Mash together the cheese and butter. Sift the sugar and add it along with vanilla essence. Mix well. Enough to frost 2 to 3 dozen cupcakes (1 tbsp icing per cake) or 9x13 sheet cake. Makes one tub (US) frosting.

Butter cream frosting:
Ingredients:
Butter - 1/2 cup (1 stick)
confectioner's sugar - 4 cups
milk - 1 tbsp
vanilla extract - 1/2 tsp
salt - a pinch
food color - if needed

Bring butter to room temperature by leaving it in counter top. First beat the butter to fluffy. (I did manually using a fork, but a mixer is good for this).Mix other ingredients logically to get a smooth flowing but stiff icing.
Butter cream icing is ready!

Tips for moist cake finish / Soaking before icing:
Sugar syrup :
brown / white sugar - 3 tbsp
water - 1/2 cup
Microwave sugar and water for 2 minutes or heat in stove top till it gets slightly thick. switch off and let cool. After baking the cake, cool it completely in wire rack. Then transfer it to the base. If the cake needs to be transported, then stick the cake to the base with few tsp of icing. This steps prevents sliding of cake while carrying it. Then using a skewer randomly pierce all over the cake and brush the sugar syrup on top of cake. This keeps the cake very moist and delicious while refrigeration / storage. Then do the icing. Keep refrigerated. Keep in room temperature for at least 1 hour before serving.

Tips on transporting a sheet cake without much equipments.
Transporting the perfectly iced cake to the party location is equally as much challenging as preparing it. Here are some tips and tricks I use to transport the cakes without buying any special cake carriers.


USA cake sizes (standard / commercial)
Serving sizes may differ. It is always nice to make some extra servings while planning a party. Here is an approximate calculation for number of servings of cake in a very generous serving (2 to 3 inch pieces). One may increase the servings by reducing the portion, but I prefer to stick to the generous serving for my guests:)

Number of people vs size of cake (ref 1, ref 2)
8 inch cake =  8 to 10 people
Quarter (1/4) sheet cake (9x13 inch) = 18 to 20 people (28 formal / small servings)
Half sheet cake (11x15) = 30 to 40 people
Full sheet cake (18x24) = 70 to 80 people (110 formal small servings)

How to cut a 9x13 inch cake while serving:
9x13 is the normal homemade sheet cake size needed for a birthday party.
see how to slice the cake for 18/21/28 plates.


How to carry a sheet cake for a home party?
1.Buy a cake carrier / container. (or)
Use a cookie sheet as an inexpensive / reusable cake carrier as strong base (may be it wont have a lid or get creative to make a lid at home using a heavy duty aluminum foil) . I always keep a sturdy wooden board under the cookie sheet for extra strength, as many cakes may come up to 3 kg and the cookie sheets may wobble. This set up is good enough to transport within 1 hour drive if we have someone to hold the cake.
2. Glue the cake to cake base cardboard / cookie sheet by using some icing / frosting. By this way, cake won't slide while driving.
3. Have a responsible friend to hold your cake carefully. Plan the route, drive smoothly.
4. If the cake is larger and if we can't find a lid, then get creative and make a cake lid at home. This time I used a maruchen noodle box I got (free) from local grocery store as 'home made cake cover/ lid'. Just cut two sides and slide the lid to the cookie sheet without touching the cake....stays neat.
4. Don't transport cupcakes after icing. Do the icing in the party premises. Cupcakes are hard / expensive to transport if you are not commercial. So stick with sheet / round cakes:)

Time taken to bake a 9x13 inch cake:
40 - 50 minutes.

Always choose a very good quality cake tin. I prefer wiltons cake tins or glass pans for large cakes. They are quick to bake, even finish and results without browning the cakes.
Cool completely for 4 hours or overnight.

Planning:
Plan the size of cake (as mentioned above) and buy ingredients earlier.
(1/4 sheet cake need 7 cups of cake batter).
Prepare the icings earlier and keep refrigerated. The sugar in the icing acts as a natural preservative and hence the icing can stay longer in fridge. I prepared the icings 3 days before thanksgiving day.
Cake should be baked on the day or two before icing. Keep it refrigerated with a cling wrap cover.
Icing can be done one earlier and kept refrigerated. Keep the cake in room temperature for at least 1 hour before serving  (melts the icing slightly and gives a soft texture).
Poori and chicken curry I made for thanksgiving dinner party.
----------------------------------
Update Feb 21, 2014
Birthday carrot cake with pink roses and yellow flowers for Em

Thursday, November 22, 2012

Thanksgiving wishes and prayers

Wishing all my readers, friends and family a blessed , prosperous and happy Thanks giving!


Thanksgiving Pictures, Comments, Images, Graphics

Thanksgiving Pictures Comments - Photobucket


Thanksgiving Pictures, Comments, Images, Graphics

Thanksgiving Pictures Comments - Photobucket

Thank you, Heavenly Father, for having created us and given us to each other in the human family. Thank you for being with us in all our walks of life, for your comfort, your companionship, your guidance, your love, and your presence. Thank you for safeguarding us and protecting us. Thank you for yesterday, today, tomorrow and for the whole of our lives. Thank you for friends, family,  health and your grace. May we live this and every day thankful for all that has been given to us.
Amen.
(Prayer inspired by American Catholic website).

Happy Thanks giving and thank you all!

Monday, November 19, 2012

Pumpkin rice

With the start of Autumn season, we can see orange in everything....from leaves to veggies to celebrations. Pumpkin is more associated with pies, cakes and pancakes in US. I wanted to try my spicier favorites too. Here is a rice I love very much with pumpkin. This is my mom's creation for us when we were kids. In one of our bedtime stories, there came a scene in which two bunnies would ask for a pumpkin from an elderly bunny to make some rice as camping food(it was a translated version may be...so that the cake could have become a rice). Then we asked mom to make a pumpkin rice for us and she gladly created this recipe, which we cherish very much:)
A small cute 99 cent pumpkin I bought. I didn't carve it.....instead cooked that.

Pumpkin seeds tastes great when dry roasted.

Pumpkin patch in Giamarese farm


Pumpkin rice

Ingredients: 
Pumpkin - 200 gm
rice - 2 cup
salt - as per need
oil - 2 tsp
sugar - 1 tsp (optional)
onion - 1
green chilly - 4
cinnamon - small piece
bay leaf - 1
fennel seeds - 1/2 tsp
curry leaf - 1 sprig
channa dhal - 2 tbsp
cumin - 1/2 tsp
shredded coconut - 1 tbsp

Method:
Wash and cook the rice with 6 cups of water till tender but firm.
Drain and keep the rice aside.

In a separate vessel, heat the oil and add fennel seeds. As it gets red, add bay leaf, cinnamon, channa dal and onion. Fry till onion gets soft. Then add the sliced green chilly, curry leaves and chopped pumpkin. Cook covered till channa dal and pumpkin are well cooked. Then add salt. Taste it. If needed add sugar (brings out the pumpkin flavor). Add freshly shredded coconut, cumin and cook till pumpkin turns almost mushy.

Mix with the cooked rice. Pumpkin rice is ready!

Serving suggestions:
Serve as main course meal with any raitha or appalam (pappad).


Sunday, November 11, 2012

Happy Diwali !


Wishing all my readers and friends a joyful Deepavali.
Wishing you all enjoy the day with family and friends with beautiful rangolis, mehanthi , favorite foods, new dresses, sparkling crackers, lamps (diyas), health , wealth ,prosperity, new movies and most importantly with lots and lots of happiness and smile,
May all the days ahead are filled with happiness in all of our homes,


Happy Deepavali!
Love,
Viki Xavier

Saturday, November 3, 2012

Bruschetta

Bruschetta is an Italian appetizer dish prepared during November to taste the newly prepared olive oil.  This is a very quick recipe and easy to follow. I prepared this as a main course meal along with soup. Here we have a farmer's market in the neighborhood that sells freshly baked Italian bread and rolls. There will be a rush for this bread always and I love that freshly baked smell very much. So we pick up three or four big breads for a dollar (unbelievable price:) ) whenever we go there.  I adopted this recipe from various foodnetwork tv shows according to our taste. Try this bruschetta and enjoy !
Ingredients:
Bread rolls - 1
small avocado - 1
butter - 1 tsp
extra virgin olive oil (EVOO)- 2 tbsp
garlic powder - 1 tsp
basil leaf - 3
salt - to taste
pepper - 1 tbsp
onion - 1
cherry tomato - few
tomato sauce (ketchup) - few tsp

Method:
Heat oven to 350 deg F.
Slice the rolls in to thick slices in diagonal way (larger surface).
Mix butter, Evoo, salt, garlic powder, pepper powder , finely chopped basil leaf to a paste.
Brush this mixture over the bread.
Sprinkle few pieces of sliced onion.
Bake for 6- 8 minutes for denser breads and lesser for white rolls.
Spread coarsely mashed avocado and top with sliced cherry tomatoes and tomato sauce.
Bruschetta is ready!

Serving suggestion:
Serve as appetizer or side dish with soup.
Shredded cheese can also be added on top.

Note:
Instead of baking in oven, the bread can be fried in butter in a pan and spread the topping.
Avocado and tomato sauce is purely optional.

Saturday, October 27, 2012

Capsicum Ramen noodles

Fresh Capsicums show up in every local market during the summer and mild weather conditions here. I admire them for their gorgeous colors and shapes....the common green chillies, jalapenos, sweet red capsicum, perfectly shaped yellow, rare orange, economical green peppers, locally grown multi colored peppers, long hot varieties and many many varieties. Whenever we go to a farmer's market I will definitely buy one or two peppers. Though literally I don't know much recipes for these capsicums, I will buy as if I am seduced by these colors:) Then only I will think for ways to using them whenever I open the fridge. In this recipe I prepared a noodle dish with a single sachet of Ramen noodles and increased the meal quantity by adding lots of capsicum, so that it serves two.  Here is the flavorful spicy noodles version using Ramen noodles and capsicum.

Ingredients:
Ramen noodles - 1 pack
(Oriental flavor vegetarian noodles - 85 gm sachet - 400 k cal)
green Capsicum / bell pepper - 1/2
red capsicum - 1/2
onion - 1
fresh green peas - 1/2 cup
ginger - 1 inch
flavoring sachet in the noodles - 1 (or) 1/2
tomato puree - 2 tbsp
oil - 2 tsp

garnish:
spring onion - few tbsp
tomato ketchup - 1 tbsp
hot sauce - 1 tsp
chilly flakes - 1/2 tsp

Method:
Cook noodles with 2 cups water. Rinse in cold water and drain. Keep aside.
Saute the finely chopped ginger. Add chopped onion and saute till it wilts.

Then add the sliced capsicum and saute for a few seconds.
Add the tomato puree and cook for 1 minute.  Then  add the cooked noodles, tomato sauce / ketchup, hot sauce, flavoring mix given in noodles packet. Switch off.
Garnish with finely chopped spring onion and chilly flakes.

Capsicum noodles is ready!

Serving suggestion:
Serve hot as main course with any protein rich side dish.
Makes a good lunch pack too.


Thursday, October 25, 2012

Kathirikkai kadalai paruppu koottu

Brinjal curry with channa dal masala, eggplant Bengal gram curry.

This curry made with mashed bengal gram (channa dal) and brinjal is quite common in Southern Tamilnadu weddings. This koottu can be prepared more like a dal or like a thick curry (as I have shown in photo) and both ways it tastes good.

Ingredients :
Brinjal - 200 gm
channa dal (kadalai paruppu) - 1/2 cup
tamarind - small amla size
coconut oil - 1 tsp
mustard - 1/2 tsp
hing - a pinch
curry leaf - 1 sprig
turmeric powder - 1/4 tsp

To fry and grind:
coconut oil - 1 tsp
channa dal - 2 tbsp
coconut - 3 tbsp
cumin - 1 tsp
dry red chilly - 4
coriander seeds - 2 tbsp

Method:
Fry the items given one by one and let cool.
Grind to a  fine paste. Keep aside.

Take channa dal, chopped brinjal with turmeric powder, 2 cups water and cook completely (using pressure cooker or stove top).
Add the tamarind extract, salt,  masala paste prepared and bring to a boil. Cook till raw smell goes.

Heat 1 tsp coconut oil in a wok. Add mustard and after it crackles add curry leaves, hing and pour over the dhal. (Some times I add onion also while tempering, which is not common for this recipe). Switch off.

Brinjal dal curry is ready!

Serving suggestions:
Serve as side dish with rice or chapati.

Wednesday, October 24, 2012

Cauliflower pakoda

I think Cauliflower is one of the most favorites in every household. Some years back (at least for people in my home town)getting some English vegetable like cauliflower was rare. Also those kind of veggies were more expensive because of transportation. I have never come across a Tamil word for Cauliflower (there will be a Tamil equivalent for most of the words in English), so I guess it is definitely a vegetable of modern days:) Thanks to the globalization in everything we get what we desire. While growing up, Cauliflower being an apple to our eyes, mom would make only chosen dishes with it. She would make very crispy fries with cauliflowers or put a tiny flower in vegetable briyani...that's it, we all would love whatever she made:). But nowadays I make many dishes with it and it became my regular in this part of globe we live and I love it:) Here is a pakoda / bajji with cauliflower and we had it did with sambar and rice :) 
Cauliflower pakora / bajji.

Ingredients:
Cauliflower - 1 (300 gm)
turmeric powder - 1/2 tsp
Besan flour (kadalai mavu) - 3/4 cup

rice flour - 2 tbsp
corn starch - 1 tsp  (optional)
salt - to taste
red chilly powder - 1 tsp
hing (asafoetida)- 1/8 tsp
red food color - a pinch (optional but I didn't use)
garam masala - 1 tsp (optional)
oil - to deep fry (200 ml)

Method: 
Wash the cauliflower and break it into medium size florets.
Bring few cups of water to boil with 1 tsp salt and turmeric powder.
Put the cauliflower pieces in boiling water and boil for only one minute.
Switch off, drain water completely. Keep aside.

In a separate bowl mix besan flour, rice flour, corn starch, salt, hing, red chilly powder  with 1/4 cup water to a thick batter. The batter should be thick and should not be runny (otherwise the bajjis will absorb more oil). If there is more water , then add some more rice flour.  Heat oil in a wok. As it gets smoky hot, reduce flame and keep in medium flame. Dip the semi-cooked cauliflower pieces in the batter and put in hot oil.
Flip and fry both sides. Drain oil and take out.

Cauliflower pakoda / bajji is ready!

Serving suggestions: 
Serve hot as snack along with hot coffee or tea during rainy / winter season.
Tomato ketchup / sauce is a nice side dish for this fry.
I usually make them for some weekend lunch along with sambar rice or curd rice.

Tuesday, October 16, 2012

Kambu puttu

Kambu - pearl millet, bajra ; puttu - steam cooked food.

 Kambu is a native cereal of India. It can be grown in any soil with minimal care and believed to be one of the few existing ancient crops. No wonder it was one of the major crops before green revolution, but changes in culture has brought newer grains.
Preparing porridge (kool / koozh) using kambu is a common breakfast in South Indian villages. I prepare many dishes with kambu like kambu dosai, kolukkattai, urundai etc. Kambu has a very nice flavor when roasted. Recently I prepared puttu with kambu and it tasted many folds yummier.  Here is  a virtual treat to your eyes...Enjoy!

Kambu puttu
Ingredients:  (for 2 people)
whole pearl millet  (bajra/Kambu) - 3/4 cup
shredded coconut - 3 tbsp
salt - pinch

Method:
Sort the millet and remove any stones or sticks (nowadays they are stone-free).
Dry roast the kambu till it turns mild red and starts smelling nice At this stage it will start popping.
Now switch off and pour enough water. Wash the millet very well (thrice).
Keep it soaked for 10 to 30  minutes.

In the meantime prepare the puttu kuzhal or steaming vessel. Bring the water in bottom vessel to a boil. Click to see my rice kuzha puttu recipe for detailed instructions with photo.

Grind the kambu with pinch of salt, shredded coconut in a mixie to a 'medium coarse to fine' powder. Don't add water while powdering the kambu. Just pulse in intervals and it will be easily done.
Put it in puttu kuzhal and steam cook for 10 minutes after steam comes through the top holes.
We can make puttu in idly plates also. If need to prepare in a big batch,  tie the prepared kambu flour in a thin cloth and steam cook over an idly stand. We can feel the nice flavor filling the whole kitchen when it is completely cooked.

Puttu gets easily cooked than making a kambu choru (cooking like rice).

kambu puttu is ready!

Serving suggestions:
serve with powdered jaggery or white sugar or brown sugar and more shredded coconut.
It can also be served with green gram sundal.
Kadalai curry also makes a good accompaniment.

Thursday, October 11, 2012

Brinjal buttermilk curry

Kathirikkai more kulambu, Eggplant curry with buttermilk, South Indian more curry.

'More' is the Tamil word for Buttermilk . 'Kulambu' means 'stew' poured over rice.So 'More kulambu' means a stew prepared with Buttermilk. This kulambu is a must if you prepare a traditional TamilNadu style lunch. More-kulambu should be served over steamed rice , after serving sambar and vathak kulambu.

I used our homegrown eggplant which was nearly 350 gms. As it was very big for a more kulambu, I halved it and used one half to make more kulambu one day and used the other half to prepare sambar the next day.

More kulambu.....our favorite curry with our favorite vegetable.
Another beautiful aubergine / eggplant from our garden.

I used the largest brinjal to make serwa .

The largest aubergine brinjal from our garden


Brinjal serwa I made using our largest brinjal. It tasted absolutely delicious.
Ingredients:
curd (Indian Yogurt plain) - 1 cup
Turmeric powder - 1/4 tsp
Brinjal - 150 gm
Ginger - 2 inch
green chilli - 2
Bengal gram / channa dhal - 1 tbsp
rice - 1 tsp
salt - to taste
coconut oil - 1 tbsp
mustard - 1/2 tsp
Dry red chilli - 2
curry leaves - 1 sprig
water - 2 cups

Method:

Soak channa dhal and rice for 30 minutes.

In the mean time prepare the brinjal.
Wash the brinjal and cut it into long thick slices.
Heat oil in a wok and add the brinjal pieces.
Fry well in low heat. Cook till it is almost done with a mild red color.
Take out and keep aside.

Grind ginger , green chillies , rice and channa dhal to a fine paste.
Heat 2 cups of water in a cooking pan and add the ground paste along with turmeric and salt.
Cook for few minutes till raw smell goes.
Now add the fried brinjal and bring it to a boil.
Before switching off add the curd. Mix well.


Now heat 1 tsp oil in a pan (that we used to fry brinjal).
Crackle the mustard seeds and add chopped dry red chillies with curry leaves.Add this tempering to the prepared curry.
Garnish with chopped cilantro.
Brinjal more kulambu is ready.

Serving Suggestions:

Serves 4 people.
Serve over steamed rice.
Potato fry is a good side dish for More Kulambu.

Tuesday, October 9, 2012

Spinach Enchilada

Enchilada is a popular Mexican dish. Enchiladas are made by rolling corn tortillas around some filling like beans or veggies and covered with chile + tomato puree and baked with cheese. Click to read more about it. I have a very nice neighbor (Shukla aunty) and we exchange our best dishes always. Last month she brought us a plate of flavorful enchiladas she prepared using spinach. She made it from scratch and taught me that recipe. Here is that yummiest enchilada with 'home made enchilada sauce'. We used my homegrown basil leaves in this recipe. This may be a unique recipe with little Indian touch and sweetness, but this is the best for us. Hope you all enjoy!
Basil plants are growing (right)


Ingredients:
tortilla - 6
shredded mozzarella cheese - 3/4  cup

Spinach filling:
Spinach - 1 small bunch
onion - 1/2
garlic - 3 clove
bell pepper - 1/2
cumin powder - 1/2 tsp
red chilly powder - 1/2 tsp
oil  - 1 tsp

Filling:
Heat oil in a wok.
Add chopped garlic and onion. Fry for a minute.
Put the chopped bell pepper. Saute till it wilts.
Then add chopped spinach and saute for 1 minute.
Add required salt, red chilly powder, cumin powder.
keep aside.

Enchilada sauce:
butter / oil - 1 tbsp
garlic - 2 cloves
green onion (spring onion) - 1 small bunch
dried Italian seasoning - 1 tsp
Tomato puree - 1/2 cup
tomato sauce - 2 tbsp
hot sauce - 1 tbsp
red chilly powder - 1/2 tsp
All purpose flour - 1 tbsp
water - 1/4 cup
basil leaf - 1 sprig
cumin powder - 1/2 tsp

Method:
Heat oil and saute the chopped spring onion + garlic for a moment.
Add AP flour and saute for a few seconds.
Pour in the tomato puree and add salt, red chilly powder, cumin powder, dried Italian herb seasoning and bring it to a boil. Reduce heat and cook till raw smell of tomato vanishes.
Then add finely chopped basil, hot sauce, tomato ketchup / sauce (for sweetness),  1/4 cup water and bring it to a boil. Switch off.
If needed add some shredded cheese now (anyways we will be adding cheese later).


arranging the enchiladas: 
Preheat the oven to 350 deg F. Pour  few tbsp of enchilada sauce in a baking dish.
Toast the tortillas both sides in a tawa or microwave. place them in a wide plate.
Divide the spinach filling into 6 and scoop 1 part to each tortilla.
Fold them as shown in photo and keep them in the baking dish with seam side down (touching the sauce in bottom).
Now pour enough sauce to cover the tortillas.
Sprinkle enough cheese to cover the top.

Bake 15 minutes or till cheese turns bubbly and mild red.

Spinach enchilada is ready!

Serving suggestion:
Serve as main course meal.

Tips:
The left over enchilada sauce (while preparing) can be refrigerated for 3 weeks and used as sauce for pasta or pizza.

Wednesday, October 3, 2012

Eggplant fry and kitchen garden

Gardening is one of my favorite hobby from childhood. After coming to US, I couldn't understand this weather for a few years and planted only mint, herbs and some flowering plants. Bringing the plants indoor for cold weather and maintaining them is equally interesting but needs more space and knowledge. Then I wanted to grow some seasonal plants (annuals) as if it is a typical kitchen garden. This summer (by June) we bought 3 eggplant seedlings and one tomato plant from the local grocery shop. The apartment has allowed the residents to have some garden space. We planted them in our garden space in downstairs and the plants started growing very fast. I watered them regularly and fed them with home made fertilizer. My neighbors are already much enthusiastic gardeners and hence I started enjoying gardening again with them all. Within 6 weeks we could harvest huge eggplants (18 till now and still coming up) and I made many dishes with that. Also I shared the brinjals with my neighbors and got back some green chillies, long hot pepper (bajji milagai), tomato, spring onion. Our eggplant tastes very good, just like butter (am I boasting now:)). Totally we all enjoyed that buttery creamy delicious home grown brinjals:)
Here is the simple varuval (fry) I made using the second brinjal .... the first one....i picked before it got big, as I didn't realize how big it will grow: )

Eggplant varuval / fry.
Eggplant started showing up and growing.

Eggplants in cluster.

fully grown eggplant shrub.

see the small seeds inside...buttery eggplant.

I weighed each and every brinjal and noted down for fun. The biggest one weighed 584 gm :)

Ingredients: 
Eggplant (big brinjal) - 1 (300 gm)
oil - 2 tbsp
fennel seed (sombu) - 1 tsp
onion - 1
garlic - 5 cloves
curry leaf - 1 sprig
red chilly powder - 1.5 tsp
garam masala powder - 1 tsp
turmeric powder - 1/4 tsp
salt - to taste

Method:
Cut the eggplant into small cubes. Heat oil in a wok and add the fennel. After it gets mild red, add the chopped onion and fry till it gets golden brown. Add the crushed garlic, curry leaf and fry for 10 seconds. Then add the chopped eggplant and stir well. Cook covered with a tbsp of water and low heat till it is well done. Add the chilly powder, garam masala, turmeric, salt and cook covered in low heat for a few minutes.
Switch off before it gets mushy.
Eggplant varuval is ready!

 Serving suggestions:
Serve as side dish with chapati or any rice.

Tuesday, October 2, 2012

Groundnut chickpea sundal

Chickpea - channa, konda kadalai ; groundnut - peanut, nilakadalai, verkadalai.

Having sundal (salad with lentils) for snack is a great way to stay fit. I always try to keep a batch of sundal in my fridge for that tea time cravings:) Though the easiest way is to buy a canned lentil, I prefer the home cooked ones better. Dried nuts are lesser expensive, healthy and delicious. Pressure cooker makes perfectly cooked chickpeas very easily. We can do stove top cooking too, but it will take nearly 2 hours. Sometimes I cook the chickpeas in a big batch and freeze in small portion / containers, so that I can add some protein in any dish I want.


A healthy snack for tea time.

Ingredients:
dry White or red chick peas - 1 cup (1 coffee mug)
dry groundnut (peanut) - 1/2 cup
coconut oil - 1 tsp
shredded coconut - 2 tbsp
dry red chillies - 3
curry leaf - 2 sprig
mustard seed - 1 tsp
asafoetida (hing) - a pinch
salt - to taste
water (to cook) - to immerse and 1 cup standing over.

 Method: 
Wash the groundnut, chickpeas thoroughly and Soak them for 12 hours or over night. They will double in size after soaking. Fast Soaking can be done in hot water for 5 - 6 hours along with some baking soda (but I won't suggest that). Remove the soaked water which is frothy (must). Wash again and add some more water. They should be totally covered with water and add some water to stand 1 inch above. Pressure cook the peas to one whistle, then reduce the flame and cook in low flame for 15 minutes. Release pressure and take out. Add salt, drain the water. Heat oil in a wok. Splutter the mustard seeds. Reduce flame and add the red chillies, curry leaves, hing and wait till the chillies turn dark red. Add the cooked letils and stir fry till it looses all the water. Check the salt. Add  grated coconut. Switch off immediately.

Serving suggestion:
Serve as snack with tea / coffee.
Sometimes I make some chundal with variety rice like puli saatham, lemon rice or puli kulambu rice as side dish.
Channa is a very healthy protein rich snack with nearly 100 calories per cup after cooking.

Note: 
It would be better to make channa sundal and peanut sundal separately and mix them for the peanut lovers, as some can't take peanuts.
Red channa has more fiber than the white one.
Red chickpeas takes only 6 hours to soak (more the better) and it is easy to sprout too.

Saturday, September 22, 2012

Universal food festival in our Church

Last weekend (September 15) our Church, St.Cecelia's Church, Iselin, NJ organized an 'Universal food festival'. The parishioners were requested to bring a dish from their heritage. Also we were asked to send some recipes for the booklet the church printed.
I was very much excited to prepare a food from Indian cuisine. Hubby dear suggested me to make something with a story behind to share. Then he looked at my menu list and picked sarkkarai pongal (sweet rice pudding), as it is prepared on the Pongal day, the day of thanks giving celebrated by Indian farmers. I prepared the pongal using almost 2 lb rice. I needed a very big heavy bottom vessel to prepare this quantity of pongal. So I used my huge 10 liter pressure cooker my Father in-law presented us during our wedding :)  I used it as my stirring pot and it took me nearly 3 hours to get the pudding like consistency. The next thing puzzled me was the serving tray, as the pongal was very heavy and the disposable tray we bought couldn't hold it. So I kept a tray as base and set the disposable tray over it and poured the pongal into it. Now the whole serving tray was safe and I covered it with a foil. Then carried it carefully and presented it to the person in-charge (our favorite choir singer Ms. Mary Jane).
Other dishes from India were Vegetable briyani, chicken tikka, veg samosa and everything tasted fabulous.

The buffet was delicious with many choices from Cuba, Dutch Indonesia, Germany, Hungary, India, Ireland, Italy, Malaysia, Philippines, Poland, Polynesia / Hawaii ,  Slovakia, Sri Lanka, Ukraine , Vietnam, All American Classics.

Dessert buffet was opened around 7.30 pm and I was very much delighted to see the guests liking our Sarkkarai pongal along with all the dishes. Whenever someone asked about this 'sweet rice pudding', I told them the festival associated with pongal and we all enjoyed the party.

As soon as the party started I was very surprised and happy to see my recipe printed in the festival booklet.


The next happy thing was the gift they presented us by randomly choosing the ticket numbers. The gift is a beautiful Angel , named as Bright Star Angel made by 'willow tree gifts'. We both were very much thrilled to get that precious gift and consider and thank God as it is His blessings.
Bright Star Angel.

Totally the food festival was a very pleasant experience for all of us and looking forward to participate in all the festivals in Our St.Cecelia's church in future.


Thanks for reading this post my friends, this festival means a lot to me.
Thanks,
Viki.

Thursday, September 20, 2012

Avarakkai varuval (broad beans fry)

Usually my veggie stir fries used to be less spicy and less oily. But here is a spicy recipe for a simple stir fry with broad beans. We can substitute avarakkai with snow peas (tastes almost same).
Spicy Avarakkai Varuval.
Ingredients:
Broad beans (avarakkai) - 250 gm
sesame oil / olive oil - 3 tbsp
fennel - 1 tsp
shallot onion - 2
red chilly powder - 1 tsp
cumin powder - 1/4 tsp
turmeric powder - 1/4 tsp
curry masala powder - 1 tsp
curry leaf - 1 sprig
salt - to taste

Method: 
Wash the broad beans (avarakkai) very well. Remove the two tips and thick fiber in edges. Slice the broad beans as thin as possible.
 Heat oil in a wok and fry the fennel seeds till red. Then add the finely chopped shallot and fry till it wilts. Add the chopped broad beans and cook covered in low heat for 5 minutes. Stir in between. Add the salt, curry leaf, all the powders mentioned above. Sprinkle a tbsp of water and cook covered for 2 minutes. Switch off.
Avarakkai varuval is ready!

Serving suggestions:
Serve as side dish with sambar rice or any rice.
Makes a good side dish with chapati.
I serve some raitha also with this fry and chapathi.

Tuesday, September 18, 2012

Greetings!

Hearty wishes for all my friends and readers who celebrate Ganesh Chathurthi festival! Happy celebrations !
Cheers,
Viki.


Get Latest Greetings,Scraps

Click to see some kozhukkattai (dumplings) from my recipes:
Mothagam


Paal kolukkattai (sweet dumplings in coconut milk)

Paal kolukkattai
(milk dumpling)

Kambu kolukkattai (millet dumpling):

Aval Pazham

 If there is one easiest breakfast recipe in Indian, then it should be this one. LOL. Because all other recipes in India requires lot of ing...