Tuesday, March 25, 2014

Fish fry with green masala

What will you do, when one of your vegetarian friends is in need of a fish recipe temporarily, that doesn't smell too much? I prepared this new recipe when my friend was in need to include fish diet for the first time for her husband. I showed her to process the fish and the benefits of having it as curry than deep frying. But I knew , eating fried fish is easier for the beginners. My ordinary fried fish would have more fish smell, so she wanted one with more spices and I found this recipe myself:)  On that day we made it with butterfish . Then the next weekend I made it with pompano fish for us. (Butterfish can be made as whole fish fry, by slitting few lines and stuffing it with this masala). We tried tandoori method too, but frying tasted better. Now I am glad that this has became my hubby's favorite too.


Fish marinating in green masala

Ingredients:
Pompano fish or pomfret  (vaaval meen) - 1/2 kg (1 lb)
corn starch or rice flour - 1 tbsp

To grind:
salt - 2 tsp
green chillies - 4
turmeric powder- 1/2 tsp
Coriander powder - 2 tsp
cilantro - 2 handful
ginger - 1 inch
garlic - 4 cloves
black pepper - 1 tsp
cumin - 1 tsp

others:
lemon - 1 (juice)

Oil (to deep fry) - 200 ml (1 cup)
(I used corn oil here).

Method:
Wash the fish and remove all the fins and scales by a knife.
Then slice it into thin slices (as shown in photo).

Apply little turmeric powder over the fish and keep aside.

Grind the items given without adding water. If needed add few tsp of lemon juice.
Then mix this with corn flour or corn starch.

Mix the ground masala with the powders and salt given above.

Gently rub the masala over the fish slices(dab some masala inside the fish too)and marinate for 30 minutes.

Heat oil in a broad based wok .Fry the fish both sides crispy.

Fish fry is ready! Sprinkle some lemon juice all over the fried fish to jazz up the taste.

Serving suggestions:
Serve as side dish with any rice. The suitable combinations are sambar rice , rasam rice or meen kulambu rice.

Wednesday, March 19, 2014

Pav bhaji

Pav bhaji can be related to buttery mashed potatoes with an Indian touch. It is one of the popular dishes in North India and will come under 'chaat food' or 'street food' category. It will be typically served with a toasted bun called pav bun (looking like small burger buns).
The base for this curry is always potatoes and in some occasions raw plantain. Also it is noted for its rich butter / ghee flavor. It is one of my most favorites and my neighbor aunty would bring us this yummy gravy often. I used to make this with a readymade powder masala. But here is a recipe for this famous pav bhaji from scratch.

Pav bhajji with little ghee on top.

Pav bhaji is ready !

Tempering for bhajji

Boiled potato and vegetables.

Ingredients:
Boiled potato - 3 or 4
cauliflower - 1 cup
carrot - 1
green peas - 1/2 cup
capsicum - 1/2
onion - 1/2
tomato - 1
ginger - 2 inch
garlic - 3 cloves
green chillies - 3
cilantro - handful
milk - 1 cup (optional)

To powder :
Fennel - 1 tbsp

others:
ghee / butter - 3 tbsp
oil - 3 tbsp
cinnamon - small piece
bay leaf - 1
curry masala powder - 1 tbsp
red chilli powder - 1 tsp
turmeric powder - 1/2 tsp
cumin powder - 1/2 tsp
salt - to taste
ghee - few tsp while serving.
lime juice - 2 tbsp

Method:
Pressure cook the potatoes for 3 whistles or in 5 minutes in simmer after 1 whistle.
Put them in cold water and peel immediately. Mash finely using hands or a masher / spatula.
Mean while chop the cauliflower, capsicum, carrot finely and put them in a large wok with 1 cup water or milk. Put green peas also and cook till tender. To this add the mashed potatoes, turmeric powder, salt, garam/ curry masala powder, cumin powder and bring to a boil. Mash with spatula again coarsely, so that all vegetables get mixed very well.
 
Heat oil+butter in a wok and add cinnamon, bay leaf. Then add minced onion and stir fry for  a few seconds. Then add chopped tomato. Saute till oil separates. Finely chop ginger and garlic. Pour this to the boiling vegetables mixture.

Dry roast the fennel and powder it. Add this powder to the boiling mixture. If needed add some more water , so that the curry comes to a thick gravy consistency.

Switch off and mix lime juice, cilantro.

Pav bhaji is ready !

Serving suggestion:
It is traditional to add little ghee on top of the pav bhaji while it is served hot.
Serve with toasted pav buns or any roti.
Raw sliced onion and lemon are kept along with this bhaji.
Tastes good with dosa too.

Note:
My version is a simple pav bhaji recipe  'without pav spice masala mix'. We can find this pav masala easily in any  Indian grocery store (in the masala powder aisle).
If using pav bhaji readymade masala , then  don't add fennel / Sauf powder, cumin powder, curry masala powder. Pav masala has everything together.

Thursday, March 13, 2014

Spicy masala dosai

In South India, we make Masala dosai by stuffing the dosa with yellow poori masala. But the masala stuffing varies from city to city. My neighbor aunty (from Gujarat), gave me a spicy masala dosa on a  morning and I totally loved her version. Here is  her version. Enjoy this with sambar and chutney for a  delicious dinner


Potato masala:
Boiled potato - 3
red onion - 1/2
ginger garlic paste - 1 tsp
turmeric powder - 1/4 tsp
red chilli powder - 1 tsp
cilantro - few leaves.
salt - to taste
garam masala / curry masala powder - 3/4 tsp
lemon juice - 1 tsp
oil - 1 tbsp
fennel - 1 tsp
Tomato ketchup - 1 tsp per dosai (optional)

Peel the boiled potatoes and mash almost finely.
Heat oil  in a wok, add fennel (sombu). As it gets red, add finely chopped onion. After the onion gets soft, add ginger garlic paste and saute till raw smell goes. Add the turmeric powder, chili powder, curry masala powder and mix for 10 seconds. Then add the mashed potatoes, salt, cilantro and cook covered with handful of water for 5 minutes.
After switching off sprinkle lemon juice and keep aside.

Dosa:
Dosa batter - 2 cup
sesame oil - as per need
ghee - optional

Method:
Heat a dosa tawa. Sprinkle few drops of sesame oil. Soak a clean cloth with water and wipe it off, so that the tawa is completely coated with oil.
Pour a 1/2 cup batter (for a large dosa tawa or lesser for a small tawa).  Spread it in circle to get a medium thick dosa. Drizzle some ghee on top of it. Flip as it gets mild red on one side.
After it gets cooked both sides, take the dosa and keep it on a plate as if the red side remains at bottom. Spread the tomato ketchup over the dosai. Take a scoop of potato masala and spread over it and fold. Masala dosai is ready!

Serving suggestion:
Serve with sambar and coconut chutney as dinner or any main course meal.

Note for beginners:
It would be laborious to make all these potato masala, dosa batter, sambar , chutney on a single day. I am sure , no Indian would do like that. So I generally make dosa batter ahead and keep refrigerated always.  Potato masal I have mentioned here can be prepared a day before for lunch pack along with chapati or rice. Like wise  sambar can also be saved from lunch. So if we plan ahead it would be easier for us to make this masal dosa for our loving family.

Monday, March 10, 2014

Coconut milk vegetable biriyani

Making biriyani with coconut milk is more popular in Tamilnadu and Kerala, where we get lot of coconuts easily. Even today, we can see many coconut trees surrounding houses in my hometown. In my dad's house we used to pick the coconuts by hiring a person regularly and would store them in  a small den like place near kitchen. Isn't it cool to have some coconut trees of our own, enjoying the fresh air along with tender coconuts and coconut for cooking:) So making use of coconuts is more in my tradition than ghee. Here is one biriyani I make with coconut milk.

I made this biriyani for a potluck function to celebrate one of our friend's (Emelda) birthday and another friend's (Priya) wedding anniversary. As it was a Friday, many of us were vegetarians on that day and we decided to make veg as well as non veg biriyanis.  While the birthday girl was making a super soft surprise coffee cake for Priya (and Dindigul chicken biriyani ), I surprised Emelda with a carrot cake on her birthday:) Our friend Brinda had made a very delicious cutlet and raitha, while another friend bringing drinks, icecream and chips. A big thanks to our friend Elizabeth for organizing and conducting these parties together in her pretty house. Also she had made chicken curry and pasiparuppu payasam along with arranging everything together and hosted the party. While the men were roaming around, talking and enjoying themselves, we ladies played with kids, talked a lot and not to mention we all enjoyed the foods very much.  Totally we had a wonderful party!


Coconut milk vegetable biriyani with chicken curry, raitha and boiled egg.
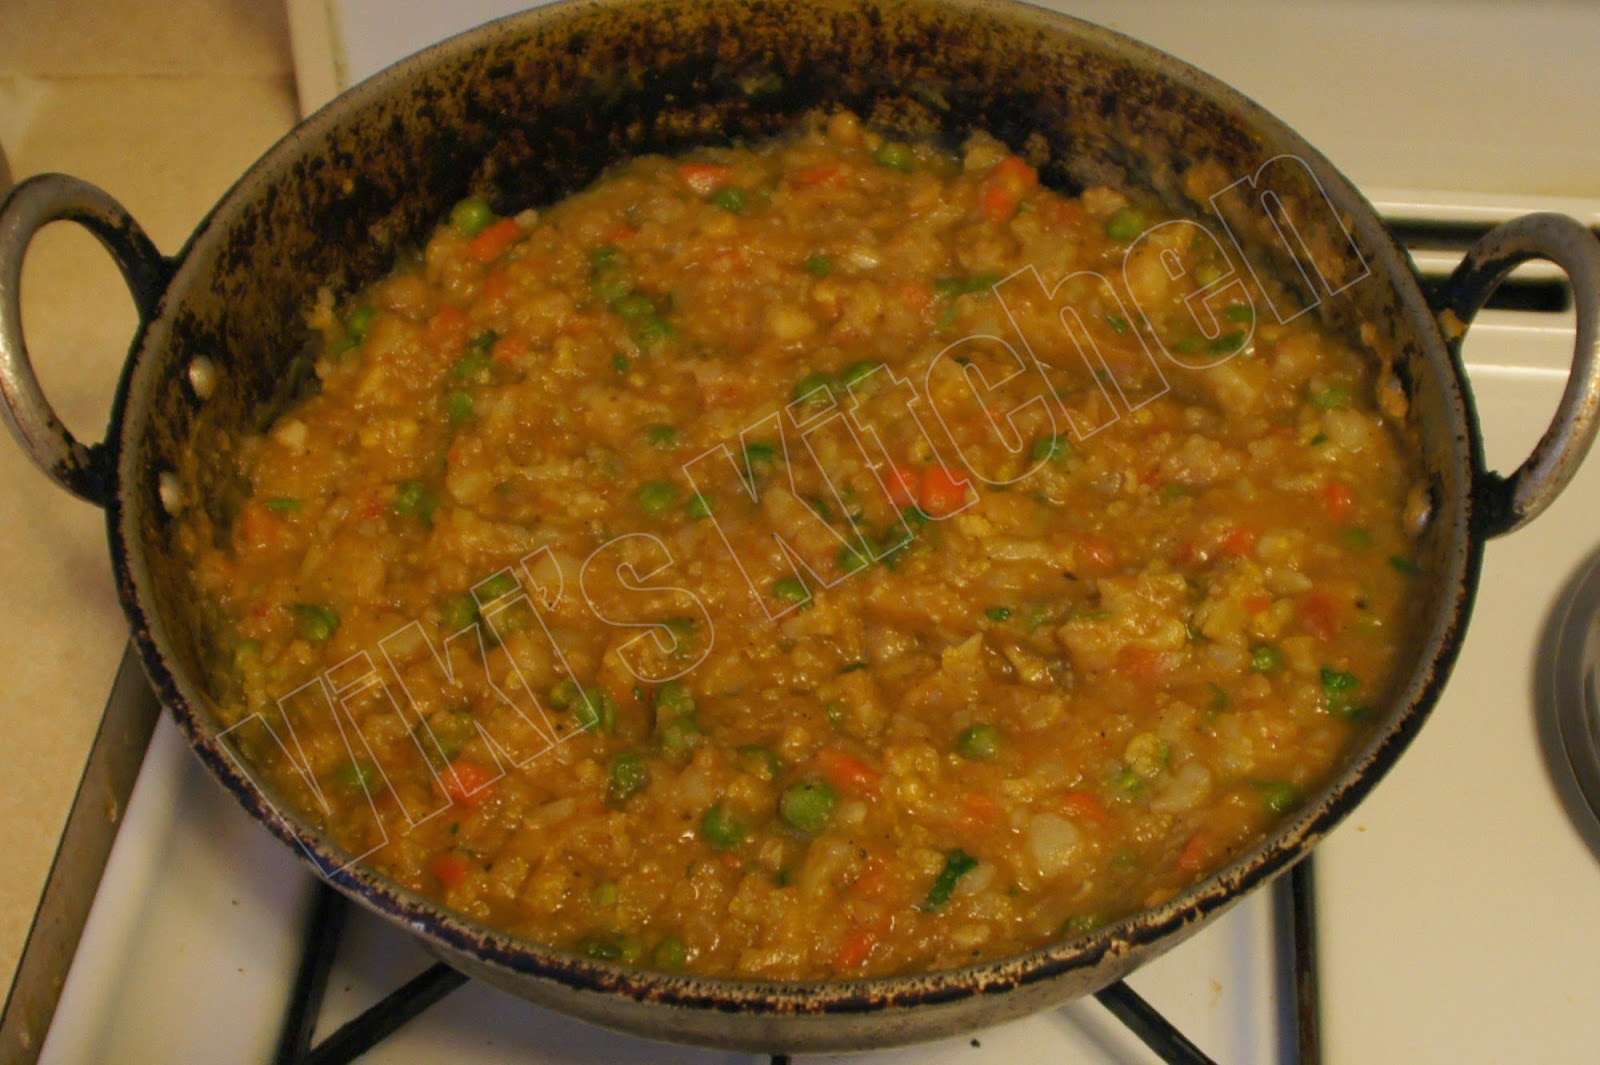
After dhum process

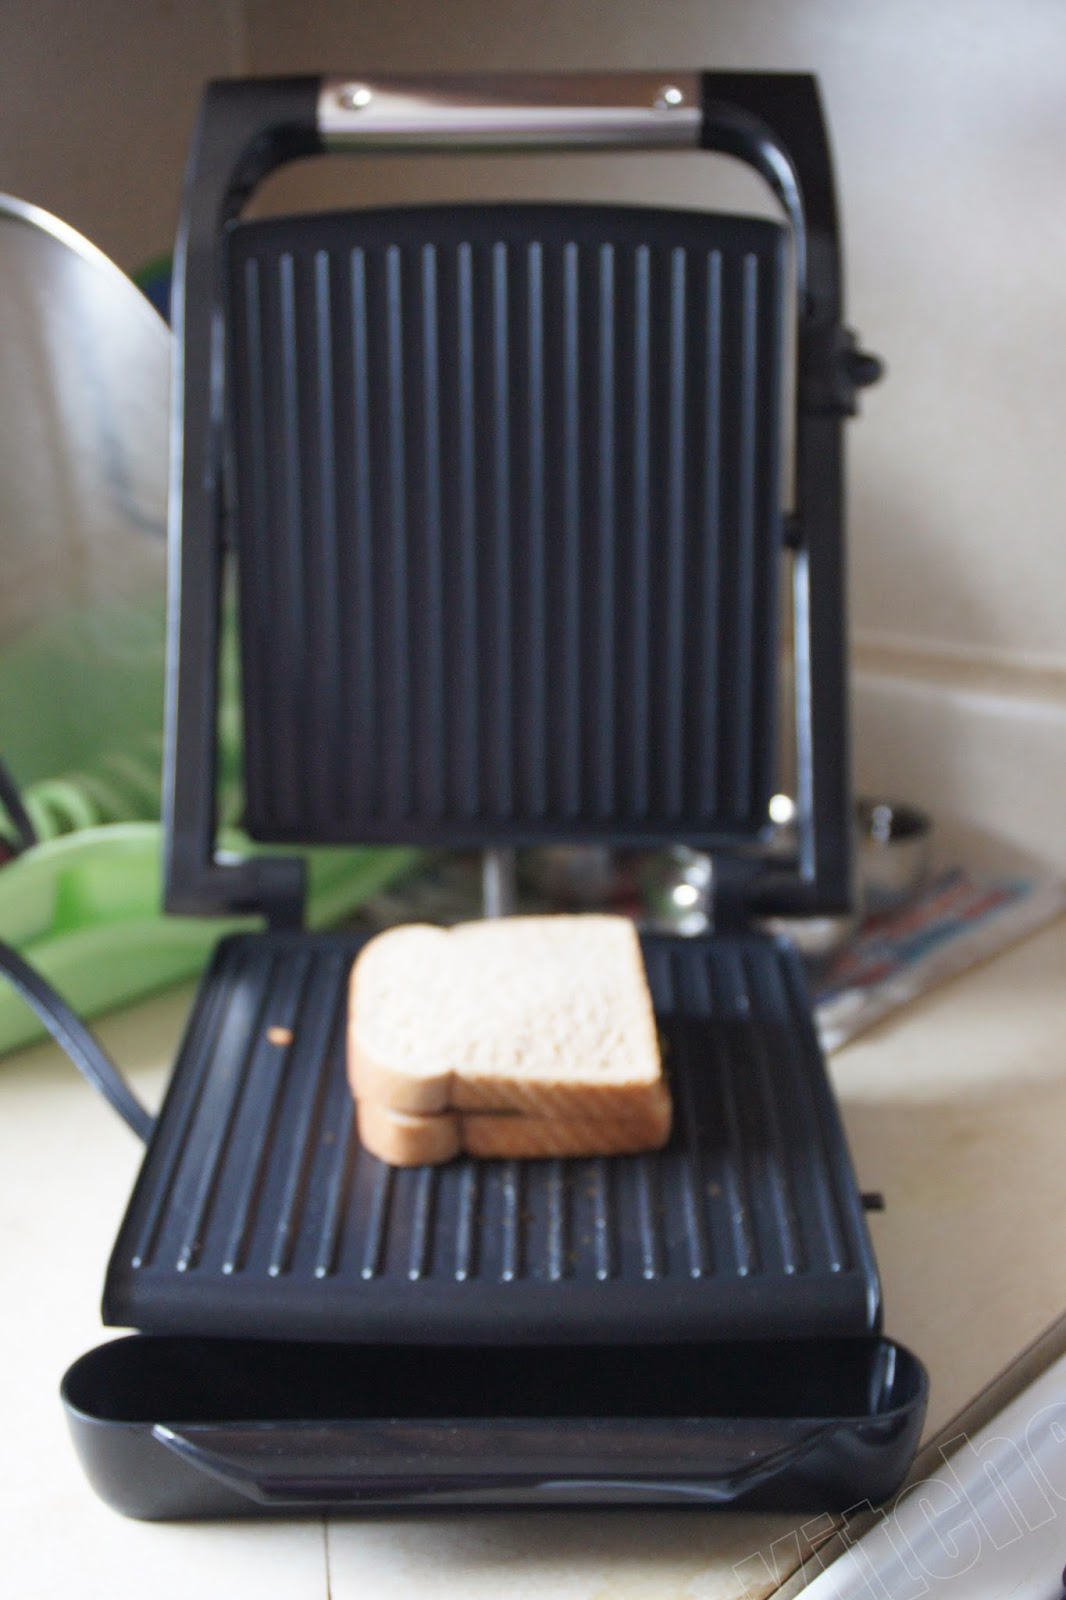
Biriyani in dhum:Dum biriyani sandwiched between  Hot dosa tawa (bottom) and hot water (top vessel).

Biriyani before dhum.

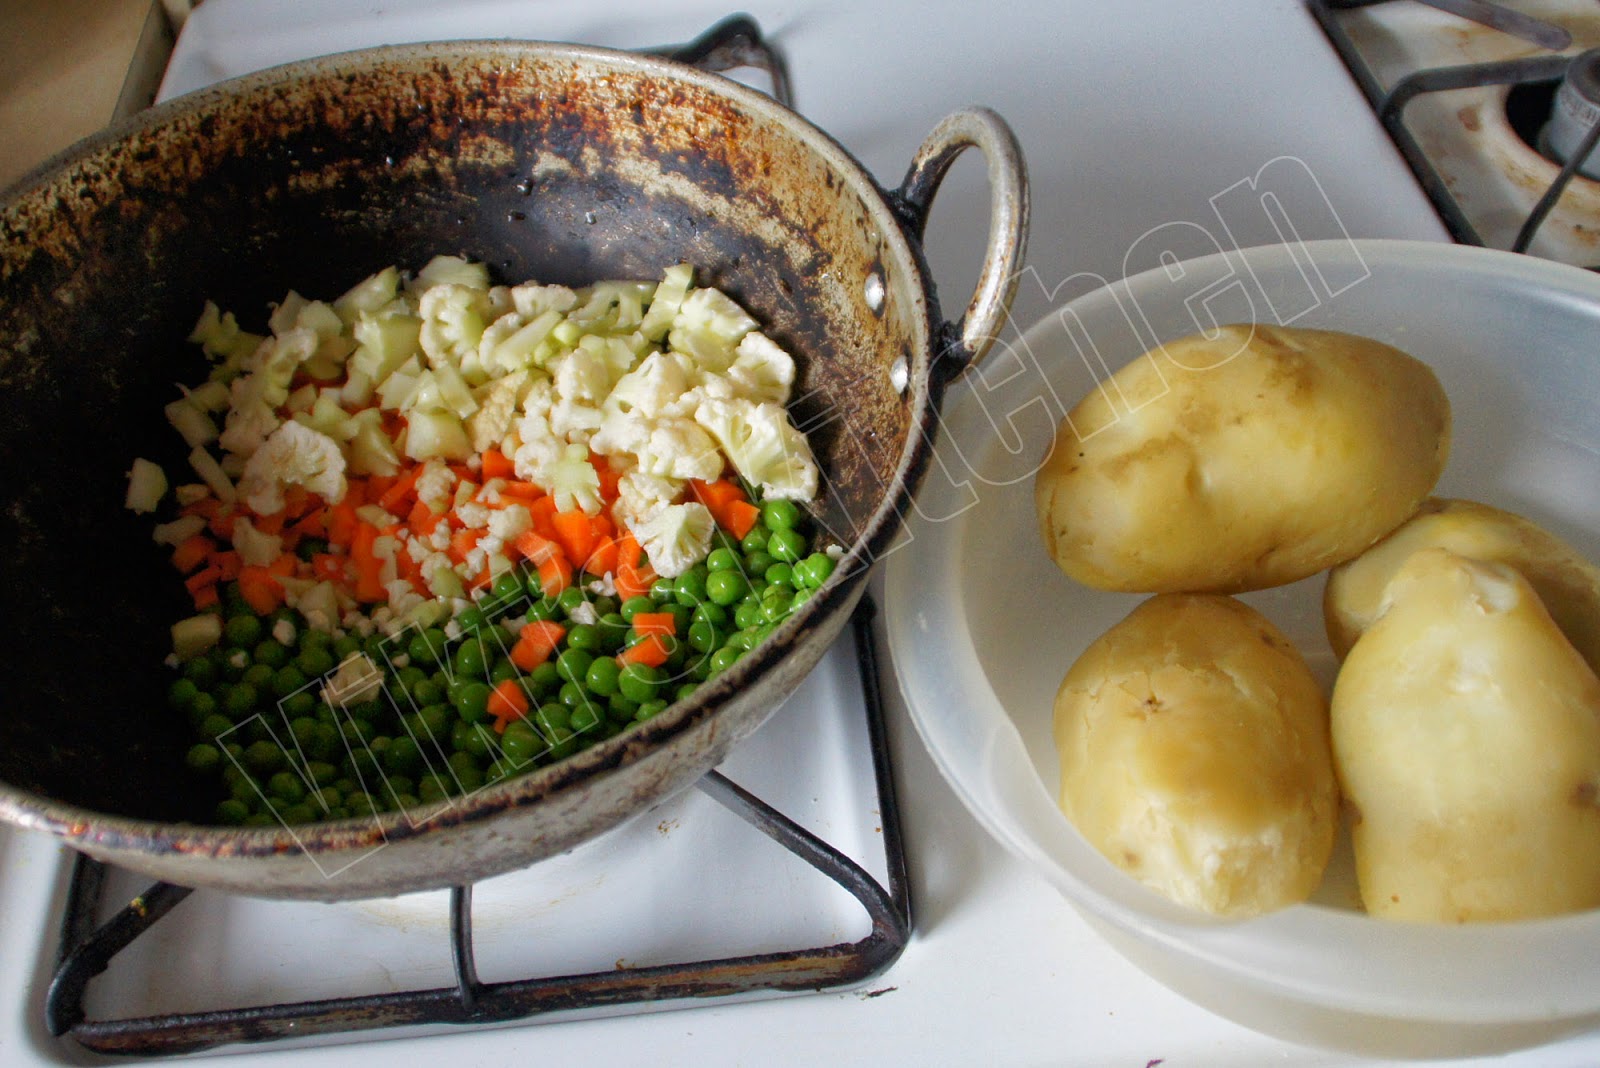
Vegetables for biriyani along with pure coconut milk.

(Carrot cake:) Birthday cake I made for my friend.

Vegetables:
Cauli flower - 1/4 flower (chopped 1 cup) , green beans - 20 , carrot -1 , green peas - 1/2 cup , cooked double beans - 1 cup, potato -1 , green capsicum - 1/2 , soya chunks or bread crumbs - optional (see note below).

Ingredients:
Basmathi rice / Jeeraga samba raw rice - 5 cups
medium thick coconut milk - 1.5 cup
Turmeric powder - 1/2 tsp
Red onion - 2 (medium size)
green chillis - 5 (uncut).
Lemon - 1
Tomato - 4
curry masala powder - 1 tsp
red chilli powder - 1 1/2 tsp

To temper:
Fennel - 1 tsp
bay leaves - 2
star aniseed - 1,
cinnamom stick - 2 inch
cardamom - 2
cloves - 4
ghee - 2 tbsp
Any cooking oil - 1/2 cup
cashew nuts -10
raisins- 10.
salt - to taste

Masala - 1
cilantro- 10 stems
mint leaf -1 handful.

Masala 2:
Ginger - 2 inch
Garlic - 1 (whole) peeled

Preparation:
wash and clean the vegetables. peel the skin of carrot and cut into long thin slices.
Cut the green beans in to long pieces.
Pluck 5 -6 florets from the cauliflower.
Defreeze the green peas.

Wash the rice and soak it for 10 minutes.

Grind all the pastes separately.

Chop onion and keep aside.

Method:

Heat oil + ghee in a biriyani vessel.
Add fennel ,star aniseed , cinnamon stick,cardamom ,cloves, bay leaf , cashew, raisin.
Then goes the chopped onion . Add 1 tbsp sugar at this point to make the briyani more flavorful and it cooks onion soon too.
Fry it till golden brown and add the ginger garlic paste and stir well till the raw smell goes.
Now add the finely chopped tomato and cook till the oil oozes out of it.  Add the cilantro paste and cook well till raw smell goes. Add all the powders given.
Now put the vegetables, green chillies and add salt. Cook for just 2 minutes. The vegetables should be tender but crisp. Pour coconut milk. Switch off.

In the mean time, in a separate vessel bring lot of water (10 cups) to boil. Add lemon juice, salt and rice. Cook for 3 to 4 minutes in rolling boil. Drain water while the rice is 75 % cooked. Now add this rice to the vegetables. (keep that hot water safe for making the dhum process...see image). In this stage add cooked double beans or butter beans.

Start heating the biriyani vessel again. Mix well now and check for salt in this stage.

Close with a tight lid and place this vessel over a hot dosa tawa (girdle / flat pan) . In a separate vessel pour the hot water which we got while cooking rice and place it above the biriyani vessel. This is a homely dhum process. Reduce the flame to minimum. After 30 - 40 minutes the biryani will be ready!

Serving suggestions:

Garnish with chopped cilantro , mint leaves and ghee fried bread crumbs.
Serve vegetable biryani hot with onion raitha .

Note:

*Instead of dhum process , we can pressure cook it also. Bring to 1 whistle, reduce flame and keep in low for 5 minutes. Switch off then.
*Double beans or butter beans or rajma can be bought in a can or in dry form. Dry double beans should be soaked for 3-4 hours and pressure cooked for 1 whistle. switch off and check if it is cooked. If not continue cooking in stove top, as it gets mushy easily after 1 whistle.
*Bread crumbs: slice one or two fresh bread slices into 1.5 inch cubes. Fry all in small batches in 1 tsp ghee in a shallow tawa. This can be replaced by soya chunks or paneers pieces. Adding some star ingredients like this will make the vegetable briyani more special.
*Don't use thick bottom vessels for making briyani, as it will retain heat differently and will make briyani mushy. I had done this before and found out now:) Regular broad vessels are only suitable for dhum briyani.
Typical biriyani aluminum vessel degchi (photo courtesy: here)...its not mine:) want one  like this...perhaps a little smaller is enough...ha ha:)

*Approx....Number of adults : 11 and kids 5. I had made this dish with 5 cups of rice (so is my friend for chicken briyani), so that we all could share some for the next day, so we ladies could be relaxed the next day.
But calculate  the ingredients as per your need.  Noting this measurement for my future reference.

Thursday, March 6, 2014

Podi mini idli

If you like cute miniature foods , then this post is definitely for you:) Podi idly is a non traditional form of idly (rice cake) , created by Indian mothers to make the kids love their food. We cannot see these kind of motherly foods in restaurants, as it definitely needs some special love for the family eating it. I have made small mini idlies and prepared this simple breakfast. But my mom used to make this using regular big idli and pack this for lunch. At that time, getting a mini idly stand was not that easy for people in my town, as all the stores we got were small and would have the traditional vessels only:) After buying all types of traditional kitchenware, we women would look out for more choices and the market is full of newer equipments now:)
The specialty of this idli is, it never gets dry because of the idli powder, sesame oil mixture. So it is a better choice than regular idli for picnics and lunch boxes too.
Also check out my sambar mini idly too.
I made it for breakfast for us on a weekday, and love the way hubby dear exclaimed and enjoyed it:) So prepare this and make your sweetheart happy:)
Mini idli coated with idli-podi

For mini idly:
Idly batter - 1 cup
ghee - 2 tbsp
mini idly stand
idly cooker or a pot to steam the idly.
Idli podi - 2 tbsp
sesame oil - as per need ( 3 tbsp)

Method:
Grease the idly plates with very little ghee.
Pour the batter in the idly holes using small spoon.
Heat the pressure cooker (idly cooker if any) with 2 cups of water and place the idly stand carefully inside.
steam the idlies for 7 to 10 minutes without keeping the pressure valve.
Then let the idly loose the heat for 5 minutes and scoop out the idlies carefully using a spoon.

Mix the idly podi with sesame oil in a  bowl.
Place the required number of mini idli in the mixing bowl and  gently stir to coat all the idlies.
If needed add more sesame oil over the idlies.
(If using regular idlies, then coat each idly individually by dipping on the prepared podi and pack for lunch in an airtight container).

Serving suggestion:
Serve as breakfast or make a lunch pack.

Thursday, February 27, 2014

Oats granola

Here is a sweet snack I made for us during a weekend. I saw this recipe in foodnetwork by Alton Brown. Click to see the original version. In my recipe I have infused my own method to bake to avoid charring. Enjoy!
Oats granola.


After baking.

Spread on cookie sheet.

Mix oats , nuts with sugar.
Ingredients:
Old fashioned oats - 3 1/2 cups
dry coconut flakes - 1/2 cup
slivered almond - 1 cup
cashew - 1/2 cup
peepled pumpkin seed -  1/2 cup
dark brown sugar - 1/2 cup
maple syrup - 1/2 cup
olive oil - 1/4 cup
salt - 3/4 tsp
raisin - 1 cup

Method:
In a large mixing bowl put oats, nuts,dry fruits, coconut, sugar.
In another bowl mix maple syrup, salt, oil.
Pour the liquids to dry ingredients and mix well.
Spread this in two baking sheets.
Preheat oven to 250 deg F.
Bake for 20 minutes, stirring after 10 minutes.
Take out and let dry for 30 minutes.
Then bake again for 20 minutes, stirring after 10 minutes.
Switch off and let it get crispy in that heat for next 10 minutes.
Oats granola is ready!

Note:
We can continuously bake for 1 hour, as suggested by the original recipe too. But I do like this for a more safer method to prevent sugar from charring.


Monday, February 24, 2014

Gulabjamun (with egg)

Whenever I buy a pack of gulabjamun mix I would always wonder how much effort our mothers would have put to make these from scratch. Those olden recipes involve making a palkova without sugar, which itself demands lot of time and then mixing it with Ap flour, etc . While talking about this to my neighbor aunty, she told me that it can be made easily with milk powder and it is not necessary to buy a ready-pack . She also told me that it is a popular way there in NorthIndia and Pakistan. I was totally impressed by her recipe, but didn't note down on that day (now I have noted down her veggie version too). That day I wanted to make one immediately and searched the net and got a recipe of Gulabjamun with egg. This recipe is adopted from Morewish cuisine.  Egg in gulabjamun may sound unique but it tasted extremely good.  My hearty thanks to this author, I am going to use this inexpensive way hereafter instead of buying a pack. Hope you all enjoy this !


Have  a look inside and see how spongy and soft:)

Ingredients:
Milk powder - 1 cup
Egg - 1
Ghee - 1 tbsp
Maida (AP flour) - 1 tbsp
sooji (ravai) - 1 tbsp
baking soda - 1/4 tsp
baking powder - 1/4 tsp
Oil for frying- 1 cup + 1 tbsp ghee
For syrup:
Sugar - 1 cup
water - 1 cup
Rose essence - 1 drop
cardamom powder - 1/8 tsp
alomond slivers - to decorate

Method:
Make the syrup by mixing sugar with water and bring to a boil. Reduce flame and boil for 2 more minutes. Switch off and keep it warm. add cardamom powder and rose essence.
Mix all the dry ingredients first. Then mix ghee and stir well. Beat the egg with a  fork and add to the mixing bowl. Knead to a smooth dough. Don't knead too much. Make a smooth dough.
Divide it into 15 - 16 pieces and roll each piece into small balls or elongated balls. By toughing some oil or ghee smooth the gulab jamuns, so that there is no crack.

Heat oil  + ghee in a frying pan. Keep the flame in minimum and fry the jamuns in small batches, till they get golden red color.
Take them out and soak in prepared syrup.
Let it soak for an hour or overnight before serving.
Decorate with almond slivers.
Gulab jamun is ready!

Serving suggestion:
Makes 16 gulabjamuns.
Serve warm or cold as dessert.

Note:
This is the best way to make gulabjamuns that gets cooked inside and outside uniformly.
As soon as it is soaked (within few minutes) it may taste a little salty. But after an hour or more this gulabjamuns will be perfectly sweet and soft.

Thursday, February 20, 2014

Quinoa upma

Quinoa is another good grain I started cooking in recent years. Generally quinoa can be made into a salad. It blends with many Indian recipes easily and here is my Uppuma (upma or kichidi) with Quinoa. Quinoa comes in a rainbow of colors, I picked up this red quinoa as it looked more pretty in that aisle:) Other than that all tastes almost the same. But red quinoa has more crunchy texture. We can use any variety for this upma recipe.


Quinoa upma with vegetables
Ingredients: (for 2 adults)
Quinoa - 1/2 cup
water - 1 1/2 cup
Tempering:
olive oil - 1 1/2  tbsp
channa dal - 1 tbsp
mustard seed - 1/2 tsp
onion - 2 tbsp 
green chilly - 2
ginger - small piece (1/2 inch)
curry leaf - few
cilantro - few
salt - to taste
carrot - 1
green peas - handful
  
Method: 
Wash the quinoa thrice in running water with gentle rubbing with our palm (as per directions). This is done to remove bitterness.

Heat 2 tbsp oil in a wok.
Add mustard seed. let it splutter. Then add the channa dhal. Wait till it gets red. Then add chopped onion, curry leaf, cilantro, ginger, green chilly. As the onion starts to get soft, add chopped carrot, peas and stir for a minute.
Pour water + Salt and let it come to a boil.
Then reduce flame and add quinoa.
Cover tightly with a lid. Reduce flame to minimum.
Cook for 15 minutes or little more to get the quinoa completely cooked.  Then stir well.
Switch off. Quinoa upma is ready!

Serving suggestions:

Serve as dinner along with pickle or sugar.

Friday, February 14, 2014

Happy Valentine's day ,


Gulabjamun from milk power and egg. Pre Valentine's day Gift Feb 10

Valentine's day treat: Kesari with icecream

Wishing all a very happy St. Valentine's day !
Love,
Viki Xavier

Wednesday, February 12, 2014

Capsicum Panini in Indian flavor

Panini or Panino is a kind of sandwich originated in Italy. I had no idea of this dish till I tasted one made by my neighbor aunty. She can merge any cuisine with our Indian spices and lots of butter and it will satisfy all my taste buds:) Gujarati foods have become my next favorite after Tamil foods because of her:) Then I saw one recipe by Giada in Foodnetwork Tv and saw how she made those thin sandwiches out of the thick baguette or heavy breads. After that also I didn't buy a panini maker, as I was much hesitant to ask for one more kitchen gadget while my existing collections is already voluminous :) Then the thanksgiving came and every other store we went was having a sale on this panini press and I silently waited without asking hubby for this. I watched all my friends filling their carts with these panini makers and came home with the electronics he wanted for  a long time (along with my other stuffs). But I was chanting 'panini maker' 'panini maker' silently and didn't want to say it loud:)  Hubby could have watched me looking at other's carts or my rantings  (about aunty's :) )could have made him...I don't know. But he bought me this panini maker with all those Kohls cashback offers we had got after the sale and presented as Christmas gift:) With my wish coming true, I am making panini quite often, exploring all the recipes with this. So you can expect more and more paninis from me , while you are trying this yummy capsicum panini in Indian flavor.
Panini in Indian flavor.


My Bella panini maker....wow!
Ingredients:
Whole wheat bread - 6 slices
green capsicum - 1/4
red capsicum - 1/4
onion - 1/4 cup
shredded cheese - 1 tsp for every sandwich
butter - 1 tbsp
Indian green chutney - 1/4 cup
tomato sauce - 1 tsp each sandwich

Method:
Heat the panini maker to maximum heat with the lid closed. After we see the ready button glowing, open the grill. (Read and follow the instructions carefully if it is the first time).
In the mean time place three bread slices on a plate and spread 1 tbsp green chutney and 1 tsp tomato sauce over the breads.
Put the chopped capsicum, onion and cheese over that. Place the other half of bread slice over the sandwiches.
Rub a piece of butter on panini press (bottom plate) in a small area and  place the prepared sandwich.(one at a time).
Place the lid gently (no locking) and the by the weight of the top plate the sandwich will get thin, crunchy and extremely good in one minute.
If needed apply some more butter on top and press again gently.
Take out using a spatula, slice and serve while it is hot.
 Simple panini is ready!

Serving suggestion:
Serve as breakfast or dinner as main course meal.

Thursday, February 6, 2014

Almond candy

Almond candy is one of the easiest snacks I have found recently. Cooking something special on Fridays is a common scene in many households. I too love to make the weekends special by making a snack or special dinner on Fridays. Two weeks back, on a Friday morning I made this as a gift to hubby and kept it secretly in his snack box. Now this has become his another favorite :)

There are many versions to make this simple candy. But I have my own method to make it quickly in stove-top, though the original versions call for baking. So try this if you want some quick treat.
Glazed almond candy

Ingredients:
Almond - 1 cup
brown sugar - 1/2 cup (or little lesser)
cinnamon powder - 1/4 tsp
water - 2 tbsp

Method:
Heat a wok and dry roast the almonds in low heat till they smell good. It may take almost 3 minutes for the almonds to get toasted. Look for spots while heating. Then add the brown sugar, cinnamon and water and mix well.
Continue stirring and wait till sugar dissolves and coats the almonds.
Almost after 2 minutes of low heat roasting we will notice caramelizing of sugar and it will get hard. Don't heat further. Switch off. Transfer to a plate and let cool completely (almost for 10 minutes). 
Almond candy is ready!

Serving suggestions:
Store them in airtight containers and serve as snack or dessert.

Tuesday, February 4, 2014

Muttai kothu chapathi (Scrambled egg chapati)

Muttai kothu parotta (scrambled parotta with eggs) is another popular street food in Tamilnadu and Kerala. We can get this kothu parotta dish in almost all parotta stalls in Tamilnadu.
Instead of the regular maida flour parotta, occasionally I use my leftover whole wheat chapatis to make this kothu parotta for a special dinner. So I am giving my standard recipe here. But we can substitute chapatis in this recipe with plain parotta (frozen plain parotta , Ceylon parotta) to get the original taste. 

While growing up, my elder brother was the first one to introduce us with this kothu parotta. Going to a parotta stall or road side shop would not be a girly thing at that time. So my brothers would do it for us giving us a relaxed evening:) He used to buy this from some shop near Palay bus stand. After few months he started saying that this dish is the most sought one in that place and would buy the plain parotta with salna only, to avoid the queue. Then mom started making us this muttai kothu parotta at home using the plain parotta  he brings and I too got the knack from her. Good that I learned to make this kothu parotta, as this is my hubby's favorite food after briyani.  While we were newly married he was amazed at seeing his favorite dish done at home. Though he buy me this special dish on many weekends, he appreciates the good eggs at home, quickness and less expensive good food we get by making it personally:) Slowly I swapped the parotta with chapati in this dish. Nowadays whenever I make vegetable salna or kuruma with chapati for lunch , hubby will expect me to do this spicy dish for dinner:) This has become many of our friends' favorite too and so I am giving this as another post after my muttai parotta recipe.
Enjoy my version of muttai chapati and tell me how much you all love it:)

Scrambled egg chapathi / muttai kothu chapati with onion curd raita.

Ingredients: (for 2 plates)
wheat chapati / small parotta - 4 (or)  frozen parotta- 3
Egg- 3
salna or Kuruma- 1 cup (veg or Non-veg)
Red onion- 1
green chillies- 2
Tomato - 2
ginger garlic paste - 1 tsp
curry masala powder- 1 tsp
chilli powder - 1/2 tsp
pepper- 1 tsp
curry leaves- 2 sprig
cilantro - handful
oil- 2 to 3 tbsp
salt - 3/4 tsp

For garnish:
green chilly - 1
curry leaf - 1 sprig

Method:

*Cut or tear off the parotta/chapathi into very small pieces.
Keep aside.

*Heat oil in a broad thick bottom wok, add fennel seeds, after it gets red add the chopped onions and saute a little. No need to cook till red. Add ginger garlic paste and saute till raw smell goes.
Now add the finely chopped tomatoes and cook till it is cooked.

*Make some space in wok by moving all the fried items to one side. Pour the eggs, salt, chilli powder and stir it till the eggs get half cooked .
Then mix the egg with the onion and tomato and stir well.

*Add the scrambled chapati pieces and mix well. Reduce flame and continue sauteing.
Sprinkle curry masala powder, pepper powder, chopped cilantro,curry leaves.
Stir in low flame till it gets almost dry. Then pour the salna / kuruma. Mix well and switch off.
Sprinkle with finely chopped green chillies and curry leaves and serve piping hot.

Scrambled egg chapati is ready!

Serving suggestion:
Serve as dinner or lunch along with onion raitha.
Makes a good lunch pack too.

Saturday, February 1, 2014

Pumpkin pie (simple)

Making a pumpkin pie was in my mind for a long time but some how I would pick one up from the grocery store during holidays and my pie baking would be postponed. At first I saw this Libby's famous pumpkin pie recipe on the back of the Nestle evaporated milk tin's label. I saved it like a treasure and bought everything as per list. Baking a pie from scratch would have been more appropriate for blogging, but I thought these kind of convenient groceries would make cooking more easier. I prepared this pie during last year Thanksgiving and it came out very well. This recipe is a keeper for me, as we both enjoyed it very much:) Hope you all like it too!
Pumpkin pie with kulfi icecream.


Semi homemade quick pumpkin pie.

(The following recipe will give 2 pies.But I had only one crust.  So I halved the recipe and made one pie with crust and reserved the remaining mixture for another pie without crust).

Ingredients:
Pumpkin puree - 1 can (15 oz)
Nestle evaporated milk - 1 can (12 fl.oz)
Sugar - 3/4 cup
egg - 2 large
salt - 1/2 tsp
dry ginger powder - 1/2 tsp
powdered cloves - from 3 cloves
cinnamon powder - 1 tsp
crust:
graham cracker pie crust - 2
(or) one 9 inch 4 cup volume deep pie crust.

Method:
Preheat oven to 425 deg F for nearly 15 minutes.
In a large bowl beat the eggs. Mix the pumpkin puree and evaporated milk. 
In a small bowl mix  sugar, spice powders, salt. Add this to the large bowl and mix well.
Pour into ready made pie shells.
Bring down the  temperature to 350° F.
Bake for 40 - 50 minutes or until an inserted knife comes clean.
Check every 10 minutes after 35 minutes.
The next important step is cooling the pie completely. Cool it on wire rack for 2 hours.
Pumpkin pie is ready!

Serving suggestion:
Serve slices of pie with whipped topping or ice cream.
Keep refrigerated till use.

------------------------------------------------------------------------------------
If using frozen pie crust: Keep it in room temperature for 1 hour to defrost it. Don't microwave.
For 9 inch  pyrex glass deep pie plate: first heat upto 400 deg F for 10  minutes. Then reduce heat to 325 deg F.
Use the above recipe completely to make 1  pie. Bake for 45 - 55 min, checking every 10 minutes after 35 minutes.

Wednesday, January 29, 2014

Sauteed Broccoli snack

Broccoli is another cute looking member from cabbage family. It tastes great by itself without much seasoning. Italians brought this vegetable to USA. It can be eaten raw or cooked. Broccoli is often sold in bunches by $1.49 per lb or bunch and mostly not more than that. Also we can see it in freezer aisles as microwaveable. I like fresh ones very much as they are more crunchy. But we should rinse them in water thoroughly to remove any impurities. Cooking broccoli will take less than 2 minutes in my saute process.  I make this sauteed broccoli as snack for us whenever this vegetable comes in season. Try this and enjoy a delicious easy snack.


snack box
Ingredients:
Broccoli - 1.5 lb (2 crowns)
butter or Extra virgin olive oil - 1 tbsp
salt - to taste ( 2 pinches)
garlic -10 cloves
black pepper powder - 1 pinch


Method:
Separate small florets from the broccoli bunch. 
Fill water in a large basin and wash the florets. Take them out, discard the water.
Wash again and do this thrice to remove any sand or impurities.
Let the water drain.

In a sauteing pan , heat butter or EVOO. Add peeled garlic and broccoli florets.
Reduce flame and cook covered for less than 2 minutes. No need to add water.
Sprinkle salt, pepper powder and mix well.
Switch off.

Sauteed broccoli is ready!

Serving suggestion:
Serve as snack.
Also can be served as side dish with baked chicken.
Ranch dip can also be used as dip for this broccoli.
The left over can be refrigerated and used for 3 days.
We can do the same process in oven too, but it will take more time.


Thursday, January 23, 2014

Paasi payaru ladoo

Whole green gram (பாசி பயறு) ladoo  is similar to nei ladoo. During this long weekend we had a snow storm and I wanted to make something nice for the evening snack quickly with simple ingredients. I had a pack of whole moong flour in hand, which I wanted to make use of soon. Then it came to my mind about nei ladoo made of moong lentil. Then I tried a similar version and got this flavorful ladoos. I love this sweet very much because of the lesser time consumption and wholesome ingredients. I am glad that hubby too appreciated this very much.
Hope you all like it !
Paasi payaru laddu

Moong flour ladoo ingredients

Ingredients:
whole green gram flour - 2 cup
brown sugar - 1 cup
(or) jaggery / white sugar
ghee - 2 tbsp or more *
ghee -  1/2 tsp (for shaping ladoo)
cardamom - 3
shredded coconut - 2 tbsp

Method:
Dry roast whole moong flour (paasi payaru mavu) till it smells good (2 - 3 minutes in medium flame).
(We can buy the moong flour in any grocery store or we can dry roast whole moong and get them powdered in a mill. But dry roasting is very important).
Melt 2 tbsp ghee and add to the flour.
In the vessel which we melt the ghee, roast the shredded coconut and add to the moong flour.
Powder the cardamom seeds and add it to the flour.
Put the brown sugar and mix well. Sprinkle little milk or water and knead gently, so that it looks wet. Don't add too much water.
*(If we are planning to make this laddoo as gift / to be consumed later, it may need more shelf life. Then avoid water and make it purely in ghee).
Apply pressure and make balls of equal size.
Let them cool and store in airtight container.
Green gram ladoo is ready!

Serving suggestion:
Serve as snack.
Makes 15 laddu.

Tuesday, January 21, 2014

Virudhunagar Chicken gravy

Virudhunagar is a town near Madurai. Many spicy and delicious non veg dishes have originated around that area and one among them is this chicken gravy. Also this chicken curry can be seen in any roadside parotta stalls or muniyandi vilas, or in few typical native restaurants.
 If one has to travel from Tirunelveli (Nellai) to Madras (Chennai) by bus or car  (roadway), they would have the chance to taste the spiciest curries along with parotta.  Those travels would be by night time and the drivers would make a few stops for dinner, snack, tea time on the way. Whenever we used to travel  that route (our native place -  Chennai), hubby introduced me to these foods which he had enjoyed in his bachelor days. Every stop would have some specialty like Jasmine flowers in Madurai .... In almost every stop he would wake me up and would buy me something like eatables or flowers or coconut water or milk and this habit is continuing even in US too:) I think that is the basis for my knowledge on local foods.
Back to the recipe, those typical roadside motels would have a combo of parotta , salna as a standard menu and a spicy oily chicken gravy on special orders. We call it as Virudhunagar chicken gravy or ennai (oily) kozhi curry or sometimes Nellai chicken curry. This oily gravy is very common in these places, as we can get many versions of it. The serving will be on a very small bowl but will definitely make you crave :)
The specialty of this curry is the amount of sesame oil we add. Nowadays people are making it in any oil they have, but pure cold pressed sesame oil (sekku nallennai)  is good for this.  As it is a more oily gravy, I make it on special occasions only. That day I wanted to make something very spicy and truly southern for one of my friend's family. So I made this parotta stall version of chicken gravy along with chicken briyani. We all enjoyed the dinner very much and I am very glad that it turned out similar to the restaurant curry.The next day hubby happily carried it in his lunch box too:)
Spicy Virudhunagar oily chicken curry (ennai kozhi curry)
Ingredients:
Chicken - 1/2 kg (1 lb)
sesame oil - 1/2 cup
curry leaves - 2 sprig
fennel seeds (sombu)- 1 tbsp
cinnamon (pattai) - 2 inch
bay leaf (brinji ilai) - 1
cloves - 1/2 tsp
red onion - 2 large
tomato - 2 (optional)
cilantro (malli thazhai) - a handful

To grind:
Ginger - 2 inch
garlic - 1 whole

To grind:
Coconut - 1/4 to extract milk

Marination:
Turmeric powder - 1/2 tsp
Coriander powder - 3 tbsp
red chilli powder - 1 tbsp
black pepper powder - 1 tsp
cumin powder - 1/2 tsp
curry masala powder - 1 tsp
sea salt - to taste
thick curd - 1 cup

Method:
Choose chicken pieces with some skin and bone (example, thighs).
Rinse and clean the chicken.
Cut it into small pieces.
Mix curd , coriander powder, chilli powder, curry masala powder, turmeric powder and salt.
Marinate chicken in this paste for  4 - 6 hours or inside fridge overnight. The marination is necessary for more flavorful soft chicken pieces.
Heat a thick bottom wok (kadaai) along with oil. Add spices like fennel, cinnamon, bay leaf, cloves.
After the fennel gets mild red, add finely chopped onion, curry leaves. Then put the ginger garlic paste and cook till raw smell goes. Then goes the chopped tomato. Wait till oil separates. (I won't add tomato for this gravy, but some people like to add tomato to reduce the spice level). Then add the marinated chicken, stir well and cook covered in low flame for 30 minutes.
Extract milk from coconut.
Then add the coconut milk and cook covered in low flame again for 5 minutes or till oil separates. Stir in between. If needed add 1/2 cup boiling water in the end to get more gravy. I add water at the end and cook covered for 5 more minutes in medium heat.
Spicy Virudunagar chicken curry is ready!

Serving suggestion:
Serve as side dish with parotta, chapati, briyani.

Tuesday, January 14, 2014

Wheat uppuma

Wheat upma is one of the easiest and simplest fulfilling Indian food. I am sure many of us know how to do it. I am sharing my simple recipe, which is my hubby dear's one of the favorites.
Cracked wheat (kothumai ravai) is available in almost all Indian grocery stores nowadays. But before they show up in the store isles, we used to buy whole wheat and break them into ravai (coarse flour) and fine whole wheat flour every month. Mom used to schedule this whole process at home and would dry the whole-wheat under direct Sunlight for a day, then send it to a grinding mill , get them done, would cool them off and store the flours in airtight vessels. Nowadays the whole process is reduced to a sachet sold in a nearby stores and we all are happily buying them too:)  So lets make this simple and delicious upma quick and nice !

Plain wheat rava upma with methi leaf chutney.

Wheat rava
Ingredients: (for 2 servings)
Wheat rava (cracked wheat)- 1 cup
water - 2 1/2  cup
red onion - 1
green chilly - 3
ginger - 1 inch
salt - to taste
curry leaf - few
cilantro - few
channa dal - 1 tbsp
mustard seed - 1/2 tsp
shredded coconut - 2 tbsp (optional)
oil - 1 tbsp

Method:
Dry roast the wheat rava for a few minutes till it smells nice. Take it out and keep aside.
Heat oil in a kadai.
Add mustard and let it start cracking.
Then add channa dal and fry for a few seconds.
Put the finely chopped onion, green chilly, curry leaves, chopped ginger and saute till onion gets cooked (golden color).
Add water, salt and bring to a boil.
Put the roasted wheat ravai, reduce flame and cook covered till rava gets all the water.
Check if it is cooked and stir till the upma looses the moisture.
Add chopped cilantro, shredded coconut. Mix well and switch off.
Cracked wheat upma is ready!

Serving suggestion:
Serve as breakfast or dinner along with chutney or sugar.
It tastes great with any spicy chutney like methi leaf chutney or cilantro chutney.

Tuesday, January 7, 2014

Okra sambar

Okra (Vendaikkai - Tamil) is one of the popular vegetables recommended for kids and adults.  But including that in our daily meals needs more care and knowledge to cook this delicate vegetable. Beyond the regular fries (poriyal) , I make it as sambar or puli kuzhambu to make it more delicious. Okra gives a very nice flavor to sambar just like shallot for a sambar.
Here is a special meal I made recently on a weekend. The menu was vendakkai sambar, plain rice, grilled pappad, tomato koottu, keerai poriyal and curd.
Make some extra sambar on the first day and serve along with dosa or idly the next day too. I love this sambar with masal dosai very much  and that's how I plan my meals. Isn't it yummy:)

Okra sambar

Regular South Indian meal platter : Plain rice,sambar , pappad, spinach poriyal, tomato kooottu, curd.
Ingredients:

To pressure cook:
Toor dhal/red gram lentil - 1/2 cup (100 gms)
water- 2 cups
turmeric powder - 1/4 tsp
asafoetida - 1 pinch
sesame oil- 1 drop
Wash and clean the lentil. Pressure cook the dhal with the above said ingredients for a whistle. Then reduce flame and cook for 10 minutes. Let it cool. Open the lid and add some fresh cumin seeds .Mash well using a spatula. Keep aside.
(we can cook the dhal in stove top also. But we may need to soak it first for 30 minutes or more and cook for 30 minutes).

Other ingredients:
Okra (vendakkai) - 10
Shallot (sambar vengayam) - 5
Tomato - 1
Tamarind - amla (gooseberry /  nellikkai) size ball
cumin seeds- 1/2 tsp
cooking oil / ghee - 2 tbsp
(Try to use ghee, as it gives more taste to the sambar).
curry leaves- 1 sprig
cilantro/ coriander leaves (chopped)- 1 tbsp
mustard seeds-1/2 tsp
fenugreek -1/2 tsp
jaggery- 1 tsp (optional)
salt - to taste
Red chilly powder - 1 tsp
coriander powder - 2 tsp
Sambar powder - 1/2 tsp

Method:
Soak the tamarind in 2 cups of hot water and extract the juice by squeezing.
Add the red chilly powder, coriander powder, salt and bring it to a boil. Let it boil till the raw smell vanishes.

Chop the okra into long pieces and shallot into half and keep ready.
Heat oil or ghee in a separate wok. Add the mustard seeds, fenugreek seeds and let the mustard splutter. Immediately add the shallots, curry leaf and saute well. Continue frying till the shallot and okra gets cooked. Sauteing the okra is a MUST before adding anything at this stage. Then add the finely chopped tomato and saute till oil separates.

Pour this hot mixture over the boiling tamarind paste. Add the mashed dhal, sambar powder and bring it to a boil. As it starts boiling, put the crushed jaggery, chopped cilantro and switch off.

Vendakkai sambar is ready!

Serving suggestions:
Serve hot over plain cooked rice.
Reserve some sambar for dinner and serve along with paper roast dosas.

Lemon Rice (Elumichai satham)

Lemon rice is a kind of 'Variety rice' 'sitharannam' prepared in Tamilnadu, Andhra, Kerala and almost whole South India.  Fo...