Tuesday, May 21, 2013

Egg kuruma

Whenever we say egg curry, the only thing that comes into the mind of many people is a spicy red hot egg curry. But there are many versions all over India. Sometimes we may need an egg curry with more gravy to go along with rice or idiappam (rice noodles). Then I would choose this curry or kuruma with lots of coconut masala. This kind of  egg curry with more gravy is a common in Southern Tamilnadu and kerala. On that day I made this with veggie briyani for one of my friends who likes egg curry very much and insisted on making my hometown version. Though I like her version also very much, I made it for her and we all had an amazing dinner.

 Egg kuruma.
Ingredients:

Egg - 6

Ingredients:
tomato - 2
Red onion - 1
coriander leaves - a handful.
mint leaves - few
curry leaves - few
coconut milk - 1/2 cup
red chilli powder - 1 tsp
turmeric powder - 1/4 tsp
curry masala powder- 1 tsp
coriander powder - 2 tsp
salt - to taste
oil / ghee - 2 tbsp
cinnamon - 2 inch
Fennel seeds - 1 tsp
bay leaf - 1
ginger garlic paste - 1 tbsp

to grind:
cardamom - 3
shredded coconut - 1/4 cup
cashew - 4
poppy seed - 1 tsp
cumin seeds - 1/2 tsp
green chillies - 4

Method:
*Grind ginger and garlic together.
*Dry roast the poppy seeds, cashew and grind the items mentioned to a fine paste.
* Hard boil the eggs , peel. Make 3-4 slits lengthwise on all the eggs.
Keep aside.
* Heat oil / ghee in a pan. Add fennel seeds, cinnamon and bay leaf.
*Add the chopped onion, green chillies ,curry leaves, cilantro and mint leaves. After the onion turns golden brown , add ginger garlic paste and saute well.Then add the chopped tomato and fry till it is completely cooked.
* Put  chilli powder, turmeric powder, coriander powder , curry masala powder and stir well till raw smell goes. Add 2 cups of water. Close the lid and cook for 5 minutes.
* Add the coconut masala and let it boil to give a nice flavor.
* Put the prepared eggs. Bring to a boil.
*Before switching off add the coconut milk. Switch off immediately.
Egg kuruma is ready!

Serving suggestions:
This is one best side dish for vegetable briyani,  parathas, parotta, any briyani, dosai,  idly, appam and idiyappam.

Thursday, May 16, 2013

Masal dosai

Idly and dosai are popular dishes of Tamilnadu, India. They are consumed as a main course for dinner and a staple for breakfast. Proper fermentation of the batter is the key behind the successful idlies and the hot climatic condition prevailing there throughout the year will make the idly petal soft. Though making the perfect idly depends on how much care we give for maintaining the temperature, dosa comes handy for all who long for native food.

We can see an idly vs dosai scene in almost any Indian house. When the mother wants to steam some idly in a jiffy, one fuzzy person may always demand for a dosai . That demanding person can be satisfied only by a hot dosai, while others has to eat the idly:) Just like that whenever anyone goes to an Indian restaurant , crispy dosai would be in the top preference. The restaurants would serve the dosai with variety of chutney and that makes the platter pretty.Mostly I make coconut chutney or sambar only and rarely both. But I would make masal dosai if I have some left over poori kilangu after having poori the previous day. Nowadays readymade batter is also available everywhere (I suggest making your own batter for fresh taste) and so dosa making becomes more handy.
 
Prepare this delicious Masal dosai and enjoy!

Masal dosai with sambar and chutney.

Take a look inside: ) Potato masala stuffed inside a thin crispy dosai.

Ingredients:
Dosa batter - 1/2 cup per dosai
potato masala filling - 2 or 3 tbsp per dosai
sesame oil / ghee - few tsp

Method:
For making perfect crispy dosai we may need a thick dosa tawa, sharp spatula, a medium sour dosa batter.
Add a tbsp besan flour for 2 cups of dosa batter and mix well. (Besan flour gives dosai a red hue. Some times I skip this step).
Apply one drop oil on tawa and spread uniformly using a spatula.
Heat the tawa to maximum. Check the heat by sprinkling a drop of water. Wipe the tawa clean, using a kitchen towel.
Now without applying oil to the tawa, pour a ladle full of batter on it. Using the back of the flat spatula or a small cup, spread the batter to a thin circle.
Drizzle few drops of ghee or sesame oil.
As soon as it shows little red color, flip , reduce heat and cook for 10 seconds.
Flip again, so that the beautiful red side lays down. Place 2 -3 tbsp of poori masala in the center and fold , so that the red color shows up.
Some people fold thrice like a newspaper (see photo above) and some fold only once so that dosa looks like a semicircle.
Masal dosai is ready!

Serving suggestions:
Serve hot immediately (for crispiness) with coconut chutney and sambar.

Note:
For details on dosa making see my paper roast dosai recipe.


Tuesday, May 14, 2013

Chennai fish curry

Chennai fish curry is a spicy, tangy curry. It is one of my favorite versions of fish curry. Chennai has a huge fishing harbor in Royapuram which supplies many markets all over the city and state. One can get excellent quality sea fish in all the Chennai markets.Also fresh water fish is caught from many lakes around. People living there for generations are very good at making delicious fish curries and sea foods. One popular fish recipe from chennai is the Kasimedu meen kulambu. This typical Chennai fish curry differs from southern Meen kulambu by the following hints:
1.There won't be any coconut paste in chennai fish curry. Fish curry will smell just like fish curry, the way I like it very much:)
2.Chennai fish curry should have more fish pieces and it will give a strong fish flavor.Use any chunky fish pieces like king fish.
3. Madras / chennai meen kuzhambu needs lot of onion and tomato with lesser tamarind. Chennai people won't make fish curry without tomato, whereas others care less for tomato.
4.If needed chennai people would add little coconut milk extract (very rarely), but not the ground coconut masala.
5. Any cooking oil like peanut oil, sunflower oil or sesame oil can be used in chennai fish curry, while village style south fish curry demands sesame oil only.

Salmon fish in Indian curry.
Salmon and Evoo in Madras meen kulambu. Any chunky fish like King fish and peanut oil are traditionally used there.

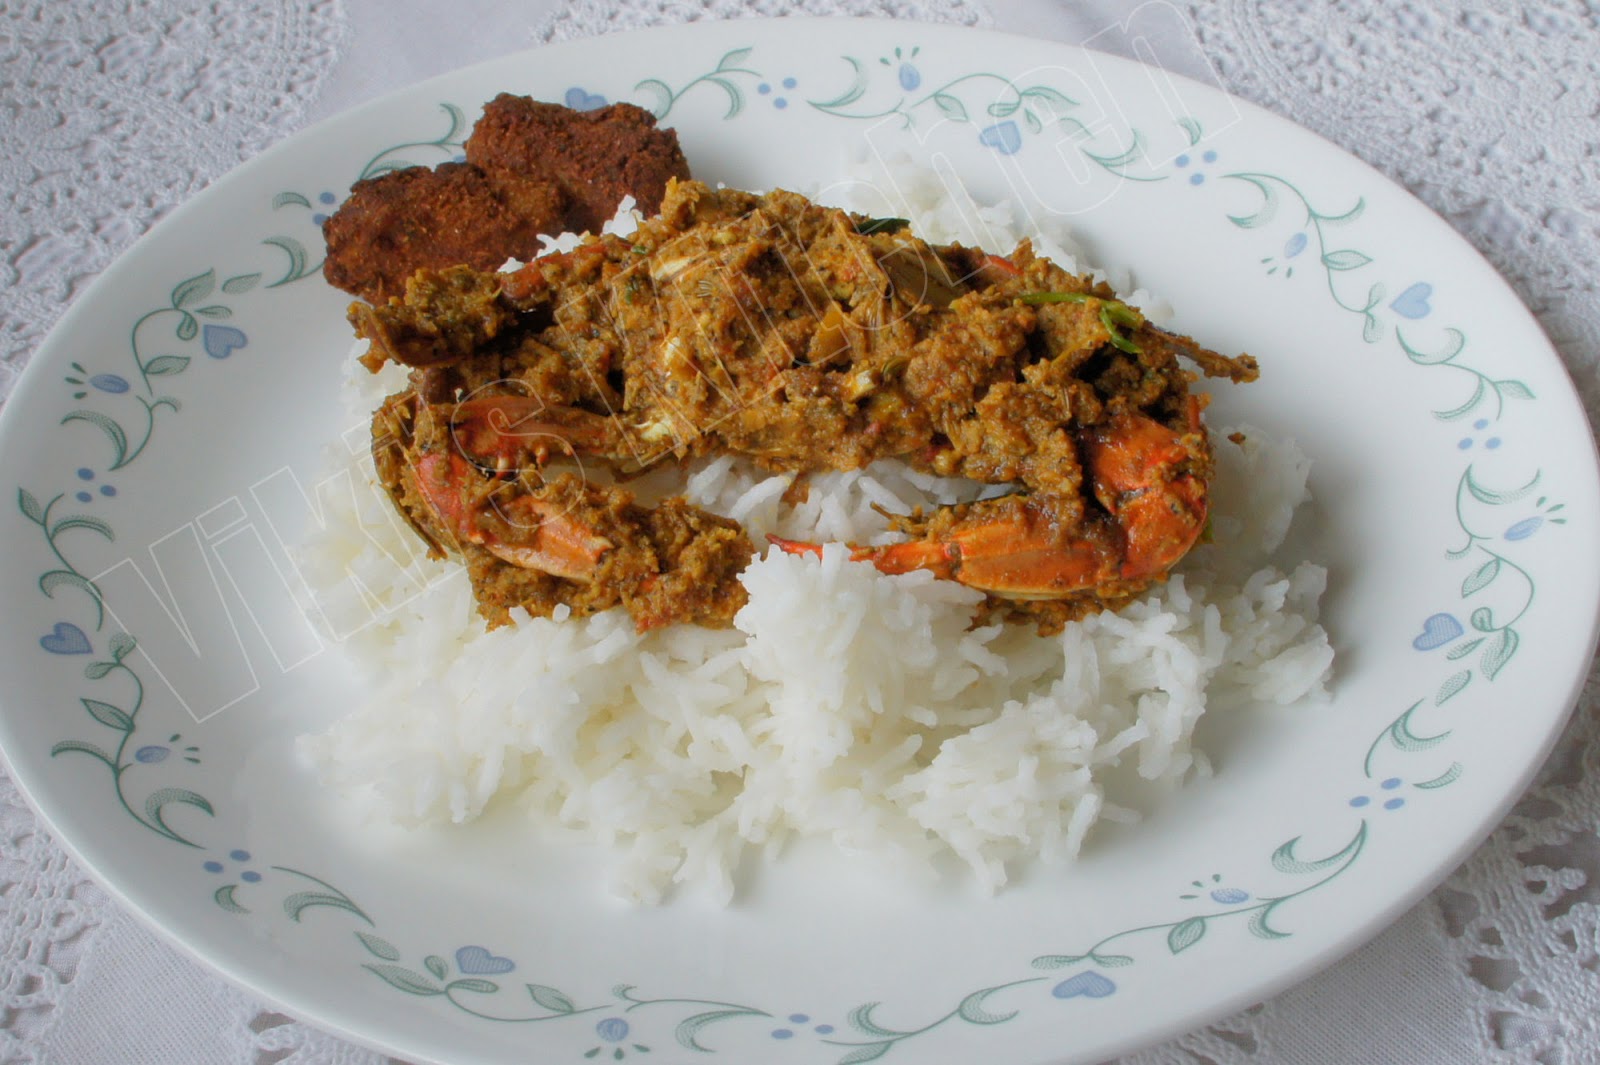
Tangy spicy Madras style fish curry.


Ingredients:
King fish / salmon - 1/2 kg (1 lb)
Tamarind - 1 small lemon size
red onion - 2 (medium big)
garlic - 10 cloves
tomato puree (3 crushed) - 3/4 cup
red chilly powder - 1 1/2 tsp
coriander powder - 3 tbsp
turmeric powder - 3/4 tsp
curry leaf - 2 sprigs
oil - 3 tbsp
mustard seeds - 1 tsp
fenugreek seed  (venthayam / methi) - 1 tsp
cumin seed - 1 tsp
sea salt - 2 tsp (as per taste)
green chilly - 2

Method:
* Soak tamarind in warm water along with salt. Extract juice using 2 cups of water.
Put coriander powder, turmeric powder, red chilly powder, salt in the tamarind extract. Keep aside.
* Clean the fish in water and cut into medium size pieces. Sprinkle some salt, turmeric powder and let it marinate till we prepare the curry (15 minutes).
* Chop onion very finely. Heat oil, add mustard seeds, fenugreek seeds, cumin. As soon as mustard starts crackling, add curry leaves, finely chopped onion and saute till onion turns soft and mild red.
Then add the crushed tomato (chop them finely and squeeze with hands) and saute till the oil shows up. Put the peeled chopped garlic and saute for a few seconds.
* Then pour the tamarind extract, slit green chilly. Bring it to a boil. let it boil for 5 minutes in medium heat till raw smell goes.
* Then add the fish pieces. Cook covered in very low heat till curry gets little thick (10 minutes). Don't stir in between. If needed gently shake. Switch off.
Chennai fish curry is ready!

Serving suggestion:
Serve hot as curry over rice.
The usual side dish for meen kulambu and rice are fried fish, omelet, ripe mango pieces.

Note:
I have used extra virgin olive oil and salmon instead of the traditional ingredients as I had that in hand on that day and we liked the curry very much. Salmon tasted similar to King fish:)
Add a tsp of jaggery (brown sugar)before switching off,  if it needs lesser sourness. 

Monday, May 13, 2013

Ragi Malt

I am sure every Indian would know to make this ragi drink and I wanted my blog to have this too:)
Many years ago with the introduction of TV and advertisements to India, many people started  buying the energy powders and brand named health drinks and started believing that it was their favorite hero's energy secret:) It would be surprising to see even the mothers from typical villages which grow these Ragi (African finger millet), appreciating the store bought health mixes. In my house too we had started naming one favorite drink for each person and used to buy a bottle per month. But then one of our elderly relative from our village (Annapazham achi) while visiting us, told my mom how much government officers were stressing the noon meal schemers to provide sathu mavu urundai (power packed home made sweet balls) for pregnant women and explained the benefits of age-old homemade drinks. She would always make us love our traditional foods than buying something from supermarket:) Her smiling face, fairy tales and folk tales could make any kid sleep tight:) She brought us the recipe to make that urundai and this energy drink and reminded my mom to stick to the older recipes than buying something made commercially. Even though at that age I preferred telling my friends that we all drink the expensive one, I secretly started liking this home made Indian ragi malt better and now I don't hesitate to tell it to the world:) Here I have given one recipe for ragi malt directly from a readymade ragi flour and one recipe from scratch.

Ragi malt, Indian ragi drink, Finger millet drink, keppai kool, keppai koozh, kelvaragu sahu mavu kanji
Ragi malt and one of my favorite coffee mugs, we bought during Christmas.


Simple keppai koozh / ragi malt:
Ingredients:   (2 cups)
Ragi flour - 2 tbsp
water - 1 cup
fat free milk - 1 cup
brown sugar - 3 tsp
cardamom - a pinch

Method:
As soon as we buy the ragi flour or powdered the whole ragi from a dry grinding mill, we should dry roast it till it smells good. Do the roasting in small batches, as it is easy. Spread the roasted flour over a large sheet of paper (I use a sheet of news paper) and let it cool completely. Then store it in an airtight container for longevity. This keeps the flour fresh. Some people keep raw flour inside fridge. Both are good ways to store the ragi flour.

Do this recipe in stove top only for better taste.

Take 2 tbsp ragi flour in a stove top vessel and add 1/4 cup water. Mix well without any lumps. Break the lumps at this stage to get a smooth drink.
Then add the remaining water and start heating.
Add the milk and bring it to a boil. Simmer till it gets little thick (but drinkable).
Then add brown sugar or karuppatti (palm sugar), cardamom powder and mix well.
Serve medium hot just like coffee and tea.

Homemade Ragi malt flour recipe from scratch:
Ragi - 1 kg
almond - 10
cashew - 10
cardamom - 10

Method:
Wash the whole ragi millet multiple times and keep it in water.
Finger millet may have some small stones. Gently hold the top of the vessel and shake it many times, so that the stones settle in bottom. Soak in water for an hour.
wash a clean thin cotton or muslin cloth and place the millet on the cloth and tie , so that it looks like a pouch. Place it in a container and cover it. Let it remain for 12 hours.
In this time it would have germinated.
Sundry the germinated millet and let it dry completely.
Then dry roast it till it smells good.
Dry roast the almonds, cashew too.
Put the roasted items together along with cardamom.
Send them to a dry grinding flour mill or powder it at home.
Keep in a cool dry place and use within 2 months.

Note:
Prepare the ragi malt drink as suggested above.
In the simple version , we can add soaked almond made into a paste to the drink too.
This is a recipe for ragi malt only.
For the Tamilnadu version of sathumavu (energy powder) we should germinate green gram, whole wheat, red channa also. While powdering we would add corn (makka cholam), almond, cahsew, cardamom, cloves, sprouted dry roasted green gram - wheat - ragi. This powder stays good for 2-3 months in room temperature / inside fridge .It can also be made into a drink like ragi or into laddu. 


Thursday, May 9, 2013

Homemade corn tortilla

Homemade tortillas are more easier to prepare if we know how to make chapati. Texture of corn is more or less similar to rice flour. So it may tend to stick to the rolling board. I keep a wax paper or plastic sheet over the rolling board, sprinkle some flour and start rolling. It peels off easily and can be cooked over any tawa or flat pan.
Anyone who tastes fresh corn tortillas will definitely have a hesitation before going for a ready made tortilla  from the grocery store.  I prefer corn tortillas than flour tortillas, as corn smells really really very good while cooking:) Homemade tortillas are incredibly lesser expensive, amazingly flavorful, soft like a cotton and no words to explain how much I love to make them at home:)

Basic corn flour from ALDI, Price: 4.4 lb / 2kg  corn flour costs $ 2.

Making corn tortilla with chapati rolling pin.

We can make cut off  perfect round tortillas using any round shaped lid.

Fresh Corn tortillas made at home.

We can refrigerate the left over tortillas...and  note down the date:)

Ingredients:
Corn flour - 2 1/2 cup
AP flour - 2 tbsp
sea salt - 1/2 tsp
water - 2 1/2 cups
oil - 2 tsp + 2 tbsp
corn flour - 1/2 cup (for dusting)

Other items needed:
Chapati rolling pin, chapati rolling board, (or) tortilla making press.
plastic sheet or wax paper - few squares

Method:
Put corn flour, AP flour, salt in a wide mixing bowl.
(I like to add some AP flour  as it helps in easy rolling of tortilla, but I don't think it is traditional).
Mix slightly. Boil the water. Add water little by little till the flour can be kneaded.
Mix well so that it rolls into a smooth ball (e.g., pizza dough or chapati dough).
Apply 2 tsp  oil and knead again to a soft ball.
Divide it into 20 lemon size balls.
spread the plastic sheet / wax paper over the rolling board.
Sprinkle some corn flour and keep one ball.
Again dust some more corn flour and start rolling it to a thin circle.
Don't bother about the serrated edges, when can make it a smooth round by pressing a sharp lid on it.
In the mean time start heating a tawa / pan.
Apply few drops of oil using a brush / flat wooden tool we use for applying oil to dosa.
Peel off the tortilla and put it on hot tawa.
Cook for 30 seconds , flip , cook again for 30 seconds and if needed cook more time till we see mild brown dots appearing on the tortilla.
Take the tortilla and store in airtight container to maintain the softness.
Wipe off the pan and again apply oil and repeat the same procedure to make all the tortillas.
Home made tortilla is ready!

Note:
Corn tortillas can be used in making endless dishes like wraps, enchilada, tortilla chips etc.
The left over can be stored air tight and kept refrigerated for a week.
Before using the refrigerated tortillas, reheat them one by one on a hot pan.

Makes 20 corn tortillas (6 inch dia).
Time taken :  45 minutes .... from start to finish.

Saturday, May 4, 2013

Crab pepper fry

Cooking seafood on most of the days was a tradition in my house while growing up. While common fishes are cooked on weekdays, we reserve the exotics like crab, shrimp for the weekends, as they take more time to devour:)  Here is what I made using crab and pepper....the crab pepper fry. I am sure I coined this recipe all by myself and I love it very much. This has a thick curry like finish, a Chettinadu crab curry touch and tastes very delicious with plain white rice and curd rice. I fried some king fish pieces and a fish curry for my hubby.

The Chesapeake blue crab or Atlantic blue crab, or simply blue crab of USA tastes similar to the native Indian smaller crabs. So choose some smaller soft shell crab for Indian version of crabs. But any crab (king crab too) works good:)
Do you know why all the crabs, shrimps and lobsters turn to red color while cooking? If interested read the chemical reactions behind and appreciate the beauty of cooking:) Love this reasoning:)
other names: Nandu milagu curry, nandu milagu varuval, crab pepper fry, Indian crab curry.
If you are looking for a newer crab recipe, then try this and enjoy!

Have a crab as appetizer as soon as it is cooked....my recommendation:)


Crab pepper fry with rice and fried king fish.

Have another look at my crab fry...flipped side :)

Ingredients:
Small crab - 6

To grind:
Coconut - 1/2 cup
black pepper - 2 tbsp
cumin - 1 tsp
shallot - 4
To mince:
garlic - 1 whole
Others:
fennel - 1 tsp
oil - 2 tbsp
red onion - 1
curry leaf - few sprigs
turmeric powder - 1/2 tsp
garam masala powder - 1tbsp
coriander powder - 3 tsp
green chillies - 4
tomato puree - 1/2 cup
salt - to taste

How to clean the crab:
Wash the crabs twice or thrice till there is no impurities.
Open the shell in stomach side (opens like a pocket with button) and discard that shell (retain other shells surrounding the meat).
Do this for all the crabs, keep them in water , squeeze and remove the yellow and green portions from stomach.
Keep the legs intact.
If cooking the long king crab legs, then gently break it at joints and cut the longest limb into two (helps the masala to penetrate better). This step is not necessary for soft crabs.

Method:
Take a  wide huge thick bottom vessel.
Heat oil , add fennel and let it get red.
Then add the finely chopped onion and fry till it gets red.
Then add the minced garlic and fry for a few seconds.
Grind the items given to a fine paste with little water.
Now put the masala, tomato puree, turmeric powder, salt, garam masala, slit green chilly, coriander powder along with cleaned crab in to the vessel.
Close tightly, cook in medium flame and stir every 3 minutes.
After few minutes the crabs will turn red color while cooking, reduce flame.
Cook for 15 minutes or till the curry gets thicker.
Add fresh curry leaves, chopped cilantro and switch off.
If needed sprinkle few drops of lemon.
Crab pepper fry is ready!

Serving suggestions:
Serve as side dish / main curry over plain rice.
Tastes great with curd rice.
Makes a starter dish too.

Friday, April 26, 2013

Semiya Pulav

Semiya pulav is a very quick and yummy main course. Semiya briyani or pulao was a new food to me, till I tasted it for the first time from my colleague's tiffin box. Many years ago, I met this happy personality Mythreyi mam, a beautiful woman, can drive a car in that small town, knowledgeable and friend for most of the beginners there. Whatever clarification we would ask, she would smile as if it is easy and would show a simple yet enjoyable way. Her memories are sealed with me by this recipe she shared.  

Spring has sprung in our state now. Have a look at this beautiful tree in our apartment. We are blessed to have this tree very close to our house, and I am enjoying this view now. I love this tree very much and photograph it through all the seasonal colors it show. It is totally green in summer, brown branches n fruits in winter. As soon as the spring starts, the tree will bloom in pretty pink flowers all over the tree before getting leaves.  Just seeing this gives me a lot of cheer and hope. Hubby and me have given it a name....'thevathai maram' 'தேவதை மரம்' means 'Angelic tree' and also my 'pinky tree':) Don't get surprised, we name everything we adore:) Most of the mornings we come near our window, sniff the fresh air and enjoy our cup of tea while watching this tree and the beautiful singing birds that visit.
Pink blossom tree in full bloom. Spring has sprung!
Ingredients:
MTR semiya - 2 cups
ghee - 1 tsp
oil - 2 tsp
water - 2 cup
bay leaf - 1
cinnamon - 1 inch
--------------------
onion - 1/2
green beans - 5
carrot - 1
peas - 1/2 cup
cilantro, mint - few leaves
green chilly - 3
tomato - 1
ginger garlic paste - 1tsp
------------------------
red chilly powder - 1/2 tsp
turmeric powder - 1/4 tsp
curry masala powder - 1 tsp
coconut milk powder - 2 tsp
salt - to taste
lemon juice - few drops

Method:
In 1 tsp ghee fry the semiya till few pieces turn golden red. (If using a ready made roasted semiya or not, just fry it in ghee).Take it out.

Cut the beans into 1.5 inch pieces. Cut the carrot to same length thin strips.
Defrost the peas. Chop onion, tomato, mint cilantro, chilly and keep them separate.

Heat oil in the same wok and put bay leaf, cinnamon.
Immediately add finely chopped onion and fry till it turns golden.
Then add ginger garlic paste, stir for few seconds.
Add chopped tomato and cook till it is soft.

Now add the chopped vegetables, peas, green chillies, mint, cilantro, salt, powders given above except coconut milk powder. Stir well and cook covered with few tsp of water. After it is completely cooked, add 2 cups of water. Dissolve coconut milk powder. Bring everything to a boil.

Add the roasted semiya, reduce flame and cook covered till it absorbs all the moisture. Switch off , sprinkle lemon juice and fluff it using a fork without mashing.
Now it may seem a little mushy, but after a few minutes it will get fluffy.
Let it rest for 5 minutes, garnish with chopped cilantro and serve!

Semiya pulav is ready!

Serving suggestion:
Serve as main course with any raitha (I would suggest onion raitha /vengaya pachadi).
Makes a tasty lunch pack too.

Monday, April 22, 2013

Fruit and nut kulfi ice cream

Ice cream topped with jelly.

update: Fruit and nut kulfi ice cream I made for hubby's office party,  June 5 ,2013
(for a Large party tray) You can do 1/4 of this recipe for a 4 member family.

To soak and grind:
Almond - 20
cashew -20
cardamom seeds - 2 tsp
saffron - 3 strands

Other ingredients:
Almond - 10
cashew -10
pistachio - 10
Tooti frooti (dry fruits) - 1/2 cup
raisin - 1/2 cup
Sweetened Condensed Milk - 14 oz 2 cans (400 gm each)
fat free Whipped Topping 8 oz (225 gm) - 5 packs
sugar - 3/4 cup
milk - 1 cup
(prepare sugar solution, by bringing to boil 1/4 cup water and this sugar. Let cool completely)

Preparation:
Powder the cardamom. keep aside.
Soak the almonds overnight (or)Put it in boiling water, wait till it wrinkle, peel .
Grind immediately to a coarse paste along with milk , saffron and cardamom (elachi).
In a wok dry roast the almond, cashew, pista and chop it to very small pieces. Let it cool completely. Keep aside.
Buy the tooti fruiti pack from Indian store or use candied dry fruits like pineapple, pear etc.

Method:
The whipped topping should be kept in refrigerator till we start using.
In a mixing bowl add the almond paste, sugar solution and Condensed milk . Mix well.
Then blend in the raisin and dry fruits. (keep the chopped nuts for decoration).
Now add the whipped topping and mix gently (too much mixing will make the ice cream hard).
Immediately transfer them to a freezer-safe lidded container.
Cover and freeze for 8 hours - overnight.
After the ice cream is completely frozen, then garnish it with sliced roasted nuts.
Tooti fruity kulfi  ice cream is ready!

Note:
Always use dry fruits that won't get hard or chewy in this ice cream.
I suggest using tooti frooti from any Indian grocery shop. (I don't know the exact spelling of tooti fruity, so giving a lot of variations....LOL)
Click to see, how I make my own tooti fruity.
Little raisin and finely chopped dates can also be used. Top with any jelly of your choice and serve.

update:

I made this nuts kulfi ice cream for Hubby's office party May  28, 2015.

Thursday, April 18, 2013

Wheat dosai

Ingredients:
Wheat flour - 1/2 cup
sour dosa batter - 1/4 cup
salt - to taste
water - as per need
oil - as per need
finely chopped onion - 2 tbsp
cumin - 1/2 tsp

Method:
Put the wheat flour in a mixing bowl. Add water and make a batter of runny consistency.
Add all the other ingredients. Mix well.
Heat a thick dosa tawa (without applying oil and till hot, then reduce flame) and pour 1 ladle, spread to a fine thin circle.
Drizzle some oil , flip once, let it cook for a few seconds and take out.
Crispy wheat dosai is ready!

Serving suggestion:
Serve with chutney.


Note:
Soft wheat dosai for dinner:
Mix 1 cup wheat flour, salt, required water. Spread oil before pouring batter as a thicker dosai, flip and serve.

Saturday, April 13, 2013

Happy Tamil New Year ,


May this wish brings all the happiness we ask,
May this wish makes us all healthy and energetic again
May this wish  grant us all peace and
May this year and all the years to come
make us praise God's love towards us
Wishing all a very happy and prosperous Tamil New Year.
(click to see image source.Thanks.)

Love,
Viki

Tuesday, April 9, 2013

Tomato chutney

Normally the red color chutnies we see in any average Indian food has to be very spicy. That too the street foods in Chennai offers its customers the spiciest chutnies along with idly, dosa etc. But when we go to some vegetarian restaurants like Saravana bhavan, we can get less spicy foods. I tried this tomato chutney just like Saravana bhavan with their mild sweetness and tangy taste. I made this tomato chutney with vegetable kara paniyaram (recipe: yet to publish) as breakfast.
Tomato chutney with vegetable kuli paniyaram.

Ingredients:
Tomato - 3
red onion - 1
dry red chilly - 4
garlic - 4 cloves
channa dal - 1 tbsp
shredded coconut - 1 tbsp
cumin - 1/2 tsp
tamarind - a small piece
salt - to taste
jaggery - 1 tsp
To temper:
curry leaf - few
mustard - 1/2 tsp
urad dal - 1/2 tsp
hing - pinch
coconut oil - 1 tsp

Method:
Cook the tomatoes with 1 cup water, till it is completely cooked.
Add the tamarind and let it cool.
Heat oil in a wok. Fry the channa dal till it turns mild red. Then add the sliced onion, garlic and saute till onion turns golden red. Switch off. Let it cool.
Grind everything together to a thick chutney form.
Heat oil in another wok. Add mustard and urad dal. Let the mustard splutter. Add curry leaves, hing.
Pour the fried tempering over the chutney. Mix well and serve.

Serving suggestion:
Serve as side dish with any tiffin (a light meal - British Indian word) like idly, dosa, uthappam, karapaniyaram.

Monday, April 8, 2013

Chicken koftha

Other names: Chicken meat balls , chicken kofta, chicken kheema balls, baked chicken meat balls, chicken kola urundai.
Deep fried meat balls (mutton / chicken kheema) is called kola urundai in Tamilnadu, India. Instead of frying I have baked it, as it seems quick for me. If we are following my recipe below, then baked koftha will definitely taste similar to deep fried version. If you want a deep fried kola urundai, then click to see my mutton meat ball recipe. I used chicken thigh kheema in this recipe. Chicken kheema can be bought from any halal meat shop. Kheema / minced chicken can also be made at home by grinding the chicken meat in mixer. For more tips on kheema meat and kebabs, please see my chicken sheek kebab recipe.
Chicken koftha / chicken meat balls.

Instead of baking we can deep fry them too.

Chicken kola urundai after baking. Keep them covered to retain the moisture and juicy texture.

Ingredients:
minced chicken - 1 lb
Onions - 1
green chillies - 2
lettuce -  2 or 3 leaves (optional)
cilantro - a handful
mint leaf - a handful
minced garlic - 1 tbsp
dry ginger powder - 1 tsp
turmeric powder - 1/2 tsp
Puffed channa dhal (dalia) - 1 cup
(powder the puffed channa dhal)
Salt to taste
Oil - 4 tbsp

To powder:
dry red chilly - 2
coriander seeds - 2 tbsp
Black pepper- 1/2 tsp
fennel seed, kali jeera - 1 tsp each
cloves, cardamom - 2
cinnamon - 1 inch 
cumin - 1 tsp
garam masal powder - 1 tsp (optional)

Method:
While the mixer / blender is dry, powder the puffed channa dhal (dhalia)and keep aside (besan flour can be dry roasted and used as substitute for puffed channa dal powder).
Grind the items given above to a medium fine powder.
Put the chicken kheema in a large mixing bowl.
Finely chop the onion,lettuce, chilly, cilantro, mint using a vegetable chopper (saves time).
Add ginger powder, turmeric powder, puffed channa dal powder,finely chopped onion, chilly, lettuce, cilantro and mint, salt.
Knead well to get a thick minced meat dough.(If needed add some bread crumbs to get the consistency enough to make meat balls).
Make small lemon size balls by adding oil.
Line a baking sheet with aluminum foil and grease its surface.
set the oven to 350 deg f.
Place the meat balls and bake for 12 minutes one side. Flip and bake again for 12- 15 minutes or till completely cooked.
The kheema kofta can be deep fried too (in medium heat).
Fry or bake till it turns golden red color.
Chicken kofta is ready!

Serving suggestion:
Serve as side dish with rice or as snack.

Note:
1 pound chicken kheema with all the above ingredients will give around 28 - 30 kofthas.
 Adding lettuce will give very juicy kebabs. Finely chopped onion and cilantro can be used in more quantities as substitute for lettuce.

Saturday, March 23, 2013

Hi !

Dear readers and friends,
I am on a short blog break.
Hope to write again soon!
Wishing all a happy, healthy, peaceful, prosperous and Blessed Easter.
Enjoy blogging and blog hopping,
Take care,
Love,
Viki

Wednesday, March 20, 2013

Radish spicy fry

Normally radish is cooked as stir fry in Indian cuisines. I wanted to give it a make-over and here is a spicy fry.
Red radish in a bag.

Radish spicy fry.
Ingredients:
Radish - 250 gm
onion - 1
oil - 2 tbsp
red chilly powder - 1 tsp
fennel seed - 1 tsp
curry masala powder - 1/2 tsp
salt - to taste

Method:
Peel the radish if necessary. Rinse well. Finely chop onion and radish.
Heat oil in a wok, add fennel.
As soon as fennel gets red, add chopped onion. Fry till it gets soft.
Then add radish, fry in high heat till moisture goes off.
Then add salt, chilly powder, garam masala, 1 tbsp water, stir and cook covered in low flame (10 minutes).
Stir well and take out.
Radish fry is ready!

Serving suggestions:
Serve as side dish with chapati or rice.

Saturday, March 16, 2013

Coconut cookies

For each petal on the shamrock 
This brings a wish your way  
Good health, good luck, and happiness 
For today and every day. 
May your blessings outnumber 
The shamrocks that grow, 
May St.Patrick pray for us all,
Happy St.Patrick's day! 

St Patrick Puppy
Glitters123.com | Saint Patricks Day |

I am seeing green everywhere around St.Patrick's day. A week ahead, I too made some cookies to honor St.Patrick. I didn't add any green color to my cookies, but served them on green color cupcake liners:)  Here is some coconut cookies to celebrate St.Patrick's day. 
This cookie should be a bit chewy inside as well as crispy on outside.

Reference: I tried Martha's coconut cookies and made some alterations according to my taste.
Instead of coloring the cookies, I served them on green cupcake liners:)

Coconut cookies for St.Patrick's day!


Cool the baked cookies in a wire rack. 


Ingredients:

Dry shredded coconut - 1 1/2 cups for powdering  + 1/4 cup for coating
white sugar - 3/4 cup
brown sugar - 1/2 cup
salt - 1/2 tsp
Baking powder - 1/2 tsp
unsalted butter - 1/2 cup (1 stick)
egg - 1
vanilla extract - 1 tsp
cardamom powder - 1 tsp (heaped)
All purpose flour - 1 1/2 cups

Method:
Preheat oven to 350 deg F.
Set aside 1/4 cup coconut in a plate for coating the cookies.
Grind the coconut in a mixer to a fine stage (by pulsing) along with sugar, salt.
Add cold butter, egg, vanilla extract , cardamom and process till smooth.
Sift the flour with baking powder twice.
Keep the flour in a large mixing bowl and add the prepared coconut.
Mix well.
Using a tablespoon as measure, scoop out 1 ball of dough.
Slightly roll it to a ball and flatten it mildly.
Dip it in coconut we kept on the plate.
Arrange 2 inch apart in baking sheets (as this cookies will puff up).
Bake until light golden brown color appears on bottom edges.
It took 13-15 minutes for me.
Always keep watching this from the second batch, as it gets brown quickly.
Cool for 1 minute, transfer to wire rack, let cool completely.
Store in airtight containers.
Stays fresh for a week.

Serving suggestions:
Makes 33 cookies of 2 inch dia.
Serve as dessert or snack.

Note:
Prepare this dough and keep refrigerated for 2 weeks, so that we can make fresh cookies whenever we want.
Sweetened dry coconut can also be used instead of dry coconut flakes

Rainbow - Happy St Patricks Day
Glitters123.com | Saint Patricks Day |

Thursday, March 14, 2013

Pomegranate strawberry jam

I made this Pomegranate strawberry preserve / jam recently. At first my plan was to use pomegranate alone, but then it came to my mind that pomegranate on its own has very less pectin, so I added strawberry to get the thickness. I have not gone for canning for this but kept it in fridge for a month. I haven't used any preservative or pectin, so it can be called a refrigerator jam:) This has become our new favorite jam. Hope you all like this beautiful delicious jam.


Instead of regular wheat bread I spread this jam on burger buns on the first day...yummy:)
Ingredients:
Pomegranate - 1
strawberry - 10
sugar - 1 cup
corn starch - 1 tbsp

Method:
Chop the cleaned strawberries into tiny pieces.
Choose seedless pomegranate. Peel the pomegranate and take out the pomegranate arils (edible seeds).
Cook the strawberry and pomegranate arils in 1 cup water, till strawberry gets cooked completely.
Let the pomegranate retain its shape (no mashing).
Add sugar and bring it to 1 string consistency.
Dissolve the cornstarch in 2 tbsp jam (separately) and pour back to the boiling jam.
It will start thickening. Stir in low flame till it gets little difficult to stir.
Switch off. Let cool.
Pour into cleaned sterilized glass bottle. Cool completely and store in fridge.

Serving suggestions:
Makes a spread on breads.
Also a good topping for ice-creams:)

Note:
I kept this in fridge for about a month and it stayed good.
Always use a clean dry spoon.
Store bought pectin can also be used instead of strawberry and corn starch.

Tuesday, March 12, 2013

Chettinadu pepper chicken

Chettinad pepper chicken is an appetizer popular in chettinadu restaurant (Indian restaurants). I tried and tried this recipe until I get the perfection of what we generally get in restaurants. I found that the secret of the flavor depends on marination, curry leaf, fresh pepper powder and sesame oil. Try this and enjoy!
Chettinadu pepper chicken fry.
I baked the marinated chicken instead of deep frying.

Ingredients:
Chicken - 2 lb
(boneless skinless thigh)
red onion - 1
ginger garlic paste - 1 tbsp
curry masala powder - 2 tsp
coriander powder - 3 tsp
curry leaf - 2 sprig
green chillies - 3
sesame oil - 2 tbsp
ghee - 2 tsp
fennel seed - 1 tsp
cinnamon - 2 inch
lemon - 1/2
salt - to taste
To marinate:
salt - 2 tsp
curd - 1/2 cup
maida (AP flour) - 1 tbsp
oil / butter - 2 tbsp
turmeric powder - 1/2 tsp
vinegar - 2 tbsp
red chilly powder - 1 tsp
ginger garlic paste - 1 tbsp
To powder:
whole black pepper - 2 tbsp
cumin - 1 tsp

Method:
Clean the chicken thighs by rinsing in water.
Cut it into 1.5 inch size pieces.
Mix the items given for marination.
Put the mixture in a mixing bowl and mix thoroughly with chicken.
Let it marinate for 1 hour (room temperature) or 4 - 12 hours (overnight) inside refrigerator.
Vinegar in this marinade will keep the meat hygienic for long hours of marination.
Heat enough oil and deep fry the chicken pieces in small batches or bake them as shown in photo.
I threaded the chicken pieces into wooden skewers and baked them at 350 deg for 30 minutes (turned once after 20 minutes). It took almost 30 minutes to cook the chicken in oven until it turns mild red and glossy.
In a separate wok, heat oil + ghee, add cinnamon and fennel. Wait till fennel gets red. Then add the finely chopped onion and fry till it turns golden brown.
Then add the ginger garlic paste and fry for few seconds.
Add the fried / baked chicken pieces and stir for a few seconds.
Then add coriander powder, curry masala powder, prepared pepper powder and fry in low heat till raw smell goes.
Then add chopped green chillies, curry leaves and cook covered.
Check for salt and add more if needed.
Before switching off, squeeze the lemon, give a brisk stir and switch off.
Chettinadu pepper chicken is ready!

Serving suggestion:
Serve as appetizer or along with chapati
I like it with curd rice.

Note:
Deep frying the marinated chicken pieces (instead of baking) is traditional in Chettinadu cooking.
Chettinadu foods are popular for their high spice level. I would suggest including some cool lassie drink or buttermilk along with this appetizer.
Instead of the homemade curry masala powder we can use Achi's or Shakthi garam masala powder too.
Instead of thighs we can use a small whole chicken also (nattu kozhi cut into small pieces).

Monday, March 11, 2013

Carrot kuzhi paniyaram

Last week I made this carrot kuzhi paniyaram, inspired by the Tamil movie Saguni, in which actor Karthi makes carrot kuli paniyaram for his girlfriend. I always try to make foods that are popular in restaurants and movies in our house, as it is safer to eat home cooked meals for people like me:)
On that day hubby had a lot of work, stayed overnight and came home only in the early morning. There was a snow storm outside and he came all the way home in that snow by dawn....won't that be an excuse to make fried foods:) After having some pepper milk with him and some sleep,  I wanted to make some good food to cheer him up. I had some left over dosa batter, but still wanted to think something better than dosai. While he was sleeping I planned to make some delicious breakfast with a catchy name....and did this kara paniyaram using left over dosa batter. I am sure it is the best gift for any wife to see her man asking what smells this delicious:)  I am very glad that this came out very well and we enjoyed it with coconut chutney.
Carrot kuli paniyaram
Kuzhi paniyaaram with carrot

Snow time is good food time.....Peeking out of my kitchen window:)

Ingredients:
dosa batter - 1 1/2 cup
besan flour - 2 tbsp
baking soda - 1/2 tsp
oil - as per need
carrot - 1
To temper:
mustard seed - 1/2 tsp
urad dhal - 1 tsp
sesame oil - 1 tsp
onion - 1/4 (small)
green chilly - 2
cilantro, curry leaf - few leaves.
asafoetida (hing) - a pinch

Method:
Take the dosa batter in a mixing bowl, and add besan flour to it.
It is not traditional to add besan flour, but I add it to get golden red paniyaram.
10 minutes before starting to prepare the paniyaram, add the baking soda and mix well. In the mean time prepare the tempering.
Heat 1 tsp oil in a small wok and add mustard seeds. Once they start splutter, add the urad dhal, asafoetida and finely chopped onion, cilantro, curry leaf, chopped chilly and let it get slightly tender. Add it to the batter and mix well.
Peel the carrot and chop it finely (I used a vegetable chopper).
Now heat a paniyaram pan and brush some oil in all the holes. Then add 1 tsp sesame oil / butter in each hole. Reduce the flame to minimum and pour the batter to halfway in each hole. Click to see the picture. Top each paniyaram with 1/2 tsp chopped carrot and let it get cooked. Cook covered or in open. (I prefer putting a lid to ensure uniform cooking). We can see the paniyaram getting cooked, by the golden color appearing in the edges. Flip using a skewer or fork (I use a spoon and fork). Take out and serve immediately.

Serving suggestion:
Makes a breakfast or snack with tea or dinner or appetizer.
Makes almost 21 paniyaram .
Serve with coconut chutney.

Note:
Click to read my kaara paniyaram recipe from scratch.
I used left over dosa batter (5 days old) in this recipe.
Do everything in low heat. It may take a little while but that is the only way to get whole fluffy paniyaram.
Non stick pans work the best. But I have used a pan similar to traditional thick paniyaram pan.
For the first round it may require more oil to fry, but it will take very lesser in the next batches.
Tastes the best when it is very hot.

Thursday, March 7, 2013

Madras Kara kulambu

Madras / Chennai is one of the major cities in India.  Kaara kulambu is another version of puli kolambu, a curry made with tamarind and spices. It is a very popular curry in Madras / Chennai.

One can hear this word kaara kolambu very often in Chennai, as this is one dish prepared in most of the households there. I have seen the women cooking this kara kulambu in the evenings after coming home from their job. A typical Madarasi dinner may be a  generous ladle of this kara  kulambu over piping hot rice with any side dish of their choice. Kara kulambu is a convenient dish in many houses, as this curry can stay fresh till next day without refrigeration. So they consider making this for dinner and reserve some for next day's lunch pack. Karakulambu needs a lot of red onion, tomato and tamarind. Sometimes I have seen the prices of onion and tomato shooting up and my friends would panic how to cook their favorite curry:) I had asked them why they may need so much onion / tomato, as my puli kulambu needs lot of coconut and had suggested them my version. But they would never consider my version and I love the way they stick to their native recipe:) Yes, this simple kara kulambu recipe is addictive and I too agree on this:)

I learned this recipe from one of my neighborhood friend J akka while in Chennai. She is a native of Chennai and her recipes include very tangy and spicy foods, which I like the most. One evening she was teaching her daughter to make this simple curry. On seeing this, I too noted down her recipe and my hubby likes it very much.  I have prepared this kara kozhambu with okra (vendakkai).  We can use any native vegetable like drumstick, drumstick leaves, brinjal, raw banana, or simply without any vegetables. This recipe can serve up to 4 to 5 people.
Vendakka kara kolambu in Madras style

Ingredients:
Tamarind - 1 small lemon size
red onion - 2
garlic - 10 cloves
tomato (3 crushed) - 3/4 cup
home made sambar powder - 2 tbsp
red chilly powder - 1/2 tsp (optional)
turmeric powder - 1/2 tsp
curry leaf - 2 sprigs
oil - 3 tbsp
mustard seeds - 1 tsp
fenugreek seed  (venthayam / methi) - 1 tsp
cumin seed - 1 tsp
sea salt - 2 tsp (as per taste)
jaggery / brown sugar - 1 tbsp
okra - 15 number

Method:
Soak tamarind in warm water along with salt. Extract juice using 2 cups of water.
Put sambar powder, turmeric powder, red chilly powder, jaggery in the tamarind extract. Keep aside.
Some people won't add jaggery (brown sugar), but I like this version better.
Chop onion finely. Heat oil, add mustard seeds, fenugreek seeds, cumin. As soon as mustard starts crackling, add curry leaves, very finely chopped onion and saute till onion turns soft.
Clean the okra, remove top and bottom. Wipe without any moisture. Cut it into 1 inch pieces.
Saute it along with onion till we see brown spots on okra.
Then add the crushed tomato (chop them finely and squeeze with hands) and saute till the oil shows up (without breaking the okra).
Put the peeled garlic and saute for a few seconds.
Then pour the tamarind extract prepared.
Bring it to a boil.
Cook covered in low heat till curry gets little thick (10 minutes).
Madras kara kulambu is ready!

Serving suggestion:
Serve as curry over rice. 

Monday, March 4, 2013

Broccoli usili (dal fry)

Usili is a side dish made with dal, which can be compared to a dry form of dal fry.  It is one of the traditional foods that can be seen in many households of Tamilnadu. Any fibrous vegetable like carrot, beans, cabbage can be turned into usili. It is a great recipe to enrich the simple vegetables with proteins.
Many years ago when I first saw this broccoli in a supermarket in Missouri, I thought it as a green cauliflower:)  and cooked it just like that. But then only I found the smell and taste more dominant and it is certainly a different veggie, which is in need of more care:) Then I would add it in stir fries, pastas or soups only. Then tried making usili with that and it tasted very yummy. In this recipe I have added carrot also, but tastes good alone also.
Carrot broccoli usili (dal fry). This recipe makes me love broccoli more:)
Broccoli usili

Ingredients:
Broccoli - 1 lb
carrot - 1 (optional)
oil - 1 tbsp
mustard - 1 tsp
curry leaf - 1 sprig

To grind:
Thoor dhal (red gram) - 1 cup
dry red chilly - 3
cumin - 1 tsp
sea salt - 1 tsp
turmeric powder - 1/2 tsp
hing - 1/8 tsp

Method:
Soak dal for 1 hour and grind without water along with the other items to a fine paste.
Scoop the dal into idly plates and steam cook for 10 minutes.
Let it get cool completely.
Put it in the mixie again and pulse gently for a few times, so that the cooked dal looks loose.
In the mean time wash the broccoli and peel the carrot. cut them into small pieces.
Heat oil in a wok and let mustard splutter.
Then add the curry leaves, chopped broccoli, carrot and stir fry it.
Cook covered along with little salt for 5 minutes.
Then add the prepared dal mixture and stir fry it in high flame for few minutes.
Switch off.
Broccoli usili is ready!

Serving suggestions:
Serve with kara kulambu + rice or rasam + rice.
Tastes good with chapati also.
I like it as snack too:)

Saturday, March 2, 2013

Shrimp pepper fry

I think I should translate it as Era milagu varuval :
Era - shrimp / prawn; milagu - black pepper; varuval fry
I made this shrimp pepper fry recently, as I wanted to make a very spicy version. I am not sure if this recipe belongs to any regional cuisine or a traditional one. I coined it as per my taste with coconut oil and black pepper. Mostly I pick up the shrimp in the freezer aisle, as it is more comfortable for me than selecting from fresh lot. In this recipe I have used frozen unpeeled raw shrimp. I put them in water and leave at room temperature for an hour to defrost.Then I ground this pepper based masala and stir-fried till oil shows up. Freshly made masala made this curry very delicious. Try and enjoy this spicy pepper fry :)
Shrimp pepper fry

Chapati, prawn pepper fry and spinach dal....yummy platter:)

Ingredients:
Shrimp - 20 numbers
salt - to taste
lemon - 1/8 fruit
red onion - 1
tomato puree - 1/2 cup
garam masala powder - 1 tsp
turmeric powder - 1/2 tsp
green chilly - 3
curry leaves - 1 sprig

To fry and grind:
coriander seed - 1 tbsp
black pepper - 1 tbsp
cumin - 1/2 tsp
fennel seeds - 1tsp
shallot -3
garlic - 6
coconut oil - 2 tbsp + 1/2 tsp

Method:
Heat 1/2 tsp coconut oil in a wok. Fry the shallot, garlic till golden color. Take out.
Fry the other items mentioned for 30 seconds. Let cool and grind to a fine paste with 2 tbsp water.
Clean the shrimp, add some salt, turmeric powder, lemon juice. while it is marinating, heat 2 tbsp coconut oil in a wok.
Add curry leaves, finely chopped onion, 1/2 tsp sugar, green chillies and fry till it turns golden.
Add tomato puree and wait till raw smell goes.
Put the cleaned shrimp, prepared masala, garam masala, salt and cook covered for 10 minutes.
If needed open the lid, add some more coconut oil and fry till it is almost a dry curry.
Shrimp pepper curry is ready!

Serving suggestions:
Serve as side dish with chapati or rice.
Tastes great with curd rice:)