Wednesday, February 11, 2015

Chocolate dipped strawberry (microwave method)

I guess chocolate dipped strawberry has become the official dessert of Valentine's day :) There are a lot of ads in TV and newspapers globally to promote rose and strawberries and I am sure it is worth the penny to celebrate this beautiful day which is common to all.
There are many traditional (aka lengthy) processes for preparing chocolate dipping. So buying a pack of chocolate berries is the easiest choice. Then I came to know of this microwave chocolate melting method through food network and it works like a charm. I am sure this easy dessert will make your valentine happy :)


white and brown choco chips with strawberry.

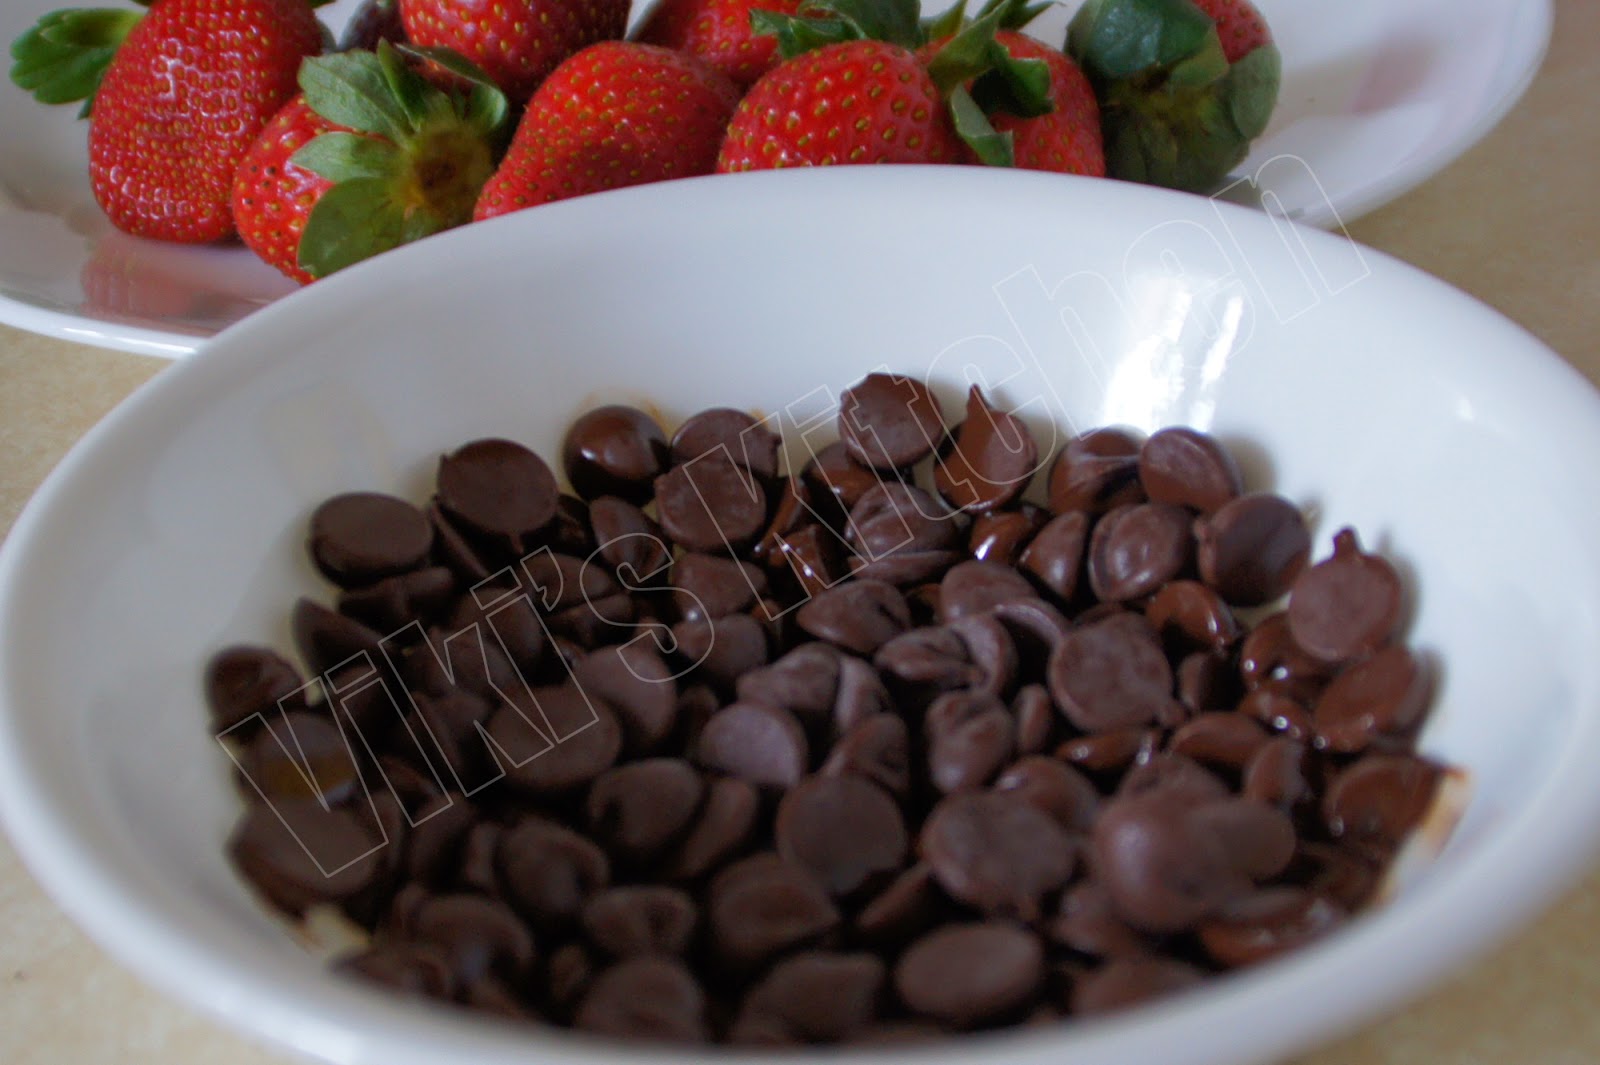
Chocolate starting to melt.

molten chocolate.

Before keeping in fridge
My friends Suchi and Paaru are decorating the strawberries for our little party.

Our lunch get together.  Bisibelebath, enchilada, pizza, chocolate strawberry .

Have a close look.

Ingredients:
Strawberry - 15
Any variety chocolate - 1 cup (chopped or chips or morsels)
(I have used semi sweet brown chocolates and white chocolates)

Method:
Choose small size strawberries with heart shape. They should be well ripe and firm.
If washing the strawberry, then do it previous night and let it dry completely.
Wipe off the water completely before dipping in chocolate, because chocolate will not stick with the fruit, if there is moisture. (This is very very important).

Take the white chocolate and regular chocolate in different microwavable bowls.
One by one keep the bowls in microwave and do as below.
Start reheating for 30 seconds at first. Then take out, check if they starts melting.
Though they may seem like not melting, but they will do after few seconds in outside.
Then again reheat (express cook) for 20 seconds .
Now the chocolates would have started melting visibly now.
Using a fork, try to mash the chocolates.
Then again reheat for 10 seconds and repeat by 10 seconds one or two times.
Chocolates may tend to char, due to overheating. So carefully check every 10 seconds.
I got my semi sweet chocolate done after 1 minute 20 seconds and white chocolate took nearly 1 minute 30 seconds.
In a clean plate, spread a wax paper.
Now hold the calyx (leaves) of strawberry gently and roll over the chocolate, so that it is half dipped.
Place the strawberries on plate and keep refrigerated for 30 minutes.
Take out and decorate with white chocolate or any other icings using a fork or icing cones. Keep in fridge and they hold good in room temperature for up to 3 hours.
Chocolate strawberry is ready!

Serving suggestion:
Have these cuties at any time of day, as snack, dessert or gift them to your loving ones:)

Monday, February 9, 2015

Valentine's day ...recap !

In USA, Valentine's day is a day to celebrate love and affection. We give greetings and chocolates to our friends, gifts to pets and every store will display decors in red and pink.  Also the lovers and couple's will celebrate this day with lot of excitement, romantic candlelight dinners, roses, gifts and I totally love the way love is celebrated here.

Here is a visual treat of some of the desserts I had made for Valentine's day in the previous years.  Lets start creating our own happy moments and enjoy :)

Gulabjamun:
2014 : Gulabjamun I made as gift for hubby dear
Kesari with kulfi icecream:
2014: kesari with kulfi icecream

 Ladoo:
2013: Ladoo, my gift for hubby dear

Boondhi:


2012 valentines day special !

Bathusha:


2012 Valentine's day special treat for hubby dear !

Ponegranate ice cream:


2011 Valentines day celebration !
Happy St.Valentine's day!


Happy Valentine's day !

Thursday, February 5, 2015

Palak paneer

Paalak paneer , is one of the most popular North Indian vegetarian dishes. Palak means spinach and paneer is Indian cheese. Sometimes I prepare this cheese in my leisure time and keep it in freezer. But buying the paneer in any Indian grocery shop is my first choice, as there are many options like low fat paneer, traditional paneer etc. Palak or spinach as we say in USA is almost similar to the pasali keerai of Tamilnadu, which has thin leaves and purple stem and grown as ornamental plant in a kitchen garden. While Malabar spinach (the thicker leaved palak with thick stems and entirely green in color) is different and it gives a texture like okra. I am not sure, if anyone can use malabar spinach for this curry.

My knowledge on North Indian foods is through restaurants, internet and my neighbors only. My neighbor aunty from Gujarat, prepares all the vegetarian foods of North India, just like restaurant made. I like the way she includes butter and ghee in the foods and I totally agree with her that her foods have good nutrition, just like mine :) We try to share our best foods frequently and will exchange recipes. I think I am very lucky, to get her as my friend, as I am growing my cooking skills with her guidance. She elaborates me the traditional way to arrive at a recipe and also the best short cuts using masala powders.

Making palak keerai in a traditional North Indian pattern is a popular recipe. But if you want to make a palak paneer which tastes like restaurant-made in a jiffy, then here is one of our versions of palak paneer and hope you all love it!
Palak paneer


Cooking the spinach with all the masala


Step 1

Ingredients:
Spinach - 1 large bunch (doesn't matter if it is excess or lesser)
paneer - 15 pieces (Cubed)
butter - 4 tbsp
salt - to taste
red onion - 1 (big)
sugar - 1 tsp
tomato puree - 1 cup
ginger - 1 inch
garlic - 5 pieces
green chillies - 3
cilantro - handful
fresh methi leaves - few (optional)
cinnamom - 1 inch
cloves - 3
fennel - 1 tsp
cumin - 1 tsp
kasoori methi - 1 tbsp
whole milk - 1 cup

Method:
Cut the paneer into small cubes of 1 inch size. Heat 1 tbsp ghee / butter in a frying pan. Fry the paneer cubes and take out. keep this aside.

Coarsely chop onion.
In the frying pan, add some more butter (2 tbsp).Add cinnamon, cloves, cardamom, fennel , cumin and add the chopped onion, sugar. Fry till onion turns golden. Then add chopped ginger, garlic, whole green chillies, few fresh methi leaves (if available), cilantro and fry till they wilt.
Then add a cup of tomato puree (or chopped fresh tomato) and cook well.
Clean the spinach leaves and remove the thick stems. 
Put the spinach and cook for 1 minutes. Switch off.
Add required salt and let cool.
Then grind to a medium fine puree with whole milk.
Return this to the frying pan and cook till raw smell goes (5 minutes). If needed add little more water.
Then add the fried paneer pieces and mix well.
Crush some kasoori methi (dried fenugreek / methi leaves) and switch off !
If needed add some more molten butter while serving.

Palak paneer is ready!

Serving suggestion:
Serve as side dish with chapati, naan, pulka.


Wednesday, February 4, 2015

Chennai special Goat leg soup

Goat leg soup is one of the most healthiest soups of India . I usually make  a simple version to prepare this soup, as I would take half of the soup to serve before meal and use the remaining to make kuruma / paya. Click to see my clear soup method.
Then last year, one of my neighborhood friend made this most popular version of goat leg soup and I got the hint of this recipe also.

Bring everything to a boil with tomatoes.
Ingredients:
Goat leg - 2
Turmeric powder - 1 tsp + 1/2 tsp
ginger- 2 inch
garlic- 1(whole)
Sesame oil - 2 to 3 tbsp
Bay leaves -2
cinnamon- 1 inch
fennel seeds - 1 tbsp
cumin seeds - 1 tsp
black pepper - 1 tsp (whole)+ 2 tbsp (powdered)
Red onion - 2
tomato - 4
curry leaves- 1 sprig
cilantro- 1 handful
mint leaves - 1 handful
Green chilli- 2

Method:
First slightly blacken the skin in legs in flame to burn all the left over hair.
Break it in to two pieces to reduce the length. (In some mutton shops they do these processes before selling).
Then rub and wash it thoroughly by applying 1/2 tsp turmeric powder.
Place the legs in a pressure cooker vessel along with water (10 cups) to immerse the legs. Add 1 tsp turmeric powder.
In a kadai , heat 2 tbsp sesame oil. Add cinnamon, fennel seeds, cumin, black pepper 1 tsp and after it turns red add bay leaves (brinjileaves), curry leaves, chopped onion and saute till onion turns red.
Now put chopped green chillies, cilantro and mint leaves one by one .
Add the ginger garlic paste and saute till raw smell vanishes.
Pour it into the pressure cooker and cook it to get one whistle.
Then reduce the flame and cook in low heat for 30 minutes till the leg gets completely cooked. (or cook till 15 whistles) .Open the lid after the pressure is gone.
Then add required salt, chopped tomato and cook again till tomato dissolves. (we cook tomato in the last to ensure complete cooking of goat leg).
Goat leg soup is ready !

serving suggestions:
Serve before meal or just like rasam over plain rice.
Add some more pepper powder , if needed.

Monday, February 2, 2015

Baked potato snack (Baked French fries)

In my view, 'French fries' is the thicker version of potato chips and it is almost the most favorite snack of the entire world. I have seen kids rushing to reach out to these fries during meal time, than any other food at first sight.
How to get the best French fries?
A. Surely they can be found in a local restaurant :)
B. Buying a pack of frozen French fries and preparing at home:)
C. Making it from scratch.
D. Unconventional methods.
I am sure the first suggestion is the easiest. The next choice is not my favorite version.
The third one requires lots of oil and  definitely the best cooking skills. But I am not sure of the ways to reuse the leftover oil....So my best choice is the fourth one.
If we are not going to fry those potatoes, then baking or microwave is the best.

Yesterday morning, after church, we bought a 10 lb pack of Russet potatoes from Shroprite and then I knew what I was going to do for the snack :) Then in the evening I made these baked French fries for us to have with tea. I am pretty sure that these fries tastes more fresh and as delicious as the fried ones.
Here is one more quick and satisfying treat for the snow days !


Ingredients:
Potato - 3 (Russet or Idaho)
salt - few pinches
Extra virgin olive oil - 2 tbsp
turmeric powder - 1/4 tsp

Method:
Line a baking sheet or tray with aluminum foil. Coat with 1 tbsp olive oil.
Preheat oven to 350 deg C.
Choose potatoes that are long (not round shapes).  Peel the potatoes, wash and pat dry. Slice them in 1/2 inch thick strips.  Pat dry again with a clean kitchen towel.
Add the ingredients mentioned above and mix well.  Spread on the baking tray without touching each other. Bake for 15 minutes one side. Then take out keep outside for 2 minutes and flip by peeling or shaking. It may take some time to do this (2 minutes for me for this quantity).
Then continue baking for 5 more minutes and change it to broil mode for 5 minutes.
Take out and now it will be easy to take them out of the tray (much easier than flipping for me).
 If the fries seem little soft, then microwave for a minute in a plate and voila the crispy Baked French fries is ready ! (I get them perfectly crispy by baking this time, but usually I microwave after baking).

Serving suggestions:
Serve as snack or appetizer with tomato sauce or ketchup.

Tuesday, January 20, 2015

Appam

Aappam or appam (ஆப்பம்) is one of the most comforting foods of South India. One can imagine this as a pancake made with rice flour.  It is a very popular food in Kerala, just like the idli of Tamilnadu. We can get this appam in almost all street side dinner shops in Tamilnadu and Kerala. The side dishes may vary from coconut milk to sambar or egg curry or non veg.  The yeast in the appam has many benefits.

Earlier I have made my mom's recipe for aappam and my own recipe 'easy appam with rice flour' .  The recipes vary from place to place and generation to generation because of the availability of rice quality and weather. Also it varies from family to family also and here is what I got recently from my chithis in Tirunelveli and Tuticorin.
Aaappam with coconut milk


Ingredients: (Makes 12 appam)
Raw rice / Everest basmati - 1 1/2 cup
Idli rice / parboiled rice - 3/4 cup
urid dhal - 1 tbsp
poha (aval) / cooked rice - 1 handful
coconut (shredded) - 3/4 cup
dry yeast - 1 tsp
sugar - 1 tbsp
salt - 1 tsp

Method:
Raw rice is the best. But I have used Everest brand rice that serves both ways and it is economical in my place. Soak  rices, urad dhal , poha  for 2 hours or overnight and grind with shredded coconut to a fine paste. Mix yeast, salt, sugar. Let it be a thick batter like dosa mavu.

Keep it closed and place in a warm place for 12-18 hours. I used to make this batter at night by 9 pm and leave inside oven (heat to 300 for 10 minutes and turn off oven) and in the next day morning there will be bubbles on the surface and the batter would  have risen. Mix well.

Now heat the aappam pan and wipe a drop of coconut oil all over the pan by using a clean cloth.

Check the thickness of aappam batter now. It should be in the more thin in consistency than that of dosa batter.If not so add some coconut milk or water.
Pour 2 ladles of batter,keep heat at medium to low.
Then Shake the pan in a circular motion so that the flour spreads and expands along the edges.(If batter is too thick and does not spread, add a little more milk or water to the batter for the next aapams ). The cooked batter forms a layer of 'lace' around the thicker center portion. It is then covered and cooked in it's own steam over gentle heat.
I wait to hear a dripping sound of water(condensation of steam) .Now we can be sure that the aapam is cooked.Then by using a dosa spatula or spoon gently take out the aapam.

Serving suggestions:
Aapam goes fine with coconut milk.Take coconut milk 1/2 can and dilute it with equal amount of water.Spread 2 teaspoon sugar over aapam and add 4 tablespoon coconut milk over the aapam. Enjoy your aapam.
Number of appam using this recipe is 12

Alternate recipe:
(use these ingredients and follow the above instructions)
Raw rice - 2 cup
Idly rice / boiled rice - 1/2 cup
urid dal - 1 tbsp
shredded coconut - 3/4 cup
coconut water - 1/2 cup
salt - 1 tsp

Wednesday, January 14, 2015

Tuesday, January 13, 2015

How to make coconut milk ?

Making our own fresh coconut milk at home gives much satisfaction than any other version. It creates a good nostalgia for anyone like me who has enjoyed watching their mothers extracting this flavorful milk on a Sunday morning , while cooking the appam on a pan. But somehow I was always for readymade coconut milks.  For many years I have been using a can of coconut milk or coconut milk powder, until I brought my super extractor mixie jar from India. Without knowing the importance of a juicer, some years ago, I had brought only the other jars while we came to USA for the first time and this juicer jar was in our house for  a long time :). Though  I agree that I love the convenience of  readymade milks, I made 2 cups of fresh coconut milk last weekend to serve along with Kerala appam. Hubby dear appreciated this fresh coconut milk with every piece of the appam I made. I was running from kitchen to dining table to meet his appam requirements :) and now I am very sure we will be having fresh coconut milk and appam most of our weekends:).
I am sure most of my blog friends are experts in preparing everything from scratch, but I am just sharing my joy about my coconut milk :) Hope you all like it !
Homemade coconut milk

extracting coconut milk using Super extractor jar.


Coconut milk served with aappam

Ingredients:
Sliced coconut - 1 1/2 cup
(or) shredded coconut - 1 cup
warm water - 2 cups

Common mixie method :
Grind the sliced coconut in a mixer. Add 1/2 cup warm water and squeeze out the milk. Filter it using a fresh cloth. This is the thick milk , which is used in many gravies.
After that grind again and extract milk just like the above three time. Combine all the milks together or keep the thick and thin milks separate as per need.

Using a Super extractor / juicer mixie:
If using a  juicer / super extractor jar from Preethi Mixie, there will not be any need of strainer.
Fix the juicing blade, Fit the filter mesh to the juicer jar.
Put the sliced or shredded coconut directly inside the jar  touching the blade(not in the space outside the filter).
Add 1/2 cup water.
Put the safety lid and close the lid.
Run the mixie in full speed for 30 seconds. The coconut milk will collect in the space between filter and outer jar compartment.
We can pour out the coconut milk straightly out of the jar. This is the thick milk.
After that we can repeat two or three more times to extract all the milk using 1/2 cup water each time.
(I used sliced frozen coconut, which I bought from Indian grocery shop, but fresh coconuts would be excellent).

coconut milk using bare hands:
Add 1/2 cup warm water to the shredded coconut and squeeze the first thick milk using our hands and filter. Then in the same way extract milk thrice.

Uses of coconut milk:
The extracted milk can stay good for at least 3 days in fridge.
Coconut milk can be served with appam, idiyappam.
To thicken curries and gravies in Indian cuisine.
To make biriyani, pulav, coconut milk rice and various rice varieties.
Used in making some kind of kheer like paal kozhukattai.

Thursday, January 8, 2015

Brown rice spinach pongal

Making a pongal with spinach and brown rice is one of my favorites. I have coined this recipe for our own taste and I am sure it will be liked by you all too.
Keerai pongal with eggplant curry, pappad


Ingredients:
brown rice - 3/4 cup
green gram dal (moong dal) - 1/2 cup
water - 4 cups
spinach - 2 cups (chopped)
salt - to taste
turmeric powder - 1/8 tsp
hing - a pinch
ghee - 1 tbsp (while serving)
Tempering:
ghee - 1 tbsp
cumin - 1 tsp
black pepper - 1 tsp
green chilly - 2
curry leaves - few

Method:
Rinse the brown rice , dhal and soak for 30 minutes - 1 hour.  This helps in easy cooking. Pressure cook the rice and dal together with water, salt and turmeric powder.
In another cooking vessel, temper the items mentioned. Heat 1 tbsp ghee. Add cumin, black pepper , chopped green chillies, curry leaves and saute a little. Add the cooked rice+dal.
Chop the spinach finely. Put the chopped spinach and add some more water to cook.
Switch off , as soon as the spinach gets cooked. Add 1 tbsp ghee and mash gently with a  spatula and serve hot.

Serving suggestions:
Serve as lunch.
Good side dishes are coconut chutney, baingan ka parta, sambar, pappad.
serves 2.

Wednesday, January 7, 2015

Winter recipes

Here in the part of globe where we live, the winters are long and cold. Having a hot cup of chocolate milk before bed is our favorite during this season. Weekends need a hot masala chaai at flask and some spicy fried Indian snacks or homemade cookies to munch on. Any food needs a little more spice level :) Also cooking during winter is a joy for me, as it is the best indoor entertainment :) Keeping a balance between cooking good foods as well as little calorie conscience will work for any season, but winter needs something extra. So I plan on making some foods that suits this weather.

Have a look at my suggestions and enjoy the virtual winter treat !

Chicken tomato soup (chennai recipe)


Crab kulambu (Tuticorin recipe)
Perfect kuzhambu for winter
Goat leg soup (clear):


Idiyappam with paya:
Add caption


Tandoori chicken:


Milagu kuzhambu:

Sukku Kuzhambu:

Scrambled egg chapati:
Add caption


Masala tea:

Bhel poori (snack):

Kara sev (fries):


Baked masala peanut:


Enjoy !

Sunday, January 4, 2015

Mutton varuval (in pressure cooker)

Here is our family recipe for mutton curry or varuval. It is easier than my version of preparing this curry in a thick wok (kadai).
I call this my family recipe (or Tirunelveli version), as my amma and mother inlaw both do the same way.  My MIL's mutton gravy is one of the best. We will definitely need a pressure cooker to prepare this gravy.
After buying my small pressure cooker, I too started following this method.
Here is a very easy way to make a delicious mutton varuval using pressure cooker.

Try and enjoy this Tirunelveli mutton curry  

Ingredients:
Goat meat (with bone)- 1 lb
Turmeric powder - 1/4 tsp
ginger - 2 inch
garlic - 1 whole
curry masala powder - 2 tsp
red chilly powder - 2 tsp
coriander powder - 6 tsp
tomato -2
brinji leaves -2
Red onion- 2
curry leaves- 1 sprig
cilantro - 1 handful
mint leaves - 1 handful
sesame oil - 2 tbsp
fennel - 1 tsp
salt - to taste

Method:
Rinse the meat and cut it into small pieces.
Pressure cook it with turmeric and handful of water. Cook for 8 whistles in medium heat (after 1 whistle reduce to medium).
Open the pressure cooker after it becomes cool. It should be cooked perfectly by now.
In a kadai , heat 2 tbsp sesame oil. Add 1 tsp fennel seeds and after it turns red add brinji leaves,curry leaves, chopped onion. Let the onion get cooked and becomes mild pink.
Then put cilantro and mint leaves one by one .
Add the ginger garlic paste and saute for a while.
Then add finely chopped tomato and saute till it gets cooked.
Add chilli powder,coriander powder, garam masala powder and saute again.
Add this to the cooked mutton in pressure cooker.
Put enough salt and pressure cook till 1 whistle. Reduce to low heat and cook for 5 minutes.
Open the cooker. If there is some excess water, then cook it without lid in open fire and take out the mutton gravy. It should be a thick curry.
Garnish with chopped cilantro.
Mutton varuval is ready!

Serving suggestion:
Serve as side dish with plain rice , coconut milk rice, ghee rice.
Tastes very good with idli, dosai or parotta.

Thursday, January 1, 2015

Mixed vegetable poriyal

A colorful bowl of side dish is always attractive. We can see 'mixed vegetable stir fries' in any cuisine in the world. In USA, any grocery store will have these chopped frozen vegetables that are easy to cook. Those packets makes the cooking very easy. But in India , our mothers had followed a different way to get those colorful vegetables. I follow the olden method and I reserve a small piece of many vegetables I use everyday to make a poriyal or aviyal that weekend. Instead we can make this poriyal with a store-bought pack or fresh too. Anyways try this and enjoy a Tamilnadu poriyal and let me know how you like it !


Ingredients:
Cabbage - 1 cup (shredded)
carrot - 1 (diced)
fresh green peas - 1/2 cup
cooked channa dal - 1/2 cup
green beans -10
shredded coconut - 2 tbsp
green chillies - 2
curry leaf - 1 sprig
onion (chopped) - 2 tbsp (optional)
ginger (finely chopped) - 1 tsp
oil - 1 tsp
salt - to taste
mustard - 1/2 tsp
cumin - 1/4 tsp

Method:
Shred the cabbage into fine pieces. Chop the carrot into small cubes and green beans to small pieces. Peel and wash the green peas (pachai pattani).

Heat oil in a wok. Let the mustard seeds pop. Then slide in the onion, ginger, green chillies, curry leaves and saute for 10 seconds. Don't let it get red.

Then add the finely chopped veggies along with green pea and stir fry for a minute.
Immediately sprinkle a handful of water. Add salt and cook covered till the vegetables are done. Tender crispy cooking making the poriyal more tasty. So don't over cook them. Then add the cooked channa dal.

Now sprinkle the shredded coconut and cumin seeds. Mix well and switch off.

Mixed vegetable poriyal is ready!

Serving suggestions:
Serve as side dish with sambar rice or any rice.
Serves 4.

Happy New year,


Wishing all a
beautiful, Prosperous , peaceful and Blessed
Happy New year,
May God protect us all and
Bless us with a happy life,
Happy New Year
Love,
Viki.

Potato fry (Urulaikilangu varuval)

Potato fry (urulaikilangu varuval) is a famous but simple side dish in Indian cuisine. This can be prepared in a jiffy and a staple in many ...