Monday, August 29, 2016

Cabbage koftha manchurian

Cabbage koftha manchurian is my own version of fried kebab in a sweet and sour sauce.
Manchurians become our favorite during cold weathers. I make it as surprise treat for my hubby dear on weekends. My hubby likes this fried cabbage koftas , just like pakoras along with tea.  Click to see my Gobi manchurian also.
In this post I have used various kitchen appliances. I am showing a glimpse of them for my readers. Indian cooking needs lot of chopping, which makes the cuisine a time consuming one. But by using various chopping equipment, we would discover the joy of cooking inside our own kitchen.


I have used the vegetable chopper in kitchenaid mixer attachment to shred cabbage.


Cook the shredded cabbage with channa dal

Cooked channa dal, cabbage with turmeric powder

Chopped bell pepper (using Vidalia chopper from Bed Bath & Beyond )

Mincing the ginger, garlic using a vegetable chopper (Rival brand from Walmart).
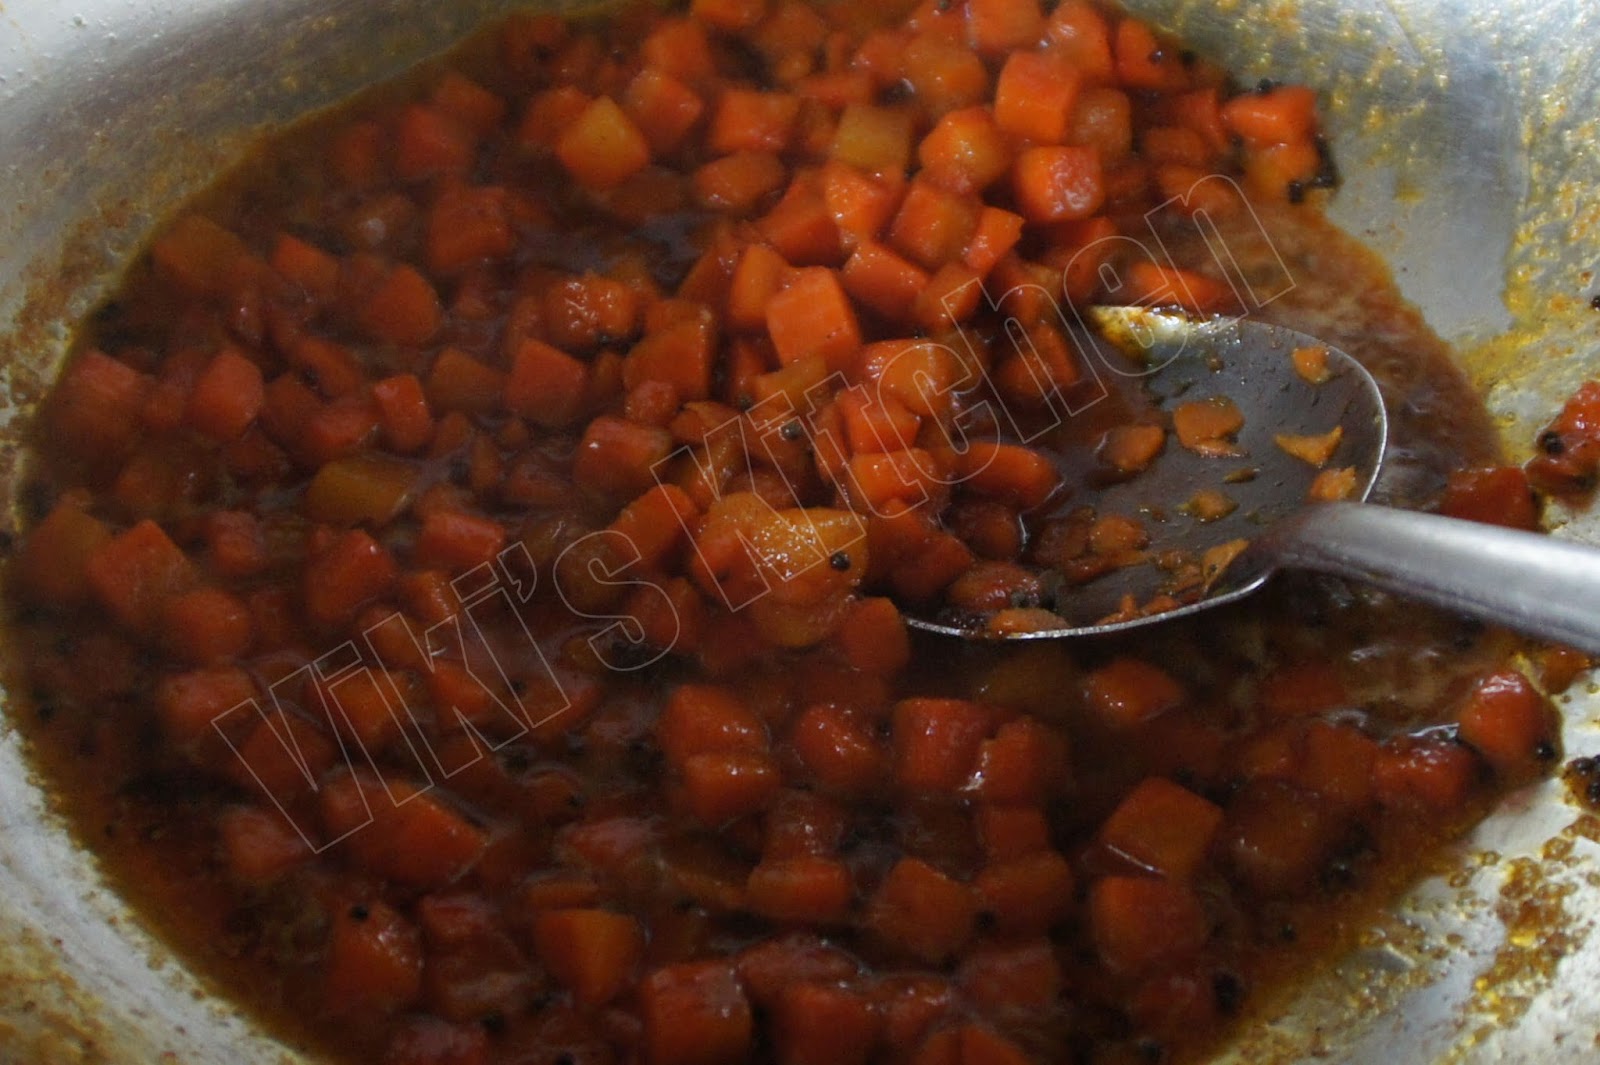
Manchurian sauce before adding tomato sauce, hot sauce and hot water.

Fried cabbage koftas


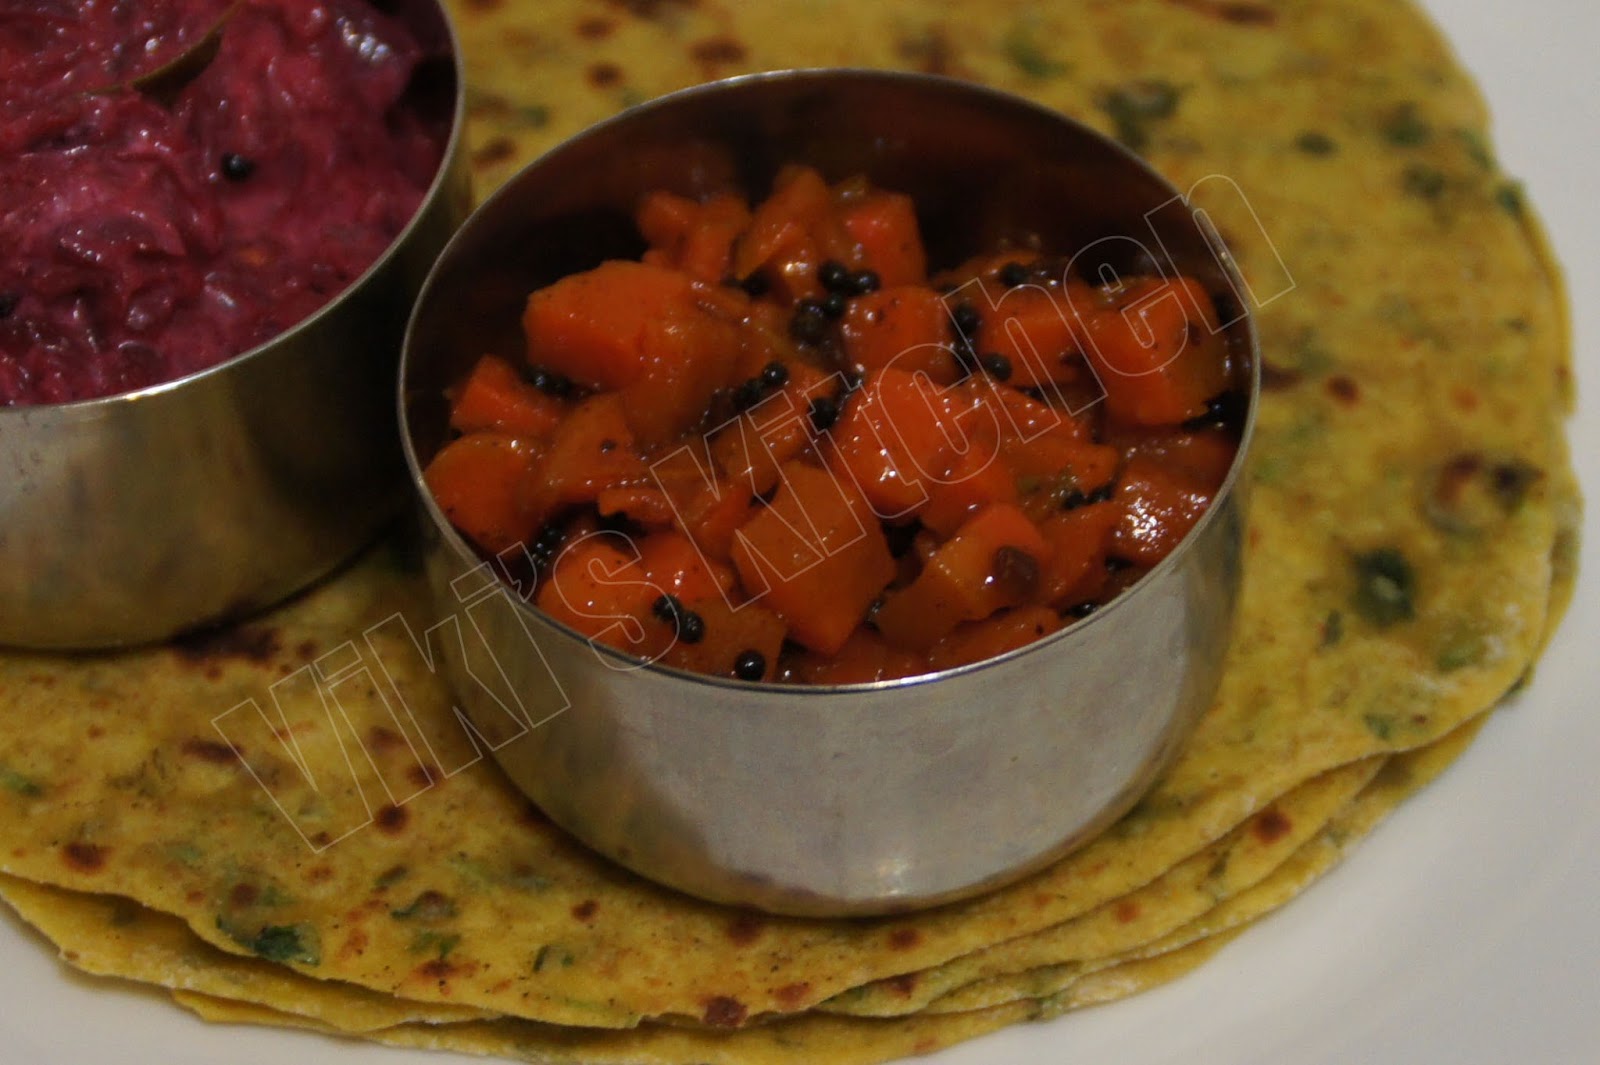
cabbage kofta manchurian is ready !

Ingredients:
For deep frying:
Cabbage - 3 to 4 cups (shredded) (300 gm)
channa dal - 3 tbsp
besan flour - as per need (1 cup)
salt - to taste
pepper powder -  1 tsp
turmeric powder - 1/2 tsp
curry masala powder - 1 tsp
Oil - to deep fry

For the manchurian sauce :
ginger - 1 inch
garlic - 5 cloves
green bell pepper - 1
scallion / spring onion - 1 small bunch
cilantro - few
dark soy sauce - 2 tbsp
salt - to taste
finely chopped green chili - 1
tomato sauce - 2 tbsp
corn starch  / AP flour - 2 tbsp 
Sesame oil - 2 tbsp + 1 tbsp

Step 1:
Shred the cabbage into small pieces. We can use a knife and cutting board like the traditional way or try using a Kitchenaid shredding attachment, just like I have used. Believe me, the vegetable choppers come handy for recipes like this.
In a cooking vessel, add 1/4 cup water. Add the channa dal and start cooking it, while we shred the cabbage. After it is almost cooked, add the shredded cabbage, turmeric powder and cook till all the water gets absorbed (less than 2 minutes). It should be tender crisp not mushy. Keep aside.
Step 2:
Add all the items given for deep frying (except oil) and cooked cabbage.
Mix well. Make small balls of amla size (key lime size).
Step 3:
Heat enough oil. Deep fry the cabbage koftas till crispy.
Take out and keep on paper towels to drain oil. You may be wondering if we can bake them instead of frying. I have tried it, but it tasted different. So I prefer deep frying for this recipe.
Step 4:
In a separate wok, heat 2 tbsp sesame oil. Add minced ginger garlic.
Saute well. Then add bell pepper. Saute well.Take these out.
In the same wok, add 1 tbsp oil.
Put the AP flour or corn starch and fry in low heat till raw smell goes off.
Add 1/4 cup water, soy sauce, tomato sauce, hot sauce, salt. Bring to a boil.
Then add the sauteed items. Mix well.
Keep aside.
Step 5:
Almost before serving (up to 1 hour earlier or lesser), add the fried cabbage kofthas.
Mix well with the sauce.
Garnish with finely chopped green chilies, spring onion, cilantro.

Cabbage kofta  manchurian is ready ! 

Serving suggestion:
Serve as side dish with fried rice, briyani, roti.

Note:
We can freeze the fried koftas for later use (just like burger patties). Do not microwave for long time to defrost. I would suggest keeping them in room temperature for 2 - 4 hours before cooking (instead of microwaving).

Saturday, August 20, 2016

Unripe banana poriyal (வாழைக்காய் பொரியல்)

Green unripe plantain (வாழைக்காய் ) is included in many ethnic cuisines. South Indians cook this banana in many ways.  One of the easiest ways is making a poriyal. Any poriyal (a stir fry) requires very less oil and can be cooked quickly too.
In Tirunelveli, most of the poriyal recipes would ask for 'steam cooking' or 'par boiling' the vegetable before tempering. My amma used to make this in a single step....she would just temper the vegetables and cook them in the same frying pan. 
But I always make this in Tirunelveli saiva samayal method, which I learned from our Rukmani aunty. I adapt this method, because I temper all of  my dishes (like sambar, rasam) one by one using the same kadai while cooking and finish off with this poriyal.  Try this and enjoy !
Vazhaikkai poriyal (வாழைக்காய் பொரியல்)

Cut the vazhaikai into 1 inch squares (approx)
I use this banana (Thai banana) for cooking purpose (from my file photos)
Ingredients:
Green unripe banana - 2
red chili powder - 3/4 tsp
turmeric powder - 1/2 tsp
cumin - 1 tsp
salt - to taste (1 tsp)
Tempering:
Coconut oil - 1 tbsp
mustard - 1 tsp
urid dal - 1 tsp
hing - a tiny pinch
curry leaf - 1 sprig
red onion - 1 (small)
dry red chili - 1 
shredded coconut - 2 tbsp

Method:
Wash and clean the banana. Scrub and remove the outer skin mildly. We can remove the skin completely but I prefer to keep the skin on.
Cut it into small cubes. Put it in water immediately to prevent it from oxidation (color change).
Pour 4 cups of water in a sauce pan.  Bring it to boil and cook the chopped banana tender crisp (it should not be mushy, but cooked well). Drain water. Add salt, turmeric powder, chili powder, cumin to it and mix well. Keep the cooked banana mix aside.
Heat coconut oil in a wok. Add mustard seeds, urid dal, hing and let mustard crackle. As soon as urid dal turns mild pink, add cut dry chili, curry leaf, chopped onion and fry till onion turns soft (not brown).
Add the cooked banana and stir well. Cook covered in low heat for 1 minute. Sprinkle shredded coconut, mix well and switch off.
Vazhaikkai poriyal is ready!

Serving suggestion:
Serve as side dish with sambar, rasam and rice.

Time taken:
Preparation: less than 10 minutes
cooking : 10 minutes

Thursday, August 18, 2016

Quick oats dosai

Sometimes I make this kind of quick oats dosai using left-over dosai mavu (batter). No one can say that it contains oats. So this is a good way to incorporate more fiber in our regular Indian food. Rolled oats behaves like poha (aval) in Indian cooking. So it is easier to make many Indian foods also.
 Also see my paruppu thovaiyal (dal chutney) too, which is my favorite chutney.  Mix that dal chutney with a tsp of sesame oil and fall in love with this combo forever. Sharing this quick and easy healthy dosai with you all ! Hope you all like it !

Oats dosai served with paruppu thogaiyal.

Bubbles in dosai will tell that you have made a super soft dosa and it is a success :) 


Ingredients:
rolled oats (traditional or microwaveable) - 1/2 cup
left over dosa batter - 1 1/2 cups
salt - to taste (optional)
Enos fruit salt - 1/8 tsp  (optional)
water - very little.

Method:
Powder the oats in a small dry mixie jar.
Add this to the dosa batter along with salt, eno's fruit salt. (Instead of eno's fruit salt we can add baking soda too, if we need a thick soft dosai. Otherwise we can make a crispy dosa with the same flour without any effervescent). Add little water to get dosa batter consistency (the batter should be thinner like pancake mixture).
Heat a dosa tawa. Coat it with sesame oil.
Pour a ladle of dosa mixture. Flatten it slightly to a small round (6 inch approximately).
Reduce flame and wait till it gets cooked (easy to flip stage).
Flip and cook the other side too.
Oats dosa is ready!

Serving suggestion:
Serve with any chutney , sambar just like ordinary idli dosai.

Note:
I have not tried this with 'steel cut oats'.
Try increasing the oats in this recipe up to 50:50 ratio and it will work good.
Eno's fruit salt can be substituted with a mixture of pinch of baking soda + lemon juice 2 drops (from my own experience , this gives the same effect .... bubbles in dosai).
Effervescent is needed in colder countries only and it is totally optional. Without this soda effect, dosa won't be spongy soft and still we can enjoy a thin dosai.

Sunday, August 14, 2016

Egg tamarind curry (முட்டை புளி குழம்பு)

Whenever we say egg curry, the garam masala based kuruma would come in mind for many. But my mom used to make this tamarind based egg curry quite often. I am sharing this for anyone who looks out for more egg recipes and also for my family, who keenly craves for ammas recipes from me.


Egg curry (முட்டை புளி குழம்பு)

Ingredients:
Boiled egg - 2 ( one per person)
Tamarind- 1 gooseberry size
tomato - 1
red onion - 1 (chopped)
shallot - 3
red chili powder - 1 tsp
coriander powder - 3 tsp
turmeric powder - 1/2 tsp
cumin seeds - 1 tsp
shredded coconut - 1/4 cup
feugreek (methi seed) -1 tsp
mustard seeds- 1tsp
curry leaves - 1 sprig
sesame oil - 1 tbsp

Method:

Hard boil the eggs and remove the shell. Make few shallow slits. Keep aside.

Extract the juice from tamarind. Keep it in a bowl.
Add the chilli powder, coriander powder, salt and turmeric powder to the tamarind extract.
In a pan add the oil then put mustard seeds and methi seeds.
After the mustard gets cracked add curry leaves and chopped onion. After the onion softens, add chopped tomato. Cook till it gets mushy.
Then add the tamarind extract mixture. Bring it to a boil. Simmer and let the raw smell goes.
Grind the coconut , cumin seeds and onion into a fine paste.
Put this paste into the boiling tamarind extract. Boil for a  minute. Add the prepared eggs and bring to a boil. Switch off.
Muttai puLi kulambu is ready !

Serving suggestion:

Serve this as curry over hot rice along with any simple stir fries like beans poriyal , mixed vegetable poriyal and kadanja keerai masiyal.

Check out my other egg curries too:
Poached egg curry (உடைத்து ஊற்றிய முட்டை குழம்பு)
Tirunelveli egg kuruma
Spicy North Indian style egg curry
Stuffed egg masala

Wednesday, August 10, 2016

Easy Mango shrikhand

Mango shrikhand is one more dessert from North India , but popular among all those mango lovers. As I have a lot of Gujarati friends, I get to taste the most delicious traditional mango shrikhands as wells as quick fix shrikhands.  We all know that desserts are supposed to be served after a large meal, but in Gujarati cuisine (my friends' house), they would serve at least 3 desserts along with food and conclude it with a 'dried sweet betel paan' or lassi. There I came to know that, this shrikhand can be used as a dip for poori (which is a staple during their festivals). I too started adding a pinch of sweetness in my dishes because of my love for Gujarati foods.
After seeing many shrikhand recipes in my friend's house, I made this lesser fat version and it is very easy to make too. Mine is not a traditional shrikhand. Traditionally this dessert should be made using whole milk curd. My low-fat version also tastes little similar and can be enjoyed any time.
Enjoy !
Mango shrikhand

Mango puree with sour cream

Sour cream

whipped sour cream

Add mango puree , brown sugar and cardamom powder

Preparing custard base

Mix everything together

Transfer to containers and keep refrigerated

Less fat Mango shrikhand  on an embroidery ....made in Gujarat :)  Love this !
Ingredients:
Mango puree - 850 gm (almost 2 lb)
Sour cream (low fat) - 450 gm (1 lb)
low fat milk - 1 cup
low fat milk - 1/4 cup
custard powder (vanilla /mango flavor) - 2 tbsp
sugar - 3/4 cup
cardamom powder - 1 tsp

Method:
First prepare the custard, as it needs cooling time.
Bring 1 cup milk to boil. Dissolve custard powder in 1/4 cup milk. REDUCE the heat and add this custard mix. Within 30 seconds it would start thickening, keep on stirring for 1 minute. Switch off the stove and let cool completely.
In a wide mixing bowl pour the sour cream. Whip it to a smooth consistency using a fork.
Add the mango puree, sugar, cardamom powder and mix well.
Add the custard at room temperature. Mix well and transfer to containers.
Keep refrigerated for at least 2 hours before serving (I keep it overnight).
Mango shrikhand is ready !

Serving suggestion:
Serve as dessert.
Ideally this should be served in small cups (2 - 3 tbsp in each cups).
Makes almost 20 servings

Note:
*Instead of custard powder we can use corn starch too.
*The custard we prepared can be replaced with low fat cream cheese (whipped smoothly).


Saturday, August 6, 2016

Carrot sweet pickle

Carrot pickle has become our new favorite now. Carrot is one of my most favorite vegetables. So I used to prepare carrot pachadi (raitha) in order to include more carrots. But recently my hubby dear started preferring cooked foods over raw. So I have to stick with carrot poriyal varieties often. See below for more carrot recipes from my kitchen.  Instead of regular stir fry, I made a pickle using carrot, just like how we do the mango pickle and believe me, this tastes and smells just like mango pickle. This is a sweet version of Tamilnadu pickle. Hope you all love this !

Recipe inspiration : Priya's Carrot pickle. Thanks Priya ! Almost 6 years back while reading your recipe only, I came to know that we can make pickle with carrots too. I kept that in my mind, but now only I tried it :) It tastes amazing dear. Thanks !

Carrot pickle with methi thepla and beetroot raita

Peel and cut the carrots in to rounds.

Chop into small squares. I have used a Vidalia onion chopper from 'Bed Bath and Beyond '  stores. That makes the chopping easier.

chopped carrot.

My homemade puliyotharai powder. I always keep this in freezer.

Lime / lemon for pickle

Sauteed carrot

Add jaggery or brown sugar, salt after the carrot is almost cooked.

Switch off and let cool. add lemon juice.

Store the carrot pickle in  an airtight container. 
carrot pickle with methi thepla and beetroot pachadi.

Sweet carrot pickle
Ingredients:
Carrot - 2 big (300 gm)
brown sugar - 1 tbsp (heaped)
red chili powder - 1 tsp
sesame oil - 1/4 cup
mustard seed, fenugreek seed - 1/2 tsp each
hing powder - 1/4 tsp
salt - to taste (1.5 tsp)
lemon  1 1/2 (big)

To powder : (puliyotharai powder) *
Methi / fenugreek seed - 1/2 tsp
mustard (kadugu) seed - 1 tsp
hing - tiny piece (like a black pepper)

Method:
Peel and rinse the carrots.  Wipe and clean without any moisture. 
Cube the carrots. 
Heat a drop of oil in a wok. Fry the mustard, methi and hing till mustard pops. Powder these together. 
Now heat the 1/4 cup sesame oil in a wok. Add mustard, fenugreek and let the mustard crackle. Sprinkle the hing powder.
Put the chopped carrots and stir well. Cook covered till tender crisp stage. Then add the dry chilly powder, salt and saute.  Put jaggery / brown sugar, prepared powder mix well and switch off.
Add  juice of  1 1/2  to 2 lemons and mix well.Check for salt and let cool completely.
Store in clean bottles. Let cool completely. secure with a lid and keep refrigerated. Stays good for a week to 10 days. (It never lasts longer than that in my house, so I don't know the maximum shelf-life of this pickle). 

Serving suggestion:
Serve as side dish with curd rice or any rice or roti.

Note:
*  I have used a vegetable chopper in this recipe.
It takes less than 5 minutes to cube a lot of carrots, if we use a good quality vegetable chopper.  Believe me, using a vegetable chopper makes our life more pleasant :) 
** I make this powder for puliyotharai  (see ingredients) and keep it in freezer up to 3 months. This is my pickling masala powder as well.
*** Always  use good quality sesame oil  (any oil) in this recipe, because the beta-carotene in the carrot is a fat soluble vitamin and it becomes more available to our body (becomes Vitamin A).  Carrot becomes more nutritious food while cooking.
I have used Lakshmi brand sesame oil here.

Other carrot recipes:
Tomato carrot soup
Carrot kuLi paniyaram
Vegetable uthappam
Moovarna poriyal
Carrot usili
Carrot paratha
Simple beans carrot poriyal
Vegetable biriyani with carrot pachadi
carrot halwa


Friday, July 29, 2016

St. Martha's day

Today is St.Martha's day. This is not just a day for a saint, this is the day for all housewives. 
St.Martha is the patron saint of housewives, waiters and waitress.

When Jesus visited Martha and Mary's house, Martha worked hard to cook and serve the Lord. While Mary was sitting and listening to the Lord. (Both are essential in my opinion. If a guest comes, someone should accompany them and that is what Mary was doing. At the same time someone needs to cook and serve the guests too, and that's Martha). May be Mary had a greater vision about God than Martha and she could have known about HIS miracles better. But as a normal woman, Martha tried to do her best to take care of Jesus and his friends that accompanied him to her house. In my view, the world needs more Marthas as well as Marys...well if possible a mix of both in one body :)
St. Martha cooking and serving for Jesus and his followers.(Image courtesy :link )
She is one of my most favorite saints. Blessed are her hands that cooked for our Lord Jesus Christ. 
Have a beautiful day all !
Love,
Viki Xavier

Wednesday, July 27, 2016

Rosemilk falooda

As far as I know, Falooda is a welcome drink in North India. It can be served as dessert too.  Falooda was not popular in my native place until we came to US. But I have tasted it in Chennai. I didn't try to make it for a long time, until I prepared one vanilla falooda along with my neighbor aunty on a weekend. She prepares this in a jiffy, while all are talking. I assist her in arranging and serving, that's my first falooda experience.  But after learning her method, I made this rose milk falooda for her and our family on a summer weekend. As I made this as a mid-morning drink for us all, I kept everything ready the day before itself. (read my recipe below to know how to save time in making falooda). Then just before serving I layered the ingredients and topped it with homemade kulfi ice cream. If we are not having kulfi ice cream, then add some crushed nuts and dry fruits along with the cooked vermicelli to make it richer.


A welcome drink !

Preparation:

Rosemilk mix, basil seeds, thin vermicelli

mix the rosemilk mix in  1/4 c cold milk

Bring whole milk to a boil and add sugar.


add the rose milk mix and mix well

soak the basil seeds and keep refrigerated until use

cooking the vermicelli noodles

keep everything handy and  keep refrigerated

prepare the falooda up to this stage before adding ice cream and keep refrigerated.

Just before serving add a scoop of ice cream in each glass and enjoy !

Ingredients:
Rosemilk mix - 2 tbsp
whole milk - 3 cups
sugar - 1/2 cup
Falooda semiya (thin vermicelli) - 2 handful
water - to cook semiya
sabja seeds (basil / Takmariya seeds) - 3 tbsp
Vanilla or kulfi ice cream - 1 scoop per glass

Preparation: 
1.Bring whole milk to a boil. Dissolve the rose milk mix in 1/4 cup cold milk or water. Add this to the boiling milk and mix well. If needed add required sugar to make it really really sweet. This is important, because once we cool the milk, it may need more sugar. Let it cool completely and keep in fridge.
2. Keep the falooda seeds (basil) in a container. Add enough water to immerse it. It may take nearly 30 minutes to soak and puff up.
3. Bring 3 cups of water to boil. Add the thin semiya. It will get cooked in a minute. Using a colander, drain the water and discard. Rinse the vermicelli in cold water , so that it gets loosened. Keep in fridge.

I suggest doing these 3 steps ahead of time , as they need to get cooled very well before serving. Also making them ahead would be a great idea if served for guests as a welcome drink.

Assembling the falooda:
Keep ready some tall glass tumblers.
Divide the vermicelli and put a little in each glass.
Likewise divide the rose milk and pour in each glass equally.
Top with soaked basil seeds.
Keep in fridge until serving.
Just before serving, add a generous scoop of kulfi ice cream and place a spoon in each drink.
Rosemilk falooda is ready !

Serving suggestion:
Serve as dessert or mid-morning drink.
Makes 5 glasses of medium size (8 oz).

Monday, July 25, 2016

South Indian Vegetarian Party

Recently we hosted a party for our neighbor aunty, who has become a new grandma. That's the baby's first party to go and that made it more memorable for us. So here is the menu I prepared for the new mom and grandparents and family.
South Indian dinner party 

Poori is getting ready !
My party menu !

Here is the menu :
Cucumber salad
Ulunthu vadai with fresh coconut chutney
Idli  with sweet mango sambar
Poori with potato masala
Kulfi ice cream

Hope you all love this party menu as much as we all do !


Monday, July 11, 2016

Corn and Bean salad

Even though we all strive to cook elaborate snacks on weekends, secretely we all would long to have something quick to fix. All the home cooks have some magic recipe in their sleeve to make their family happy on a weekend, without standing in the kitchen for long time. May it be a store bought chips packet or homemade murukku, but the smile we see in our love's face is important :) Right !
 In my house sundal (Indian lentil salad) is one snack that saves me a lot of time.  Corn and bean salad is another easy to do recipe.  Click to see my 'colorful corn and bean salad'. Mostly I buy frozen corn in a bag. But if you are willing, you can prepare it from fresh corn too. Tea time snacks in my house is mostly easy to fix types.  When it comes to lentils, I always buy dried beans. Dried beans are inexpensive and belongs to 'good eats'. Canned beans comes handy, when we need to soak them.  I cook black bean ahead , portion them and freeze it in small containers. So here is my hubby's favorite 5 minute sundal / salad.
Corn and bean salad

Ingredients:
Sweet corn - 1 cup
black bean - 1/2 cup
Parmesan cheese - 2 tbsp (optional)
salt , pepper - to taste
lemon - few drops

Method:
Boil the corn and remove the kernels from cob using a knife. (or) Just buy a bag of frozen corn and keep it handy.
Take a cup of frozen corn and rinse in water. Put it in a microwavable cup. Microwave it for 2 minutes . I don't cover it while microwaving.
Mix it with cooked hot black bean. Add salt, pepper, cheese , lemon juice and mix well.
Corn bean salad  is ready!

Serving suggestion:
Serve as snack or side dish with baked chicken and vegetables.

Aval Pazham

 If there is one easiest breakfast recipe in Indian, then it should be this one. LOL. Because all other recipes in India requires lot of ing...